Hanging leg raises are the advanced ceiling of the leg raise family. By lifting the legs against gravity while hanging from a bar, you stack the longest possible lever arm against your lower abs and add a real grip-strength tax on top. Most lifters cannot do a single strict rep on their first attempt; that's the point.
The biggest mistake is letting the body swing. A swinging hanging leg raise is a momentum exercise, not a core exercise. The fix lives in the setup: active shoulders, a hollow torso, and a posterior pelvic tilt before the first rep.
Quick Facts: Hanging Leg Raises
- Equipment needed: Pull-up bar (squat-rack chin-up bar, doorway bar, or rings). Optional: lifting straps if grip is the bottleneck.
- Difficulty: Advanced. The hanging knee raise regression brings it down to intermediate; toes-to-bar moves it to expert.
- Modality: Strength endurance (advanced anterior core, dynamic).
- Body region: Anterior core (lower abdominals, hip flexors) plus grip.
- FitCraft quest category: Core stability.
Step-by-Step: How to Perform Hanging Leg Raises
Read all five steps before the first rep. The pre-lift setup carries the entire exercise.
Step 1: Set the dead hang
Grip the pull-up bar shoulder-width apart with an overhand grip. Hang with arms fully extended. Pull the shoulders down and back (active shoulders); don't let them ride up by your ears. Engage the lats by pulling the elbows down toward the floor without actually bending them.
Coach Ty's cue: "Active shoulders, not passive. Pretend you're trying to break the bar in half by pulling your hands apart, and pull your shoulders down away from your ears."
Step 2: Brace the core and tilt the pelvis
Before lifting a single inch, posteriorly tilt the pelvis. Tuck the tailbone slightly under and pull the ribs down toward the hips. This puts the torso in a hollow position, the same shape gymnasts use. Brace the abs.
Ty's cue: "The setup is the exercise. If you start the lift without a hollow torso and a tucked pelvis, you will swing every rep."
Step 3: Raise the legs with control
Keeping the legs straight and together, slowly raise them toward the ceiling. The movement starts with the lower abs curling the pelvis up, not with the hip flexors swinging the femurs. If you feel the swing start, stop and reset.
Ty's key cue: "Curl the tailbone toward your ribs. The legs are along for the ride; the pelvis does the work."
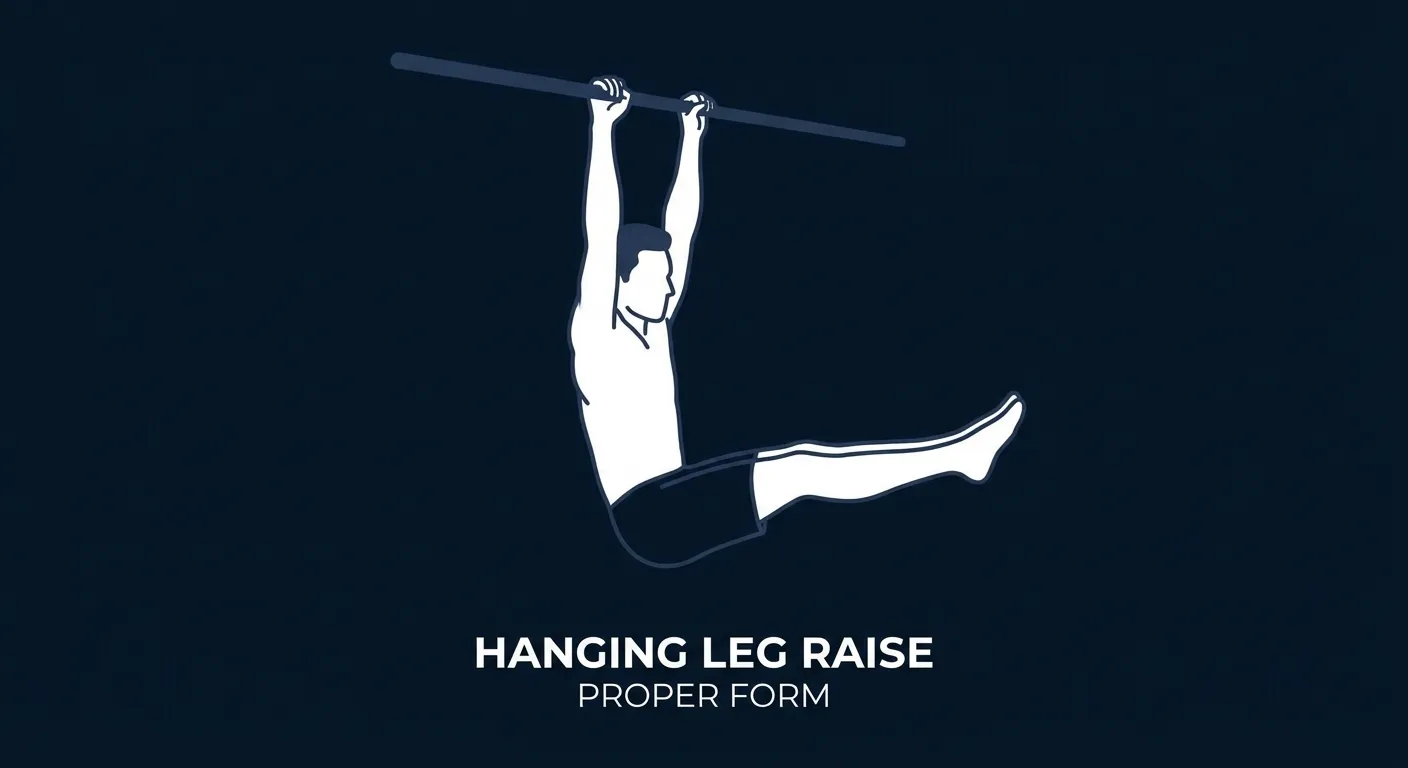
Step 4: Lift to parallel or higher
Lift until the legs are parallel to the floor (standard hanging leg raise). If your control is solid at parallel and you have the hip mobility, continue until the toes reach the bar (toes-to-bar progression). If the lower back arches before parallel, that arch is your current ceiling.
As Ty coaches it: "Parallel-to-the-floor is the bar for strict form. Anything past that is a bonus, not a requirement."
Step 5: Lower with control
Take 2 to 3 seconds to lower the legs back to the dead hang. Resist the temptation to drop into the next rep; stop the body from swinging first, reset the hollow position, then start the next rep.
Ty's reminder: "Kill the swing between every rep. One clean rep beats five kipping reps."
Get this exercise in a personalized workout
Ty programs hanging leg raises into your plan at the right volume and progression path, based on your level, goals, and equipment.
Take the Free Assessment Free · 2 minutes · No credit cardCommon Mistakes (and How to Fix Them)
Here are the mistakes Ty corrects most often.
- Kipping or swinging the body. The legs use momentum from a body swing to reach parallel. This bypasses the lower abs and turns the rep into a coordination drill. Fix: kill the swing completely between every rep. Reset the dead hang, brace, then lift. If you can't lift without swinging, regress to hanging knee raises.
- Hip flexors doing all the work. The thighs swing up to parallel but the pelvis stays in anterior tilt; the abs barely fire. Fix: cue the pelvic tuck first. Curl the tailbone toward the ribs before the legs leave vertical. If you only feel the front of your hips, the abs aren't engaging.
- Bent arms. Pulling up slightly with the arms shortens the lever and disguises a lack of core strength. Fix: keep the elbows locked. Active shoulders, straight arms, only the legs and pelvis move.
- Holding the breath. Breath-holding under the bar spikes blood pressure and pre-fatigues the diaphragm, which doubles as a core stabilizer. Fix: exhale forcefully on the way up, inhale on the way down.
- Bending the knees on the way up to cheat the lever. Knees bend so the lift "feels easier"; that's because it actually is easier, but the prescribed variation is harder for a reason. Fix: if you can't do strict straight-leg, intentionally regress to hanging knee raises and own that level. Don't sneak the bend into a "straight-leg" set.
- Dropping into the next rep. Letting gravity do the lowering eliminates the eccentric stimulus, which is where most of the strength gain happens. Fix: 2-3 seconds down, controlled stop at the bottom, full reset before the next rep.
Hanging Leg Raise Variations: Regressions and Progressions
Start where you are. Earn the progression by owning the current level for at least 3 sets of 10 strict reps.
Captain's chair leg raises (Beginner Regression)
Use a captain's chair (forearm-supported core station) to remove the grip demand entirely. Same pelvic-curl mechanics, but the forearms rest on padded supports so the abs get isolated. The natural entry point if grip gives out before the core.
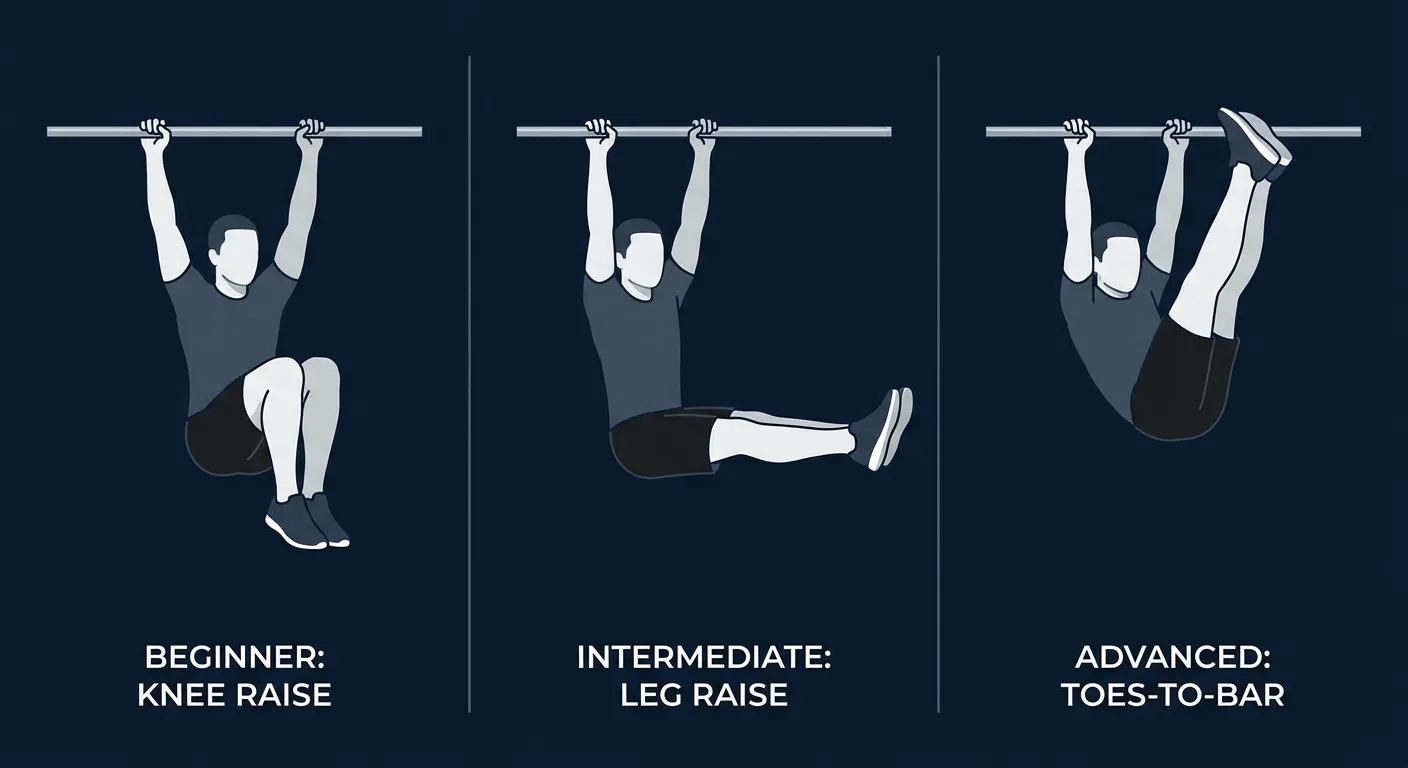
Hanging knee raises (Beginner Regression)
Tuck the knees toward the chest instead of lifting straight legs. The bent knee cuts the lever arm roughly in half, drastically reducing the load on the lower abs. Master 3 sets of 12 strict knee raises before attempting straight-leg.
Hanging single-leg raises (Intermediate Bridge)
Lift one straight leg at a time while the other hangs down. Halves the load while still training the straight-leg pattern. A useful stepping stone between knee raises and strict full-version hanging leg raises.
Hanging straight-leg raises (Standard)
Both legs together, straight, lifted to parallel with the floor. Strict form, no swing. The intermediate-to-advanced standard.
Toes-to-bar (Advanced Progression)
Continue the lift past parallel until the toes touch the bar overhead. Demands more lower-ab strength, more hip flexor and hamstring mobility, and a stronger hollow-body position. The strict-form ceiling of the family.
Weighted hanging leg raises (Advanced Loading)
Hold a light dumbbell or medicine ball between the feet. Adds load to the existing lever. Only after strict bodyweight straight-leg is locked in.
How FitCraft Programs This Exercise
Knowing how to do a strict hanging leg raise is one thing. Knowing where you are on the progression ladder and what to do next is where most people get stuck.
FitCraft's AI coach Ty handles that. During your personalized diagnostic, Ty maps your fitness level, goals, and available equipment. Then Ty slots the right hanging leg raise variation into a balanced training plan: captain's chair or hanging knee raises if grip and core need development, single-leg or partial-range straight-leg as you build, full straight-leg once you can hold the hollow position, and toes-to-bar or weighted variations once strict form is automatic.
As you get stronger, Ty adjusts the variation and volume to match your level. Every program is shaped by an Ivy League-trained exercise scientist and NSCA-certified strength coach using evidence-based progression.
Frequently Asked Questions
How many hanging leg raises should a beginner do?
Most beginners cannot do a single strict hanging straight-leg raise. Start with hanging knee raises (knees tucked to chest) for 2 to 3 sets of 5 to 8 reps. Progress to single-leg raises, then partial-range straight-leg raises, then full straight-leg hanging leg raises as grip endurance and core strength build.
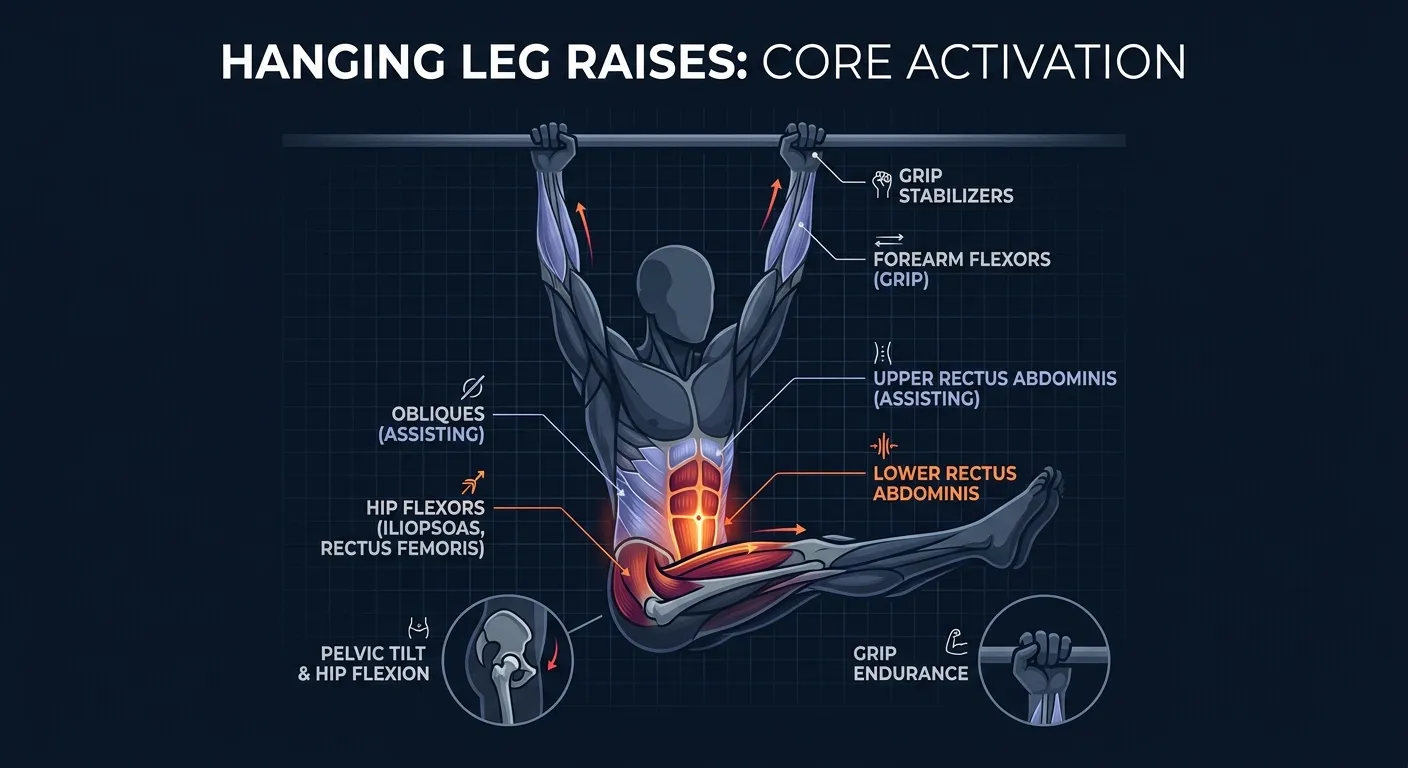
What muscles do hanging leg raises work?
Primary movers are the lower rectus abdominis and the hip flexors (iliopsoas, rectus femoris). The upper rectus abdominis and obliques assist by holding the trunk in a hollow position. The forearm flexors and grip get a significant secondary stimulus from supporting bodyweight on the bar. The lats stabilize the shoulder girdle and prevent the body from swinging.
Why do my hands give out before my abs on hanging leg raises?
Grip endurance is the most common bottleneck. Fix it with lifting straps (a legitimate tool here, since your abs are the target), a thicker bar warm-up to build grip, accumulating dead-hang volume in separate sessions, or starting with captain's chair leg raises (forearms supported, no grip demand) until the abs catch up.
Hanging leg raises vs toes-to-bar: what is the difference?
Hanging leg raises lift the legs to roughly parallel with the floor (90 degrees of hip flexion). Toes-to-bar takes the legs all the way up until the feet touch the bar overhead. The extra range demands more lower-ab strength, more hip flexor mobility, and a stronger hollow-body position. Toes-to-bar is the natural progression once strict parallel-height hanging leg raises feel controlled.