If full push-ups still beat you by rep 2 or 3, the kneeling push-up is a good place to train. It works the same muscles as the floor version with less of your body weight on your hands, so you can do more clean reps.
Done with a strict body line and full range of motion, kneeling push-ups train the same muscles and the same straight body line a full push-up demands, with less of your body weight on your hands.
This guide covers the setup, the cues that separate a clean rep from a sloppy one, common mistakes, and the clear checkpoints for when to move on to the full version.
Quick Facts: Kneeling Push-Up
- Equipment needed: None (a mat or folded towel under the knees helps)
- Difficulty: Beginner, as rated in the app (standard, close-grip and wide-grip versions)
- Modality: Strength
- Body region: Upper body
Muscles Worked
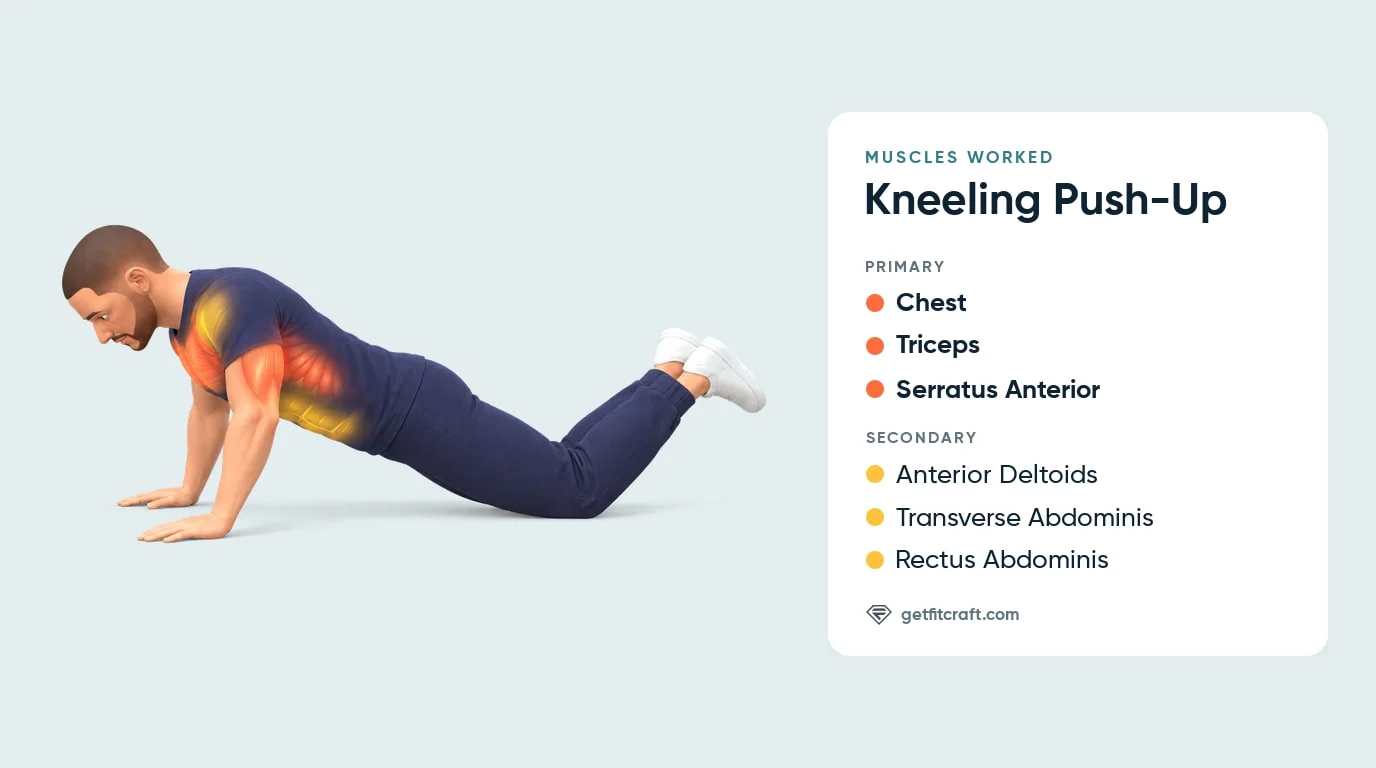
Primary movers: the chest (pectoralis major), the triceps and the serratus anterior, the same as in a full push-up. The chest pushes your body away from the floor, and the triceps straighten your elbows as you press back up. The serratus anterior, the muscle along your ribs under your armpits, holds your shoulder blades flat against your ribs and pushes them forward as your arms straighten. These muscles lengthen under control as you lower and shorten to press you back up. Kneeling changes how much of your body weight they press, not which muscles do the work.
Secondary movers: the anterior deltoids (the fronts of your shoulders), which help the chest press; the transverse abdominis, your deepest abdominal muscle, which braces your trunk like a belt; and the rectus abdominis, the six-pack muscle, which keeps your hips from sagging. Together the two abdominal muscles hold your body in one straight line from your knees to your head. Because your body pivots on your knees instead of your toes, that line is shorter and easier to hold than in a full push-up, which makes the kneeling version a forgiving place to practice bracing.
Evidence: Ebben et al. (2011) measured ground reaction forces across several push-up variations and found that the push-up on the knees produced a lower force than the regular push-up. In plain terms, less of your body weight goes through your hands while the movement stays the same, which is what makes it a clean stepping stone.
Step-by-Step: How to Perform a Kneeling Push-Up
The pattern is identical to a full push-up. The one thing that changes is where your body pivots.
Step 1: Set Your Hands
Kneel on a mat or the floor. Place your palms flat, about shoulder-width apart or a little wider, fingers pointing forward. Spread your weight across the whole palm and every knuckle rather than dumping it into the heel of the hand.
Tip: pad your knees with a mat or a folded towel. If your wrists feel strained, hold push-up handles or dumbbell handles so your wrists stay straight, and stop if they hurt.
Step 2: Build the Knee-Plank Line
Walk your knees back and lean forward until your shoulders are over or just behind your hands. Extend your hips fully so your body forms one straight line from your knees to your head. Ankles crossed and lifted, or toes resting on the floor: both work. What matters is that nothing bends at the waist.
Tip: if your butt is the highest point of your body, lower your hips until they line up with your knees and shoulders. If your body is nearly upright, your knees are too close to your hands, so walk them back.
Step 3: Brace Your Core and Squeeze Your Glutes
Tighten your abs like you're about to take a light punch and squeeze your glutes. The shorter lever makes this easier to hold than a full plank, so use that. This is where you learn the brace that full push-ups will demand later.
Tip: brace before the first rep, then hold the same line for the whole set. Keep breathing while you brace; don't hold your breath.
Step 4: Lower Your Chest with Control
Inhale and bend your elbows to lower your chest and hips together toward the floor, smoothly over about a second or a little slower. Angle your elbows back about 45 degrees from your torso, or closer, never flared straight out. Lower until your chest is just above the floor or lightly touches it, with your weight on your hands. A short pause near the floor is fine; bouncing is not.
Tip: lead with your chest and keep your head in line with your back, eyes on the floor just ahead of your hands. Your face never takes weight on the floor.
Step 5: Press Back Up
Exhale and push the floor away until your arms are straight or nearly straight, keeping the knees-to-head line intact the whole way. Either is fine, as long as you don't snap your elbows locked. Then flow into the next rep at the same smooth pace.
Tip: breathe out as you press up and breathe in as you lower. Every rep should look like the first one.
Get this exercise in a personalized workout
FitCraft, our mobile fitness app, uses an AI coach to program pressing exercises like this into your plan at the right volume and intensity, based on your level, goals, and equipment. Every FitCraft program is designed by Domenic Angelino, MPH (Brown University) and NSCA-CSCS, with research published in the Journal of Strength and Conditioning Research and Medicine & Science in Sports & Exercise.
Take the Free Assessment Free · 2 minutes · No credit card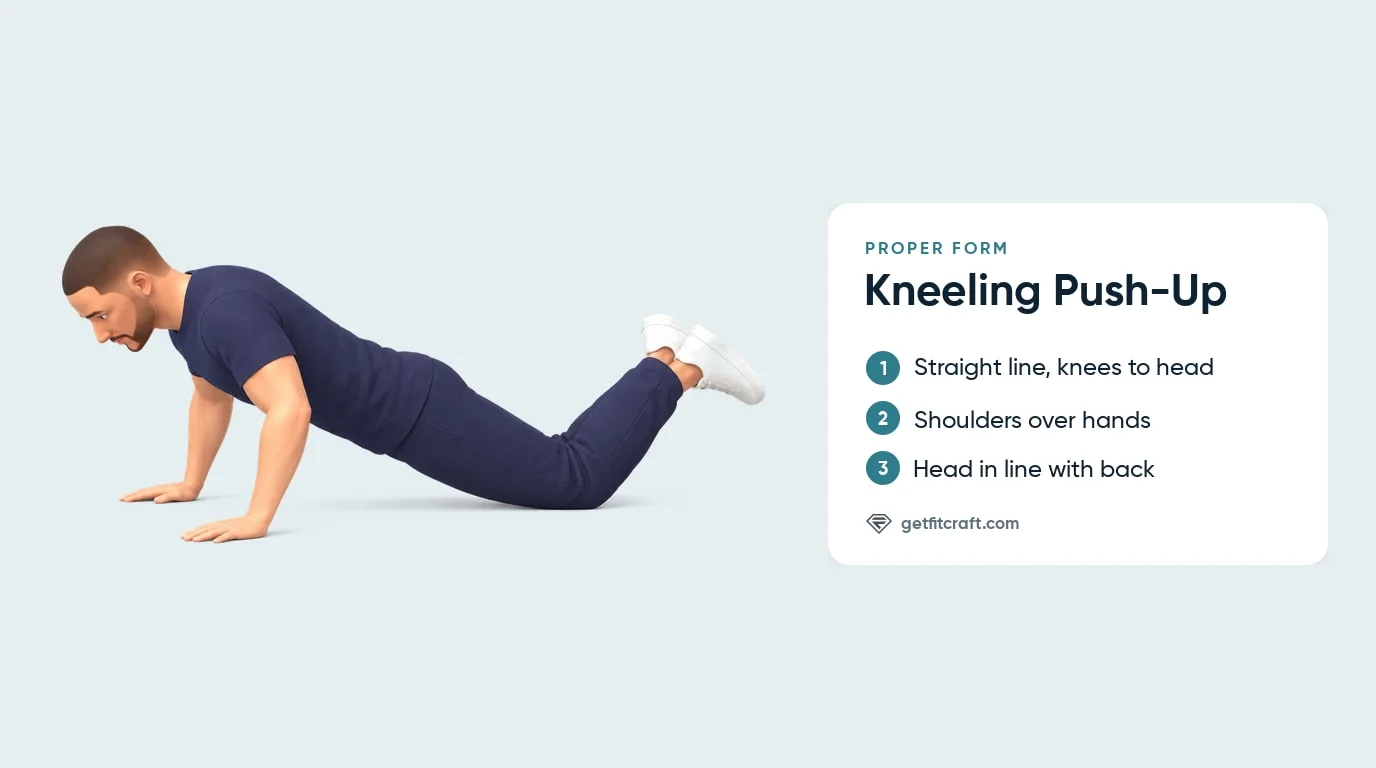
Common Mistakes (and How to Fix Them)
These are common errors on kneeling push-ups, and how to fix each one.
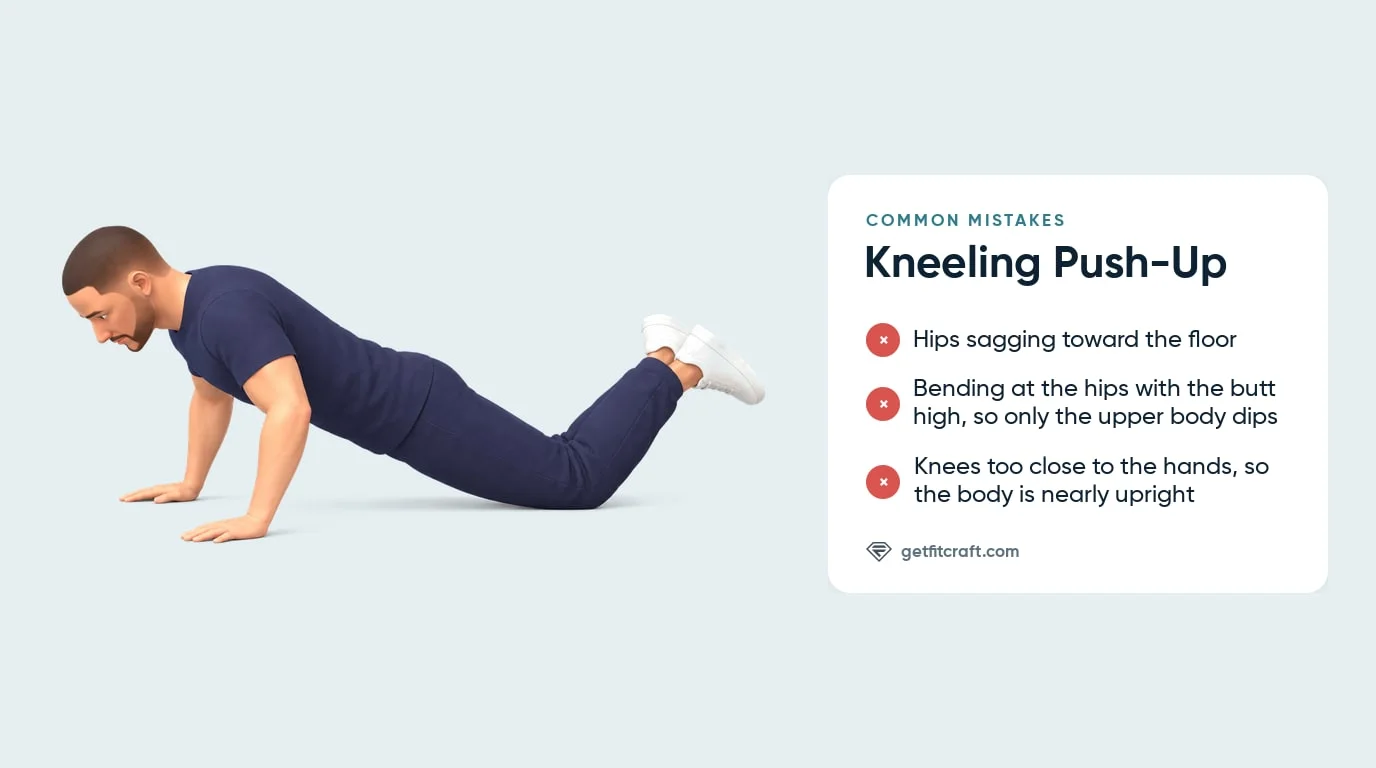
- Bending at the hips. Your butt stays high and only the upper body dips, turning the rep into a shallow arm bend. Fix: extend the hips fully so knees, hips, and head form one line, then keep that line for every rep.
- Hips sagging toward the floor. Your hips drop below the line and your lower back arches, the opposite of bending at the hips. Fix: brace your abs so your hips stay in line with your knees and shoulders, and end the set when you can't hold the line.
- Kneeling too far forward. With the knees close to the hands, the body is nearly upright and less of your weight goes through your hands. Fix: walk the knees back until your shoulders are over or just behind your hands and you feel real weight in your palms.
- Elbows flared straight out. Your elbows splay straight out to the sides in a T shape. Fix: angle your elbows back about 45 degrees from your body, or closer. Arrow shape, never a T. (On the wide-grip version, the elbows point more out to the sides by design; angle them a little back and lower with control.)
- Dropping the head. Your head hangs toward the floor or your chin pokes forward to reach it. Fix: keep your head in line with your back, eyes on the floor just ahead of your hands, and let your chest lead.
- Cutting the range short or bouncing. Stopping well above the floor, or bouncing off the bottom, skips the hardest part of the rep. Fix: lower with control until your chest is just above the floor or lightly touches it, then press. If that range breaks your form, you're better served by incline push-ups for now.
- Never testing the next step. You stay on your knees long after your sets feel easy. Fix: once you can do one or two more clean reps than your target in every set, open each set with as many full push-ups as your form allows, then finish on your knees.
Kneeling Push-Up Variations: Regressions and Progressions
The kneeling push-up sits in the middle of the push-up family. The app has three kneeling versions, all rated Beginner, that differ only in where your hands go. Here's the ladder around them, from easiest to hardest.
Wall Push-Up (Easiest)
Stand facing a wall with your hands at shoulder height, step back until your arms are extended, and press. This is the easiest version and the entry point if kneeling reps are out of reach today.
Incline Push-Up (Easier, Beginner in the App)
Hands on a sturdy bench, counter or other fixed surface, with your body in one straight line from head to heels. The higher your hands, the easier it gets. Like kneeling, the incline takes some of your body weight off your hands, but you hold the line all the way to your heels instead of your knees. You can mix incline and kneeling sets in the same week.
Kneeling Push-Up (Standard, Beginner)
Knees down, hips extended, straight line from knees to head, hands about shoulder-width apart or a little wider, chest lowering until it is just above the floor. The version this guide covers. To make it harder before you move up, slow the lowering to about three seconds, keeping your body straight and breathing the whole way.
Close-Grip Kneeling Push-Up (Beginner)
The same kneeling push-up with your hands close together on the floor right under your chest, well inside your shoulders. Keep your elbows close to your ribs; they can angle a little out, but never flare straight out. With your hands close, more of the work goes to the backs of your arms, while your chest and serratus anterior still push.
Wide-Grip Kneeling Push-Up (Beginner)
The same kneeling push-up with your hands well outside your shoulders, fingers pointing forward. With your hands this wide, your elbows point more out to the sides; that's how this version works. Angle them a little back and lower with control.
Full Push-Up (Intermediate, the Next Step)
The goal of the whole ladder: one straight line from head to heels on your toes, with more of your body weight on your hands. The app rates it Intermediate. Once you can do one or two more clean kneeling reps than your target in every set, start testing it at the front of your sets.
When to Avoid or Modify Kneeling Push-Ups
Kneeling push-ups are already the standard easier option for people who can't yet do full push-ups. If any of the situations below applies to you, check with a doctor or physical therapist before you do them, and stop any set that causes pain in a joint, your lower back or your neck. A burn in your chest, the backs of your arms, along your ribs under your armpits or the fronts of your shoulders is normal.
- Wrist pain or carpal tunnel. Flat hands on the floor bend your wrists back under your body weight. If you have wrist pain or carpal tunnel, see a doctor or physical therapist before you do kneeling push-ups. If your wrists only feel strained, not painful, hold push-up handles or dumbbell handles to keep them straight, and stop if they hurt.
- Knee pain or kneecap discomfort. The kneeling base puts pressure on your kneecaps. Any knee pain means stop, and if you have knee pain or a knee injury, see a doctor or physical therapist before you do kneeling push-ups. If your knees only feel uncomfortable, not painful, pad them with a mat or a folded towel.
- Shoulder impingement or rotator cuff irritation. If your shoulder is irritated or injured, see a doctor or physical therapist before you do kneeling push-ups, and stop any set that causes shoulder pain.
- Recent shoulder, wrist, elbow, or knee surgery. Get clearance from your surgeon before you do kneeling push-ups.
- Recent childbirth or active diastasis recti. Holding a straight body line still asks a lot of your abs, even on your knees. Get clearance from your doctor or a pelvic-floor physical therapist before you do kneeling push-ups, and stop if you feel any pain.
- Lower-back pain. Any lower-back pain during a set means stop. If you have lower-back pain, see a doctor or physical therapist before you do kneeling push-ups. If your hips sag and you can't hold your body straight, end the set there.
Related Exercises
If kneeling push-ups are in your routine, these movements extend or support the same pressing pattern:
- The next step up: Full Push-Ups, the movement this whole progression builds toward. Test them at the front of a set once your kneeling volume is solid.
- The parallel regression: Incline Push-Ups take some of your body weight off your hands while you hold a straight line all the way to your heels. Mixing both in the same week gives you two ways to practice the straight body line.
- Same muscle group with external load: Chest Press works the chest and triceps with dumbbells, and Chest Fly focuses on the chest, useful if you have access to weights and want to add load.
- Tricep-focused exercises: Diamond Push-Ups (Advanced in the app) shift the emphasis to the triceps once full push-ups feel comfortable; Bench Dips work the triceps too.
- Core foundation for the plank line: Hand Planks and Forearm Planks practice holding your body in one straight line, the same brace a push-up needs.
How to Program Kneeling Push-Ups
Kneeling push-up programming follows the same progressive resistance-training principles as other pressing exercises. The American College of Sports Medicine (ACSM) Position Stand on resistance training recommends loads of about 8 to 12 reps per set for beginners, 2 to 3 sessions a week for beginners, more than 15 reps per set with short rests for muscular endurance, and adding load once you can do one or two more reps than your target (Ratamess et al., 2009). It gives no ranges for the kneeling push-up itself, so treat the table below as a practical starting point. Since body weight fixes the load, your main progression levers are reps, tempo, and eventually the variation itself.
| Level | Sets × Reps | Rest between sets | Frequency |
|---|---|---|---|
| Starting out (first weeks of pressing work) | 2-3 × 6-10 | 60-90 seconds | 2-3 sessions/week |
| Building volume | 3 × 8-12 | 60-90 seconds | 2-3 sessions/week |
| Transition (mixing full and kneeling reps) | 3-4 × 1-3 full + 6-10 kneeling | 90-120 seconds | 2-4 sessions/week |
Where in your workout: early in the session, while you're fresh. Kneeling push-ups work the same muscles as a full push-up and need a straight body on every rep, and that is easier to hold before you're tired. In a full-body or circuit session, put them at the start of the push block, before any tricep or shoulder isolation work.
The transition protocol: once you can do one or two more clean kneeling reps than your target in every set, open each set with as many full push-ups as your form allows, even if that's one, then drop to your knees and finish the set. Add a full rep whenever the full reps you already do stay clean. This way you keep the same number of reps per set while you practice the harder position, working toward your first unbroken set of full push-ups.
Form before rep targets: the set ends when the line from knees to head breaks, the elbows flare, or the range shortens. Six clean reps are worth more than twelve sloppy ones, because the clean ones practice the movement you're trying to learn.
How FitCraft Programs This Exercise
During your personalized diagnostic assessment, the app maps your fitness level, goals, and available equipment, then builds a balanced training plan for your level. The app's kneeling push-up comes in three versions, all rated Beginner: the standard version, a close grip with your hands under your chest, and a wide grip with your hands well outside your shoulders. Its 3D demonstrations show the knees on the floor, the feet lifted behind and one straight line from the knees to the head. The standard floor push-up, rated Intermediate, is the next step up.
Domenic Angelino designs the programs.
Frequently Asked Questions
How many kneeling push-ups should a beginner do?
Start with 2 to 3 sets of 6 to 10 reps, two or three times a week. Once you can do one or two more clean reps than your target in every set, with one straight line from knees to head and your chest coming close to the floor, start testing full push-ups. Clean, controlled reps matter more than rushed ones.
What muscles do kneeling push-ups work?
Kneeling push-ups work the same muscles as a full push-up. They mainly work the chest (pectoralis major), the triceps and the serratus anterior, the muscle along your ribs under your armpits. The anterior deltoids (the fronts of your shoulders) help the chest press, and the transverse abdominis and rectus abdominis hold your body in one straight line from your knees to your head. Resting on your knees takes some of your body weight off your hands: force-plate research found a lower ground reaction force for the push-up on the knees than for the regular push-up. The movement stays the same, and only the load drops.
Are kneeling push-ups effective for building muscle?
Yes, as long as your sets are hard. If you can't yet do full push-ups, a kneeling set of 8 to 12 hard, clean reps trains your chest, triceps and serratus anterior, with the fronts of the shoulders helping. Once you can do one or two more clean reps than your target in every set, it's time to progress toward the full version.
When should I progress from kneeling to full push-ups?
Once you can do one or two more clean reps than your target in every set (one straight line from knees to head, elbows angled back, chest just above the floor), start testing full push-ups. One way to make the transition: do as many full push-ups as your form allows at the start of a set, then drop to your knees and finish the remaining reps kneeling.
Can I do kneeling push-ups with wrist pain?
Not while your wrists hurt. Any wrist pain during a set means stop, and if you have wrist pain, carpal tunnel or arthritis in your wrists, see a doctor or physical therapist before you do kneeling push-ups. Flat hands on the floor bend your wrists back. If your wrists only feel strained, not painful, hold push-up handles or dumbbell handles so your wrists stay straight, and stop if they hurt.