The seated rear delt stretch targets the back of the shoulder with almost no setup. You can do it on the floor, in a chair, or during a quick work break when your upper back starts feeling stiff.
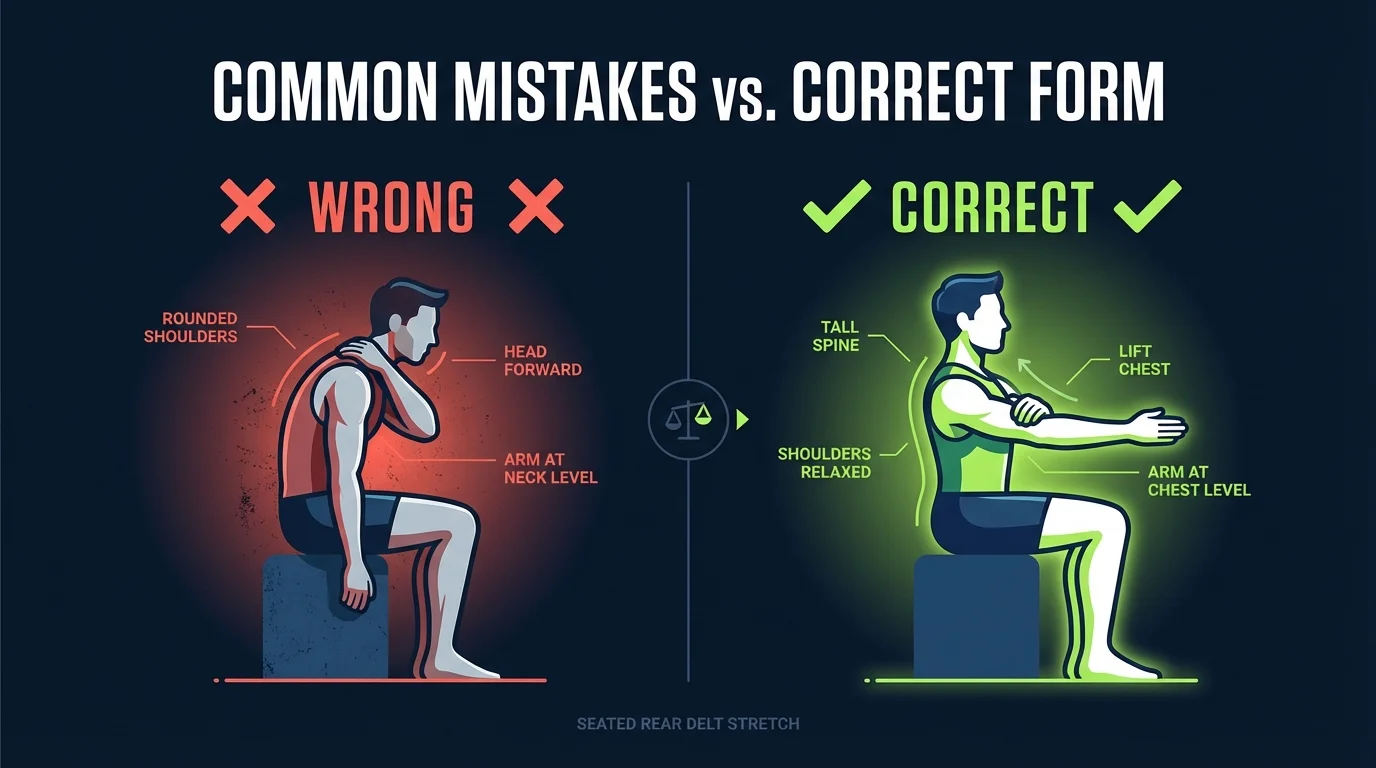
The big form detail is the line of pull. The arm should move across the chest while the stretching-side shoulder stays down. If the arm drifts toward your throat or the shoulder hikes up, the stretch usually moves into the neck and front of the shoulder.
Use this as a gentle mobility drill. Skip the max-effort pull. Mild tension is enough. Sharp pain, tingling, or numbness means you should stop and modify.
Quick Facts: Seated Rear Delt Stretch
- Equipment needed: None
- Difficulty: Beginner
- Modality: Static stretch and mobility
- Body region: Upper body, shoulder, and upper back
- FitCraft quest category: Mobility
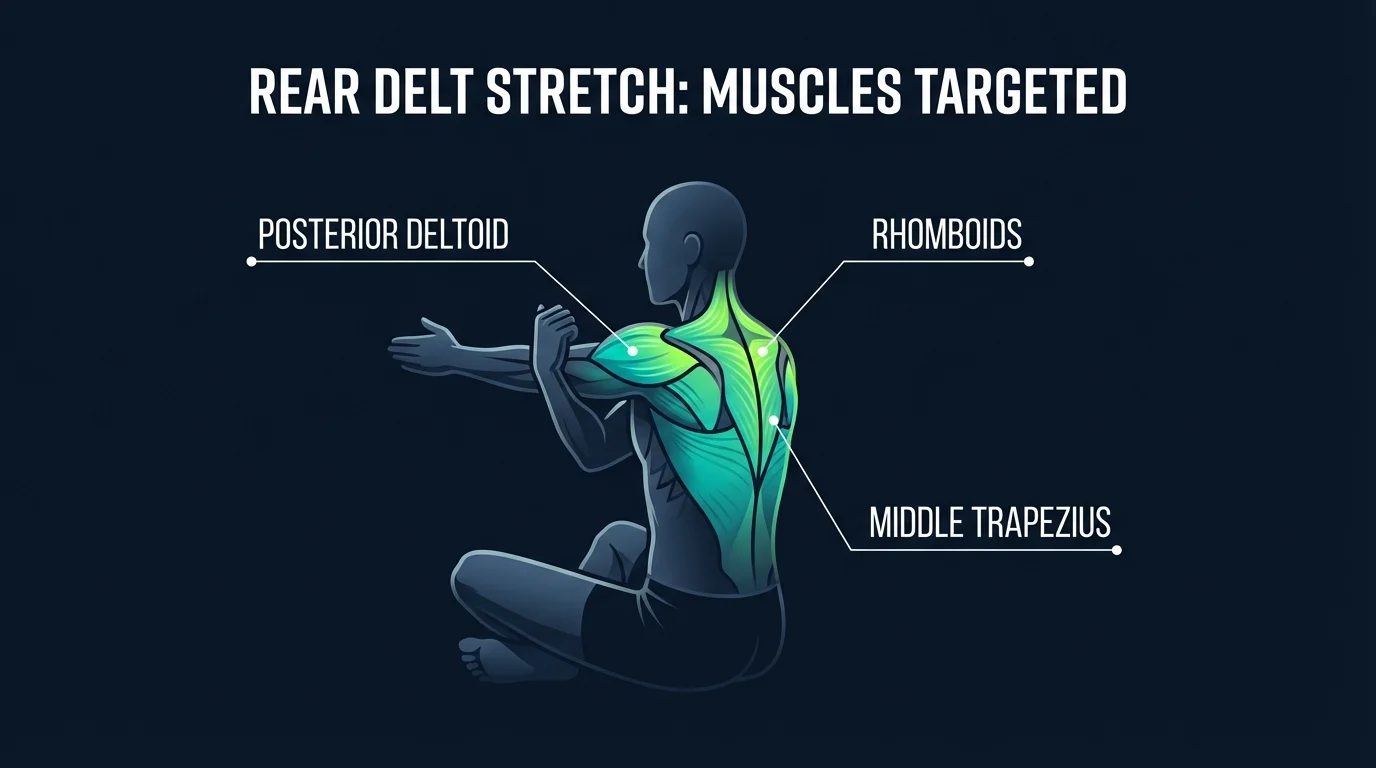
Areas Stretched & Mobilized
Primary target: the posterior deltoid is the main tissue lengthened as the upper arm crosses the chest. The stretch asks the back of the shoulder to tolerate horizontal adduction without letting the shoulder roll forward or climb toward the ear.
Secondary tissues: the rhomboids, middle trapezius, and infraspinatus move with the shoulder blade as the arm crosses the body. You may feel the stretch between the shoulder blade and the back of the upper arm, especially if your upper back is tight from sitting.
Stabilizers: this drill does not demand heavy stabilization. Your deep core and spinal extensors only need to keep the torso tall enough that the shoulder gets the stretch instead of the neck and upper traps.
Mechanism: the cross-body position creates a gentle posterior shoulder stretch by bringing the humerus across the torso while the scapula protracts slightly. Clean setup matters more than force. More pull does not make the stretch better if it pulls the shoulder into a pinched position.
How to Do the Seated Rear Delt Stretch Step by Step
- Sit tall. Sit cross-legged on the floor or sit in a chair with both feet flat. Stack your ribs over your pelvis, lengthen through the crown of your head, and let your shoulders settle down away from your ears. Coach Ty's cue: "Grow tall first, then stretch."
- Bring one arm across your chest. Lift one arm to chest height and draw it horizontally across your body. Keep the elbow soft, and guide the hand toward the opposite shoulder instead of the neck or chin. Coach Ty's cue: "Chest line, not neck line."
- Apply pressure above the elbow. Place the opposite hand on the outside of the upper arm, a few inches above the elbow. Gently pull the arm closer to your chest until you feel a stretch in the back of the shoulder. Coach Ty's cue: "Pull the upper arm, leave the elbow alone."
- Hold and breathe. Hold for 20 to 30 seconds while breathing steadily. Keep both shoulders level. If the stretching-side shoulder starts moving toward your ear, reset and drop it down. Coach Ty's cue: "Ear away from shoulder."
- Switch sides. Release slowly, shake out the arm, and repeat on the other side. Use the same pressure and hold time so both shoulders get the same dose.
Get this exercise in a personalized workout
FitCraft, our mobile fitness app, uses its AI coach Ty to program mobility work like this into your plan at the right volume and intensity, based on your level, goals, and equipment. Ty was designed and trained by Domenic Angelino, MPH (Brown University) and NSCA-CSCS, with research published in the Journal of Strength and Conditioning Research and Medicine & Science in Sports & Exercise.
Take the Free Assessment Free · 2 minutes · No credit card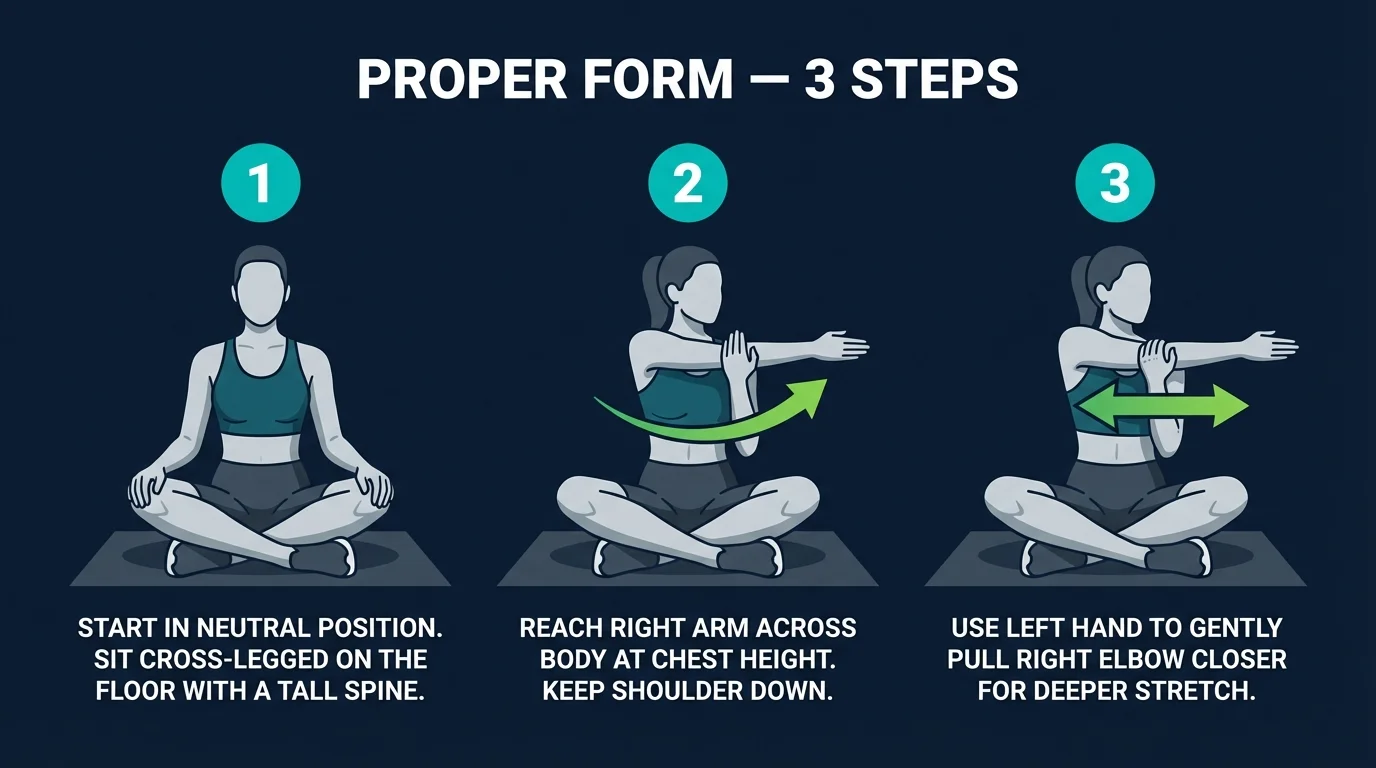
Common Mistakes to Avoid
- Pulling on the elbow joint. Hooking the opposite hand around the elbow adds stress to the joint and gives you less control over the shoulder angle. Place the hand on the upper arm instead.
- Raising the arm too high. If the hand crosses your throat or face, the stretch often shifts into the neck and front shoulder. Lower the arm until it crosses the chest.
- Slouching for more range. Rounding your upper back may make the arm travel farther, but it changes the position you are trying to improve. Stay tall and accept a smaller stretch.
- Letting the shoulder hike. The stretching-side shoulder will often creep toward the ear. Drop it down and keep the neck quiet.
- Forcing past mild tension. A stretch should feel like manageable pressure. Back off if you feel pinching, sharp pain, tingling, or numbness.
Seated Rear Delt Stretch Variations and Progressions
Chair Seated Rear Delt Stretch
Sit in a chair with your feet flat and your hips back in the seat. This version is easiest to repeat during the workday because the chair helps you keep the spine upright.
Hip-Elevated Floor Stretch
Sit on a yoga block, cushion, or folded towel if your lower back rounds on the floor. Raising the hips helps the pelvis sit neutral, which makes the shoulder stretch cleaner.
Breath-Paced Hold
Hold the stretch for five slow breaths instead of counting seconds. Each exhale should soften the shoulder down without adding a harder pull.
Threaded Needle Style Progression
For a deeper posterior shoulder and upper-back stretch, move to an all-fours threaded-needle position after warming up. Keep the pressure gentle and avoid this progression if kneeling or shoulder rotation feels painful.
When to Avoid or Modify the Seated Rear Delt Stretch
The seated rear delt stretch is safe for most healthy adults, but a few conditions warrant modification. Always consult your physician or a qualified physical therapist if you are unsure whether shoulder stretching is appropriate for you.
- Acute shoulder injury or recent shoulder surgery. Wait for clearance before stretching the joint. Use clinician-approved range-of-motion work first.
- Shoulder instability, dislocation history, or labral symptoms. Keep the arm lower, use very light pressure, and stop if the shoulder feels like it is sliding or catching.
- Hypermobility, Ehlers-Danlos, or connective tissue disorder. Avoid passive end-range stretching. Emphasize controlled active mobility such as shoulder rolls instead.
- Acute muscle strain around the shoulder or upper back. Do not stretch aggressively through a fresh strain. Reintroduce gentle range only after the acute phase settles.
- Nerve symptoms. Tingling, numbness, burning, or symptoms that travel into the hand are reasons to stop and get assessed.
- Pregnancy or generalized ligament laxity. Stay in a comfortable range and avoid chasing deeper passive stretches.
Related Exercises
- Same shoulder complex: Rotator cuff stretch targets the deep shoulder tissues from a different angle.
- Active mobility pairing: Shoulder rolls add gentle movement before or after the static hold.
- Upper-body mobility pairing: Tricep and lat stretch opens the overhead line that often tightens with desk posture.
- Spine mobility pairing: Cat-cow moves the thoracic spine and shoulder blades before you stretch.
- Yoga alternative: Cobra pose opens the chest and front shoulder to balance the posterior shoulder work.
How to Program the Seated Rear Delt Stretch
Ratamess et al., 2009 describe progression as the planned adjustment of training variables over time. For mobility work, that means changing hold time, frequency, and stretch intensity gradually while keeping symptoms calm.
| Level | Sets × Reps | Rest between sets | Frequency |
|---|---|---|---|
| Beginner | 1-2 holds of 15-30 seconds per side | Switch sides as needed | 5-7 sessions/week |
| Intermediate | 2-3 holds of 30-60 seconds per side | 15-30 seconds | 5-7 sessions/week |
| Advanced | 2-4 holds of 30-90 seconds per side | 15-45 seconds | Daily if symptoms stay calm |
Where it fits: use this stretch after upper-body pressing or pulling, during a cool-down, or as a short desk-break reset. Before strength or power work, keep holds gentle and brief so the shoulder feels mobile without feeling dull.
Form floor: stop adding time when the shoulder hikes, the neck tenses, or the arm drifts up toward the throat. A clean 20-second hold beats a sloppy 60-second hold.
FitCraft's AI coach Ty uses mobility work like this to round out programs without making the plan feel complicated. Ty demonstrates exercises, talks you through the session, and adjusts the variation and volume to match your level as your consistency improves.
Frequently Asked Questions
What muscles does the seated rear delt stretch target?
The seated rear delt stretch mainly targets the posterior deltoid at the back of the shoulder. It also gives the rhomboids, middle trapezius, and infraspinatus a gentle stretch because the shoulder blade moves across the upper back.
How long should I hold the seated rear delt stretch?
Start with 15 to 30 seconds per side. If the stretch feels comfortable and your shoulder stays relaxed, work toward 30 to 60 seconds per side for a longer mobility session.
Can I do the seated rear delt stretch every day?
Yes, most healthy adults can use this stretch daily because it is low intensity and does not load the shoulder heavily. Keep the pressure mild and stop if the stretch turns into sharp pain, tingling, or numbness.
Can I do the seated rear delt stretch with shoulder pain?
Modify or skip it if you have acute shoulder injury, recent shoulder surgery, instability, sharp pain, or symptoms that travel down the arm. Use a smaller range, keep the arm lower on the chest, and get guidance from a qualified clinician if pain persists.
Why does my neck hurt during the seated rear delt stretch?
Neck discomfort usually means the arm is too high or the stretching-side shoulder is hiking toward your ear. Lower the arm across the chest, relax the shoulder down, and place pressure on the upper arm instead of the elbow joint.