The decline push-up is the simplest way to make push-ups meaningfully harder without touching a weight. Put your feet on a step or bench, keep everything else the same, and gravity does the rest. More of your body mass sits over your hands, so your chest, triceps and shoulders have more weight to press.
Most people get the angle right and the plank wrong. Once the feet go up, the hips want to sag, the head wants to drop, and the set turns into a lower-back exercise nobody asked for. The elevation only pays off when the body line stays as rigid as it would on the floor.
This guide covers the setup, the cues that keep your shoulders and wrists happy, the mistakes that show up most at a decline angle, and the progression path from your first low-step rep to slow-tempo declines and pike push-ups.
Quick Facts: Decline Push-Up
- Equipment needed: A sturdy box, step or bench about knee height that cannot slide or tip (no weights needed)
- Difficulty: Advanced (diamond and wide-grip versions: Expert)
- Modality: Strength
- Body region: Upper body and abs (chest, triceps, serratus anterior, front shoulders, transverse and rectus abdominis)
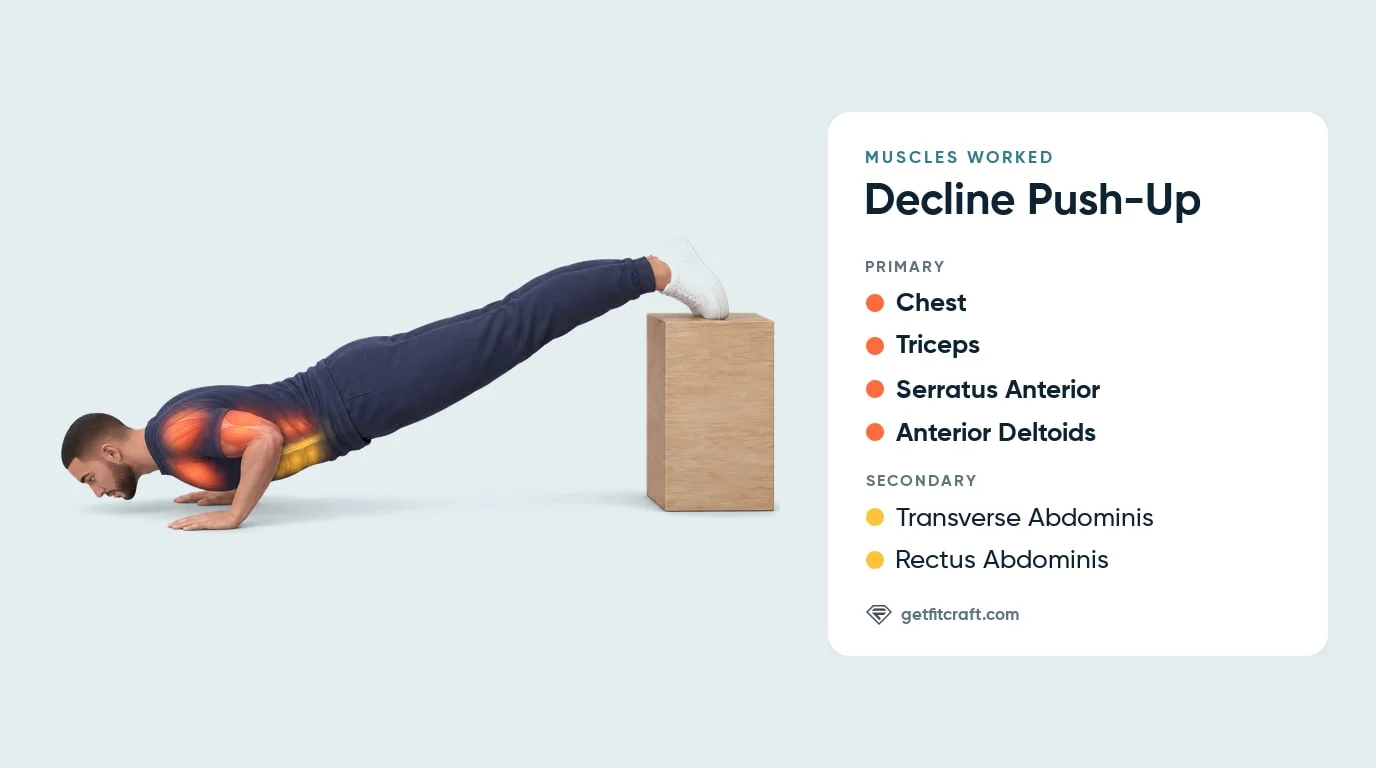
Muscles Worked
Primary movers: the chest (pectoralis major), the triceps, the serratus anterior and the anterior deltoids (the fronts of your shoulders). The chest and the fronts of the shoulders push your body away from the floor, and the triceps straighten your elbows as you press back up. The serratus anterior, the muscle along your ribs under your armpits, holds your shoulder blades flat against your ribs and pushes them forward at the top of each rep.
Secondary movers: the transverse abdominis, your deepest abdominal muscle, and the rectus abdominis, the six-pack muscle. They hold your body in one straight line from head to heels so your hips do not sag toward the floor. With your feet up, the hips tend to sag more easily than on flat ground, which is why the brace matters.
Evidence: Ebben et al. (2011) measured peak ground reaction forces across six push-up variations on a force platform and found that push-ups with the feet elevated produced higher forces than every other variation tested, while hands-elevated and knee push-ups produced lower forces. That makes the decline push-up a loading progression: the movement stays the same while a larger share of your body mass sits over your hands.
Step-by-Step: How to Perform Decline Push-Ups
The cues below assume a knee-height bench. On a lower step everything gets slightly easier, and the same form rules apply.
Step 1: Set Your Hands and Surface
Kneel with your back to a sturdy box or bench about knee height and place your hands on the floor slightly wider than shoulder-width, fingers spread, middle fingers pointing forward. Test the surface first. If it slides or tips, find something heavier.
Form tip: if your wrists feel strained, use push-up handles or make fists to keep them straight, and stop if they hurt.
Step 2: Walk Your Feet Up and Lock In the Plank
Place the balls of both feet on the surface one at a time, feet close together. Brace your abs and tuck your ribs so your body forms one straight line from head to heels. Straighten your arms, with your wrists under or just in front of your shoulders.
Form tip: set the straight line before the first rep, and keep your hips from sagging or piking for the whole set.
Step 3: Lower With Control
Bend your elbows and lower your chest toward the floor with control, taking about a second or longer. Angle your elbows back no wider than about 45 degrees from your body; tucked closer is fine. Lower until your chest is a few inches from the floor, or as low as you can control, keeping your neck long and lifting your chin slightly so your face clears the floor. Inhale on the way down.
Form tip: keep your weight on your hands. Your face may brush the floor, but your head never takes weight.
Step 4: Press Back to the Top
Drive through your whole palm and press the floor away until your arms are straight or nearly straight, without snapping your elbows locked. Exhale through the press and keep the hips welded to the plank line. Your chest and hips rise together at the same speed.
Form tip: press smoothly out of the bottom without bouncing.
Step 5: Hold the Line Between Reps
Pause for a breath at the top without letting the hips sag or pike, then start the next rep. When the plank line breaks, the set is over. Step one foot down at a time to finish rather than jumping off.
Form tip: keep breathing through the set. Never hold your breath with your head lower than your feet.
Get this exercise in a personalized workout
FitCraft, our mobile fitness app, uses an AI coach to program pressing exercises like this into your plan at the right volume and intensity, based on your level, goals, and equipment. Every FitCraft program is designed by Domenic Angelino, MPH (Brown University) and NSCA-CSCS, with research published in the Journal of Strength and Conditioning Research and Medicine & Science in Sports & Exercise.
Take the Free Assessment Free • 2 minutes • No credit card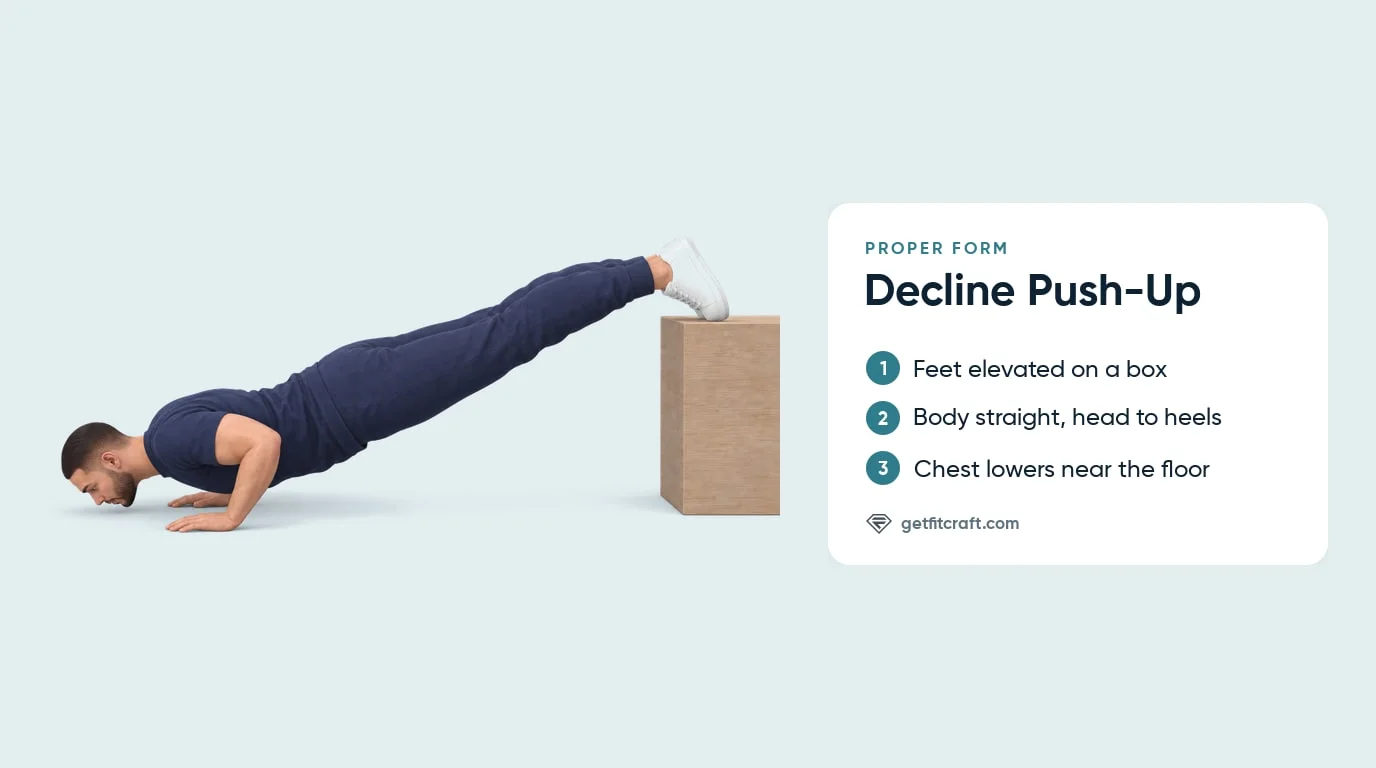
Common Mistakes (and How to Fix Them)
These are the errors that show up most once the feet leave the floor.
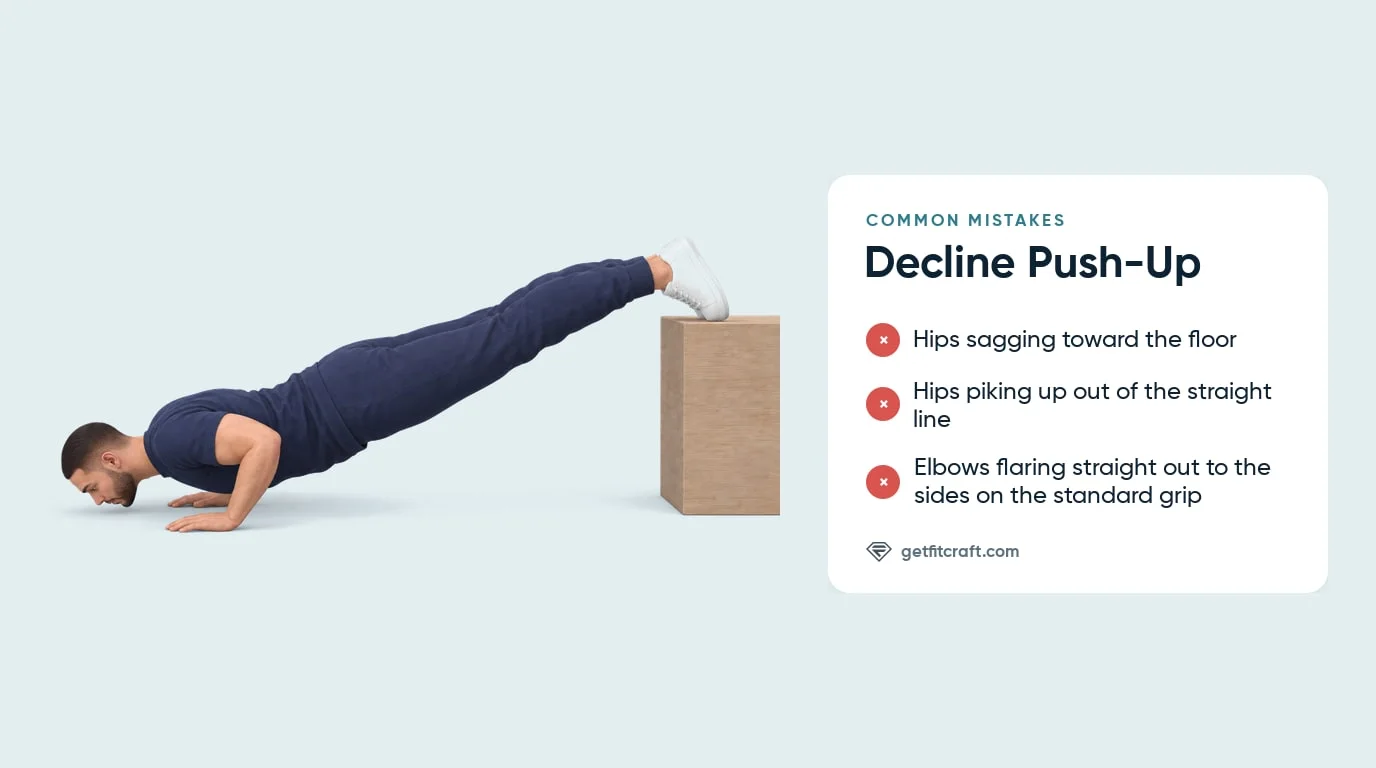
- Sagging or piking hips. The pelvis drops below the head-to-heel line, usually a rep or two before failure, or pikes up above it. A sagging plank shifts the load off the chest and into the lower back. Fix: brace your abs harder, keep your hips in line with your shoulders and heels, and end the set when the line breaks. If it breaks on rep one, lower the surface.
- Starting on a surface too high. If your hips sag or your body line breaks in the first reps, the surface is too high for you right now. Fix: use a lower surface (a low step of 6 to 12 inches is the easier entry) and raise it only when you can finish clean sets with your body straight.
- Flaring the elbows. Elbows drift straight out to the sides at 90 degrees. That position stresses the front of the shoulder right where the decline angle already adds demand. Fix: angle the elbows back no wider than about 45 degrees from your body, tucked closer if you like, so your arms and torso form an arrow shape from above. The wide-grip version points the elbows more to the sides by design.
- Dropping the head. The chin pokes toward the floor to fake range of motion while the chest stays high. This strains the neck and cheats the chest out of its full stretch. Fix: lead the descent with your chest and keep your neck long, lifting your chin only slightly so your face clears the floor.
- Bouncing out of the bottom. Dropping fast and rebounding off the bottom turns the rep into momentum instead of control. Fix: lower with control, pause for a moment at the bottom, and press up smoothly. If you can only control part of the range, use a lower surface rather than bouncing through it.
- Loose feet on the surface. The toes rest passively and the feet slide or bounce as the set gets hard, wobbling the whole chain. Fix: press the balls of your feet actively into the surface and keep the ankles stacked. A grippy shoe sole or a non-slip surface helps. Stop if your feet slip or the box moves.
Decline Push-Up Variations: Regressions and Progressions
Move up only when your current level gives you clean, full-range sets with a quiet plank line.
Incline Push-Up (Beginner Regression)
Hands elevated on a bench or counter instead of the feet. This unloads the pressing pattern so you can build volume and form before floor work.
Standard Push-Up
The prerequisite. Get comfortable with several clean sets of floor push-ups with your body straight before you raise your feet.
Low-Step Decline Push-Up (Entry Version)
Feet on a 6-to-12-inch step. The load bump over a standard push-up is modest, which makes it the right first decline height for most people.
Slow-Tempo Decline Push-Up (Progression)
On a knee-height bench, take three to four seconds on the descent and pause briefly at the bottom. Tempo raises time under tension without needing a higher, riskier surface.
Diamond Decline Push-Up (Expert)
Feet on a knee-height box as usual, hands close together under your chest with your thumbs and index fingers touching or nearly touching in a diamond shape. Keep your elbows close to your body and let them bend straight back along your ribs. The narrow hand position puts more of the work on the triceps. A slightly wider close grip is fine if your wrists prefer it.
Wide-Grip Decline Push-Up (Expert)
Hands about twice your usual push-up width, fingers pointing forward. With the hands this wide, your elbows point more out to the sides and bend less: lower until your elbows bend to about a right angle, which still brings your chest a few inches from the floor, or as far as you can control with your body straight. A wider grip shifts a little more of the work to the chest.
Pike Push-Up (Shoulder-Focused Progression)
Hips high so your body makes an upside-down V, with your head lowering between your hands. The pike shifts the pressing angle from the chest toward the shoulders and is the natural next step once high-decline push-ups feel strong.
When to Avoid or Modify Decline Push-Ups
Decline push-ups are safe for most healthy adults. If any of the situations below applies to you, check with a doctor or physical therapist before you do them, and stop any set that causes pain in a joint, your lower back or your neck.
- Shoulder impingement or rotator cuff irritation. Raising your feet puts more of your body weight on your hands and arms than a standard push-up. If your shoulder is irritated or injured, see a doctor or physical therapist before you do decline push-ups, and stop any set that causes shoulder pain.
- Wrist pain or carpal tunnel. Floor pressing bends your wrists far back, and the decline puts more of your body weight on them. If you have wrist pain or carpal tunnel, see a doctor or physical therapist before you do decline push-ups. If your wrists only feel strained, use push-up handles or make fists to keep them straight, and stop if they hurt.
- Recent shoulder, wrist, or elbow surgery. Get clearance from your surgeon before you do decline push-ups.
- First 6-8 weeks postpartum or active diastasis recti. The decline plank asks a lot of your abs. Get clearance from your doctor or a pelvic-floor physical therapist before you do decline push-ups, and stop if you feel any pain.
- Lower-back pain. Any lower-back pain during a set means stop. If you have lower-back pain, see a doctor or physical therapist before you do decline push-ups.
- Not yet solid on standard push-ups. If floor push-ups still break your straight body line, keep building on flat ground first.
Related Exercises
If decline push-ups are in your routine, these movements build the same pressing and bracing pattern from different angles:
- Same muscle group (push): Push-Ups, Incline Push-Ups and Chest Press train the chest, shoulders and triceps with different loading options, and Chest Fly trains the chest with dumbbells.
- Tricep-focused options: Diamond Push-Ups and Bench Dips shift the emphasis toward the triceps.
- Shoulder-focused progression: Pike Push-Ups continue the angle progression from the chest toward the shoulders.
- Core foundation: Hand Planks, Forearm Planks and Deadbugs build the brace that keeps the decline plank rigid, and Bird-Dogs practice keeping your back flat while one leg moves.
- Advanced chest variation: Pseudo Planche Push-Up and Lateral Push-Up add wrist, chest, and stability demand for advanced trainees.
How to Program Decline Push-Ups
Decline push-up programming follows the same progressive resistance-training principles as other bodyweight pressing. The American College of Sports Medicine position stand recommends fitting training frequency, load and rest to your training level, and adding load only once you can do one or two more reps than your target (Ratamess et al., 2009). On a decline push-up, you add load by raising the surface.
| Level | Sets × Reps | Rest between sets | Frequency |
|---|---|---|---|
| New to declines (low step) | 2-3 × 5-8 | 60-90 seconds | 2-3 sessions/week |
| Advanced (knee-height box or bench) | 3-4 × 6-12 | 60-90 seconds | 2-4 sessions/week |
| Expert (diamond or wide-grip, higher surface, or slow tempo) | 3-5 × 6-10 | 90-120 seconds | 3-4 sessions/week |
Where in your workout: put decline push-ups early in an upper-body or push session while the shoulders and core are fresh. They pair well after a heavier dumbbell press as a volume finisher, or as the primary pressing movement in a bodyweight-only session.
Form floor over rep targets: stop the set when the plank line breaks. Sagging hips, a dropping head, flaring elbows, or shrinking range all mean the useful reps are done, whatever the target number said.
How FitCraft Programs This Exercise
Knowing how to do a decline push-up is step one. Knowing when you are ready for it, and when to move on to the diamond or wide-grip version, is where most people get stuck.
FitCraft handles that. During your personalized diagnostic assessment, the app maps your fitness level, goals, and available equipment, then builds a balanced training plan for your level. The app has three decline push-ups: the standard version (Advanced) and the diamond and wide-grip versions (Expert). The 3D demonstration of the standard version shows the feet on the box and the straight body line from head to heels.
Every program is designed by an Ivy League-trained exercise scientist and NSCA-certified strength coach using evidence-based periodization, then adapted to you by the AI.
Frequently Asked Questions
What muscles do decline push-ups work?
Decline push-ups mainly work the chest, the triceps, the serratus anterior and the anterior deltoids (the fronts of the shoulders), with the transverse abdominis and rectus abdominis helping. The chest and the fronts of the shoulders push your body away from the floor, the triceps straighten your elbows, and the serratus anterior holds your shoulder blades flat on your ribs and pushes them forward at the top. Your abs hold your body in one straight line so your hips do not sag.
Are decline push-ups harder than regular push-ups?
Yes. Elevating the feet shifts more of your body weight over your hands, so each rep loads the upper body with a larger share of body mass than a standard push-up. Force-platform research found feet-elevated push-ups produce higher ground reaction forces than standard, knee, or hands-elevated variations, and the higher the surface, the harder the rep.
How high should I elevate my feet for decline push-ups?
The standard version, the one the FitCraft app shows, puts your feet on a sturdy box about knee height, roughly 22 inches (55 cm). If that is too hard at first, start on a low step of roughly 6 to 12 inches (15 to 30 cm). A lower surface is easier and a higher one is harder, so earn each height with clean reps, and use something that cannot slide or tip.
Do decline push-ups build the upper chest?
Decline push-ups work the upper chest as part of the whole chest, together with the triceps, the serratus anterior and the fronts of the shoulders. Raising your feet puts more of your body weight on your hands, so they are a harder chest exercise than standard push-ups with no weights needed. For well-rounded chest training, mix them with standard push-ups or flat pressing.
Can I do decline push-ups with shoulder pain?
No. Any shoulder pain during a set means stop. Raising your feet puts more of your body weight on your hands than a standard push-up, so if your shoulder hurts, see a doctor or physical therapist before you do decline push-ups, and start them again only once they clear you.