Warrior 3 is useful because it gives fast feedback. If your standing foot grips, your gaze drifts, or your lifted leg goes passive, the pose tells you right away.
That makes it more than a pretty yoga shape. It trains single-leg balance, hip-hinge control, posterior-chain endurance, and calm breathing under a real stability challenge.
Quick Facts: Warrior 3 Pose
- Equipment needed: None; yoga mat, wall, chair, or blocks optional
- Difficulty: Intermediate to advanced; beginner-friendly with support
- Modality: Yoga, balance, mobility, and isometric strength
- Body region: Lower body, hips, core, spine, shoulders, and ankles
- FitCraft quest category: Yoga
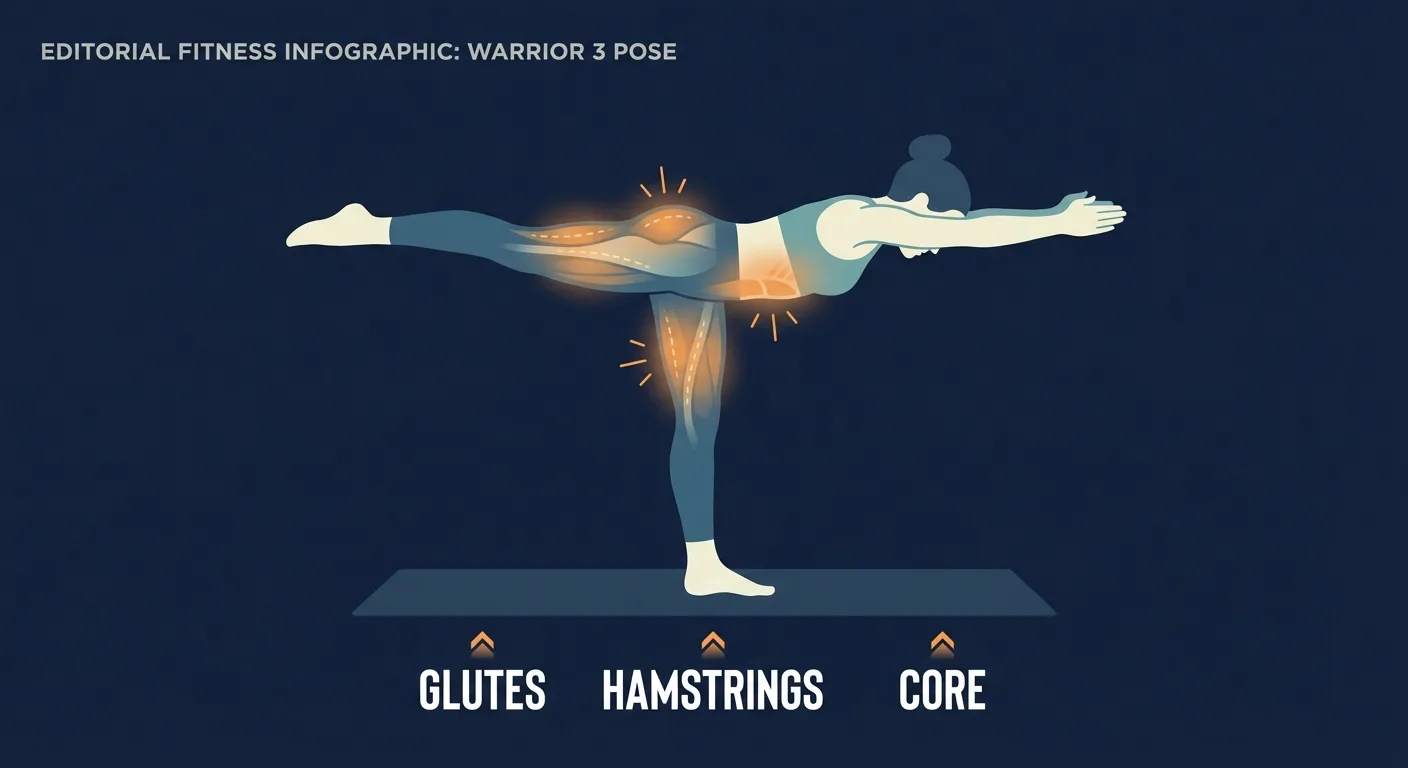
Muscles Engaged & Stretched
Primary movers: the standing-leg gluteus maximus, hamstrings, and gluteus medius create the main support for the hip hinge. They work mostly isometrically once you reach the hold, while the lifted-leg glutes and hamstrings keep the back leg active instead of letting it sag.
Secondary movers: the quadriceps of the standing leg co-contract around the knee, the calf and intrinsic foot muscles help control pressure through the foot, and the shoulders, upper back, and serratus anterior support the forward arm reach.
Stabilizers: the rectus abdominis, transverse abdominis, obliques, erector spinae, deep hip stabilizers, and ankle stabilizers keep the pelvis level and the spine long. Slow diaphragmatic breathing helps the trunk stay active without turning the pose into a rigid brace.
Mechanism: Warrior 3 narrows your base of support to one foot while shifting your center of mass forward. The pose works because your foot, ankle, hip, and trunk make constant small corrections as your gaze and breath keep the nervous system anchored.
How to Do Warrior 3 Pose (Step-by-Step)
Step 1: Start Standing Tall
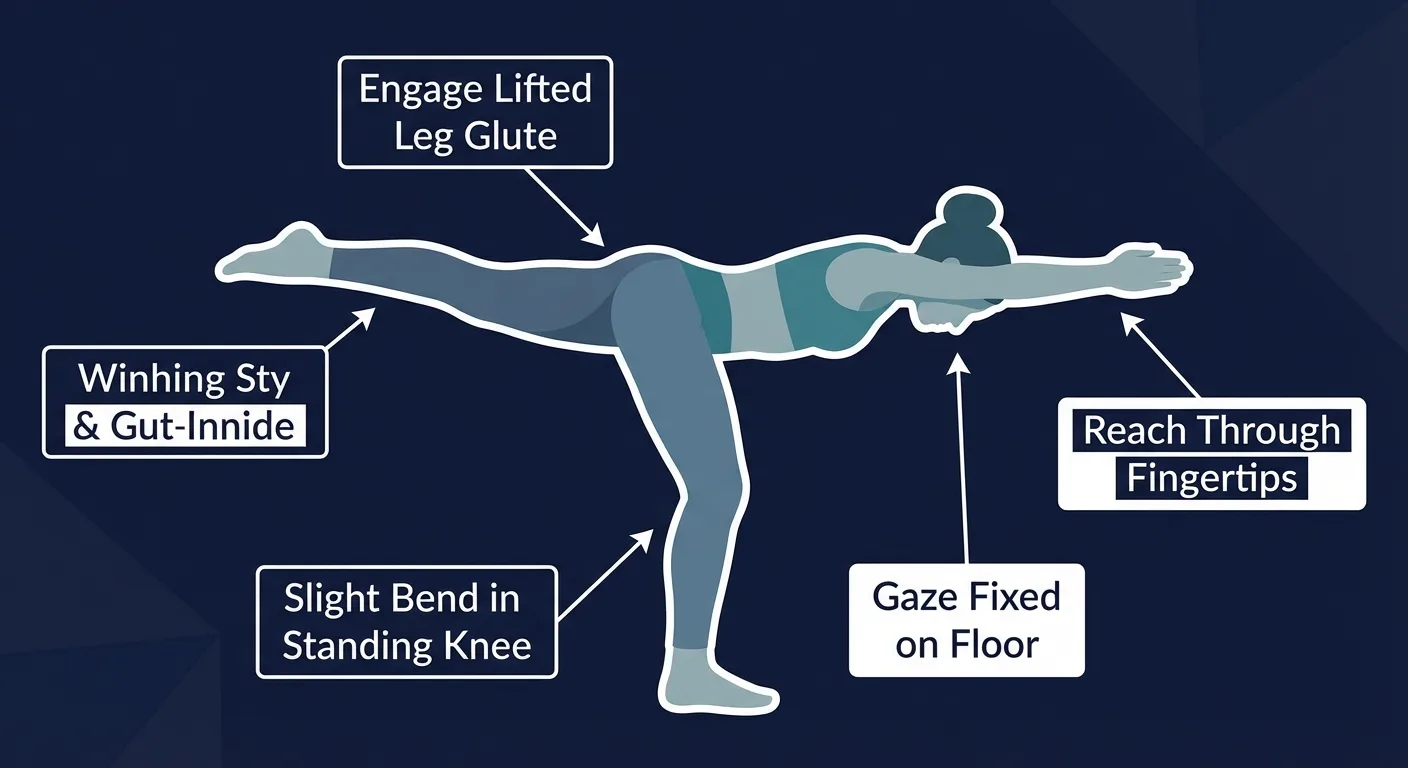
Stand with your feet hip-width apart. Shift your weight onto your right foot, spread the toes, and press through the heel, big toe mound, and little toe mound. Keep the standing knee softly unlocked.
Coach Ty's cue: "Root the standing foot before you lift the back leg."
Step 2: Hinge From the Standing Hip
Reach your arms forward as your left leg lifts behind you. Let the body move like a seesaw: your chest travels forward while your back heel reaches away from you.
Coach Ty's cue: "Crown of the head forward, heel back. Make one long line."
Step 3: Square the Pelvis
Keep both hip points facing the floor as much as your range allows. Flex the lifted foot, turn the toes down, and keep the lifted glute and hamstrings engaged.
Coach Ty's cue: "Point the lifted toes down so the hips stay honest."
Step 4: Find a Steady Gaze
Look at one still point on the floor a few feet ahead of your standing foot. Let the standing ankle make tiny corrections without gripping the toes or locking the knee.
Coach Ty's cue: "If your eyes wander, your balance follows."
Step 5: Hold, Breathe, and Exit Slowly
Hold for 3 to 10 steady breaths. To come out, lower the lifted leg with control, return to standing, reset your breath, and repeat on the other side.
Coach Ty's cue: "Exit slower than you entered. Control counts on the way down."
Get this exercise in a personalized workout
FitCraft, our mobile fitness app, uses its AI coach Ty to program yoga poses like this into your plan at the right volume and intensity, based on your level, goals, and equipment. Ty was designed and trained by Domenic Angelino, MPH (Brown University) and NSCA-CSCS, with research published in the Journal of Strength and Conditioning Research and Medicine & Science in Sports & Exercise.
Take the Free Assessment Free · 2 minutes · No credit cardCommon Mistakes (and How to Fix Them)
- Locking the standing knee. A locked knee makes the pose rigid and can irritate the joint. Keep a small micro-bend and let the thigh muscles support the knee.
- Letting the lifted leg hang. A passive back leg turns the pose into a wobbly forward lean. Press the heel back, flex the foot, and engage the lifted glute.
- Opening the hip to the side. The lifted hip often rolls open to make the leg feel higher. Turn the lifted toes toward the floor and think of both hip points facing down.
- Collapsing the chest and arms. Drooping through the upper body shortens the spine and shifts strain into the lower back. Reach forward through the fingertips and lengthen through the crown of the head.
- Gripping the toes. Toe gripping narrows your base and makes balance more frantic. Spread the toes and press the whole foot into the mat.
- Holding your breath. Breath-holding makes the pose stiff. Use slow nasal breathing and shorten the hold if the breath gets stuck.
Warrior 3 Variations: Regressions and Progressions
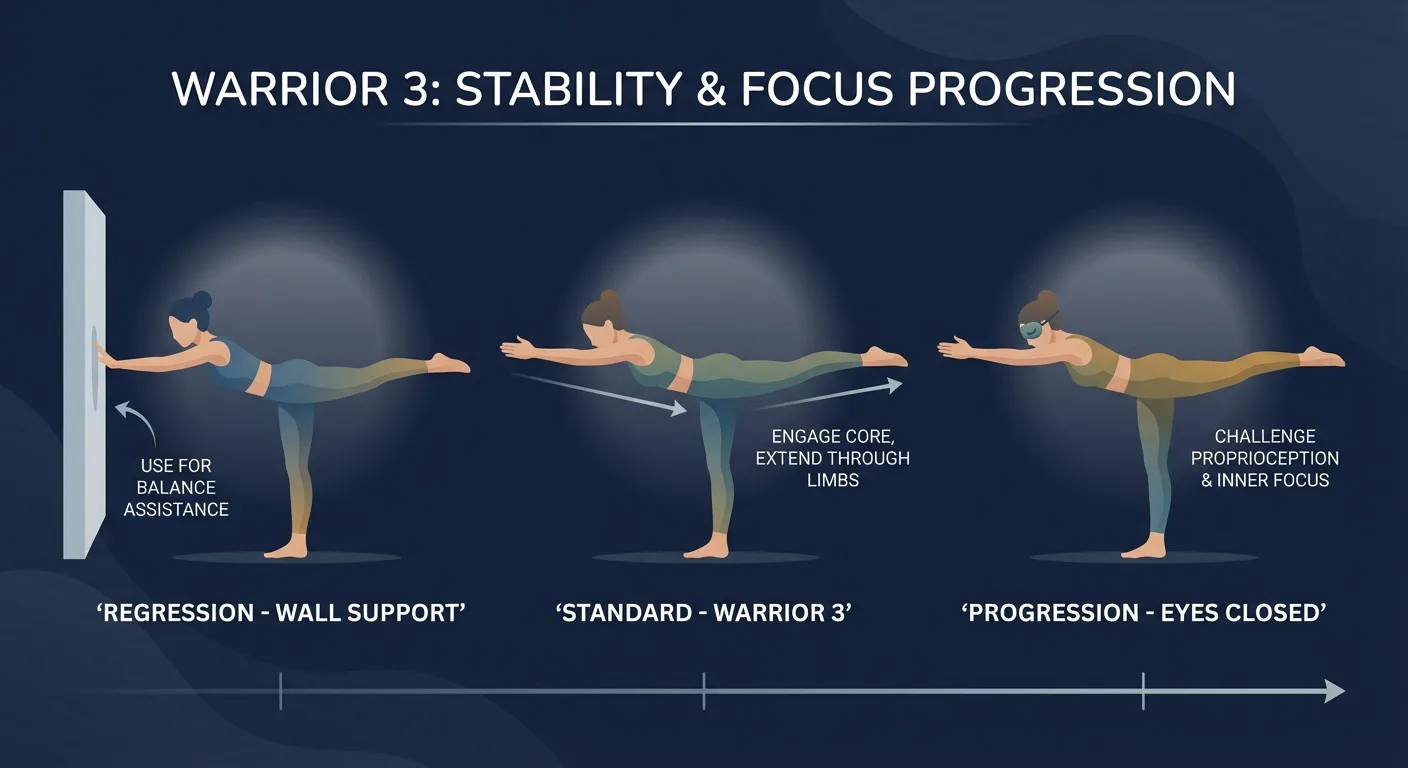
Wall-Supported Warrior 3
Face a wall and place your hands on it as you hinge forward. This lets you practice the long-line shape with less balance demand.
Chair-Assisted Warrior 3
Hold the back of a sturdy chair while you lift one leg behind you. Once the hinge feels steady, lighten one hand at a time.
Blocks-Under-Hands Warrior 3
Place yoga blocks under your hands and let them support part of your body weight. This is useful when hamstring mobility or balance limits the full arms-forward version.
Standard Warrior 3
Reach the arms forward, square the hips, and hold one long line from fingertips to lifted heel. Keep the standing knee softly unlocked the whole time.
Closed-Eye Warrior 3
After standard Warrior 3 feels steady, close your eyes for one or two breaths while practicing near a wall. Removing visual input makes the foot, ankle, hip, and core work harder.
Half-Moon Pose Transition
From Warrior 3, rotate the pelvis and chest open to enter a half-moon shape. Keep the transition slow so the standing leg stays in control.
When to Avoid or Modify Warrior 3 Pose
Warrior 3 is safe for most healthy adults, but unsupported single-leg balance is a poor match for a few situations. Always consult your physician or physical therapist for personalized guidance.
- Active vertigo, vestibular symptoms, or high fall risk. Use wall support, chair support, or tree pose until unsupported balance is appropriate.
- Acute ankle, knee, hip, or lower-back injury. Skip the unsupported version. Choose bird-dogs or deadbugs if floor-based trunk control is a better fit.
- Recent surgery affecting the spine, hips, knees, ankles, or shoulders. Get clearance before returning, and start with hands on a wall or chair.
- Late pregnancy. Balance demands change as the center of mass shifts. Use prenatal-specific modifications or practice with a qualified prenatal instructor.
- Uncontrolled hypertension or known cardiovascular disease. Keep holds short, breathe continuously, and ask your clinician which held yoga poses are appropriate.
- Hypermobility or connective tissue disorders. Avoid hanging into the standing knee or hip. Use muscle engagement and a small range before increasing depth.
Related Exercises
Use these exercises to build the balance, hip control, mobility, and trunk stability that support Warrior 3:
- Same body region: Tree Pose and Dancer Pose train single-leg balance with different upper-body and hip positions.
- Easier regression: Warrior Pose builds standing-leg endurance with both feet on the floor.
- Mobility prep: Downward Dog and Butterfly Pose prepare the hamstrings, calves, hips, and breath rhythm.
- Core foundation: Forearm Planks, Deadbugs, and Bird-Dogs build trunk control before the balance demand rises.
- Strength cousin: Single-Leg Deadlift trains a similar hip-hinge pattern with a strength focus.
How to Program Warrior 3 Pose
Warrior 3 uses yoga-style hold times, but the broader progression model still applies. Ratamess et al., 2009 describes matching training dose to current ability and progressing only when quality holds.
| Level | Sets x Reps | Rest between sets | Frequency |
|---|---|---|---|
| Beginner | 1-2 supported holds of 3-5 breaths per side | 30-60 seconds or a neutral reset pose | 3-5 sessions/week |
| Intermediate | 2-3 holds of 5-10 breaths per side | 30-60 seconds | 4-6 sessions/week |
| Advanced | 3-5 holds of 10-15+ breaths per side, or deeper variations | 60-90 seconds or downward dog between sides | 5-7 sessions/week if joints recover well |
Where in your workout: use Warrior 3 inside a standalone yoga session, as a short balance drill after a warm-up, or as part of a cool-down sequence after lower-body training. It pairs well after hip openers and before floor-based recovery poses.
Form floor over hold time: end the hold when the standing knee locks, the lifted hip opens, the back leg sags, the toes grip, or the breath gets stuck. A clean 20-second hold teaches more than a shaky minute.
How FitCraft Programs This Exercise
FitCraft can place yoga poses like Warrior 3 inside a broader program so balance work supports strength, mobility, and recovery. Ty adjusts the variation and volume to match your level, then keeps the cueing focused on foot pressure, hip position, breath, and control.
Frequently Asked Questions
Can I do Warrior 3 with balance issues or vertigo?
Modify it or skip the unsupported version. Warrior 3 is a single-leg balance pose, so active vertigo, vestibular symptoms, or a high fall risk are reasons to practice near a wall, use chair support, or choose tree pose until you have medical guidance.
What muscles does Warrior 3 work?
Warrior 3 works the glutes, hamstrings, spinal erectors, deep core, ankle stabilizers, calves, upper back, and shoulders. It also stretches the hamstrings and calves of the standing leg while the lifted leg works isometrically.
Why is Warrior 3 so hard to balance in?
Warrior 3 shifts your center of mass forward while narrowing your base to one foot. A fixed gaze, soft standing knee, active lifted leg, and even foot pressure give your nervous system cleaner balance information.
Should my standing leg be bent or straight in Warrior 3?
Keep the standing knee softly unlocked. A locked knee can irritate the joint and make balance feel rigid. A small micro-bend lets the quadriceps, hamstrings, glutes, and ankle stabilizers share the work.
How long should I hold Warrior 3?
Start with 3 to 5 slow breaths per side. Build toward 5 to 10 breaths as the pose gets steadier. Advanced practitioners can hold 10 to 15 breaths, but clean alignment matters more than total time.