The Pallof press looks simple: you push a band out from your chest and bring it back. The hard part is holding still. The band pulls your hands toward its anchor and tries to turn your trunk with them, and your core has to stop that turn.
That is why it is called an anti-rotation exercise. In a Russian twist you turn your trunk on purpose. In a Pallof press you train the muscles around your middle to keep it from turning.
Use this guide to set up the band safely, learn the press step by step, fix the common mistakes and choose an easier or harder version. Gyms often use a cable machine for the same press, and the Variations section explains how that differs.
Quick Facts: Pallof Press
- Equipment needed: A resistance band and a sturdy anchor at about chest height, such as a solid post, a rack, or a door anchor on a closed door that opens away from you; gyms often use a cable machine instead
- Difficulty: Intermediate, the level ACE's exercise library gives it. The movement is simple, but holding your trunk still against a sideways pull takes practice. Standing closer to the anchor or using a lighter band makes it easier.
- Modality: Strength (core stability)
- Body region: The sides of your waist and your deep belly muscles, with help from your abs and the front of your shoulders
Muscles Worked
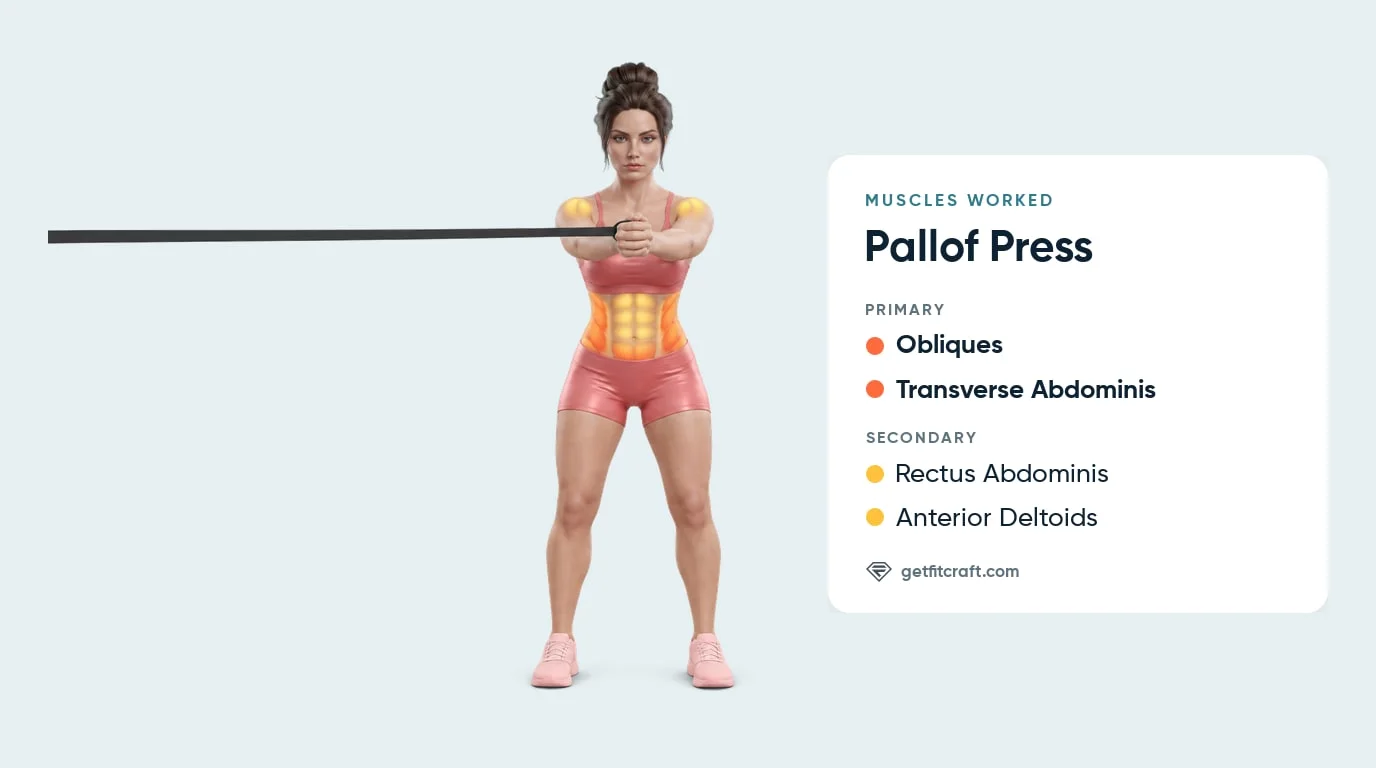
Primary muscles: the obliques and the transverse abdominis. The band pulls your hands toward its anchor and tries to turn your trunk with them. The obliques, the muscles along the sides of your waist that twist and turn the trunk, work to stop that turn. The transverse abdominis, the deep layer that wraps around your middle, braces your trunk so it stays still (Cleveland Clinic).
Secondary muscles: the rectus abdominis and the anterior deltoids. The rectus abdominis, the long muscle down the front of your stomach, helps hold your trunk steady. The anterior deltoids at the front of your shoulders hold your straight arms up at chest height through each hold.
Why your trunk works without moving: the goal of the Pallof press is to prevent movement. NASM calls it a cornerstone anti-rotation exercise for the obliques and the deeper muscles that control rotation, without too much load on the spine (NASM). We found no full published study that has measured muscle activity during the Pallof press, so this list comes from what each muscle does. The small studies we cite looked at body position and at the press as a strength test, not at which muscles work hardest.
Where you should feel it: mostly in the sides of your waist. Your deep belly muscles and abs brace, and the front of your shoulders holds your arms up. You should not feel it in your lower back.
Step-by-Step: How to Do a Band Pallof Press
If you are new to the Pallof press, start with a light band and stand fairly close to the anchor. Add tension only while you can keep your chest and hips facing forward.
Step 1: Anchor the Band
Anchor a resistance band at about chest height to something sturdy, such as a solid post, a rack, or a door handle or door anchor on a closed door that opens away from you. Anywhere from a little below chest height, such as a door handle, up to shoulder height also works. Never anchor the band to a chair or table.
Form tip: check the band and any handle for nicks or tears before each use, and give the anchor a tug to check it holds.
Step 2: Set Your Stance
Stand side-on to the anchor with your feet about hip- to shoulder-width apart and your knees soft. Hold the band in both hands at the middle of your chest, one hand wrapped around it and the other closed over it. If your band has a handle, lacing your fingers around it works too. Step sideways away from the anchor until the band is taut.
Form tip: the farther you stand from the anchor, the harder the band pulls. Start close with a light band and step out a little at a time.
Step 3: Brace and Stand Tall
Brace your middle and stand tall with your ribs over your hips. Keep your shoulders level and relaxed, and point your chest and hips straight ahead, not toward the anchor.
Form tip: stand tall without arching your lower back.
Step 4: Press Straight Out
Breathe out and slowly press your hands straight out from the middle of your chest until your arms are straight. The farther your hands move from your chest, the harder the band works to turn you. Keep them in line with your breastbone so the band cannot pull them toward the anchor.
Form tip: if your hands drift toward the anchor, step a little closer or use a lighter band.
Step 5: Hold, Then Bring It Back
Hold the press for about 2 to 5 seconds without twisting, leaning or bending your elbows. Keep taking small, easy breaths while you hold, then breathe in and bring your hands slowly back to your chest.
Form tip: never hold your breath.
Step 6: Switch Sides and Let Go Safely
After your reps, turn around so the anchor is on your other side and do the same number. When you finish, bring your hands to your chest and step toward the anchor until the band goes slack before you let go.
Form tip: never let go of a stretched band, because it can snap back.
Get a personalized core workout
FitCraft, our mobile fitness app, does not include the Pallof press, but it uses an AI coach to program core exercises from its library, such as side planks, dead bugs and forearm planks, into your plan at the right volume and intensity, based on your level, goals, and equipment. Every FitCraft program is designed by Domenic Angelino, MPH (Brown University) and NSCA-CSCS, with research published in the Journal of Strength and Conditioning Research and Medicine & Science in Sports & Exercise.
Take the Free Assessment Free · 2 minutes · No credit card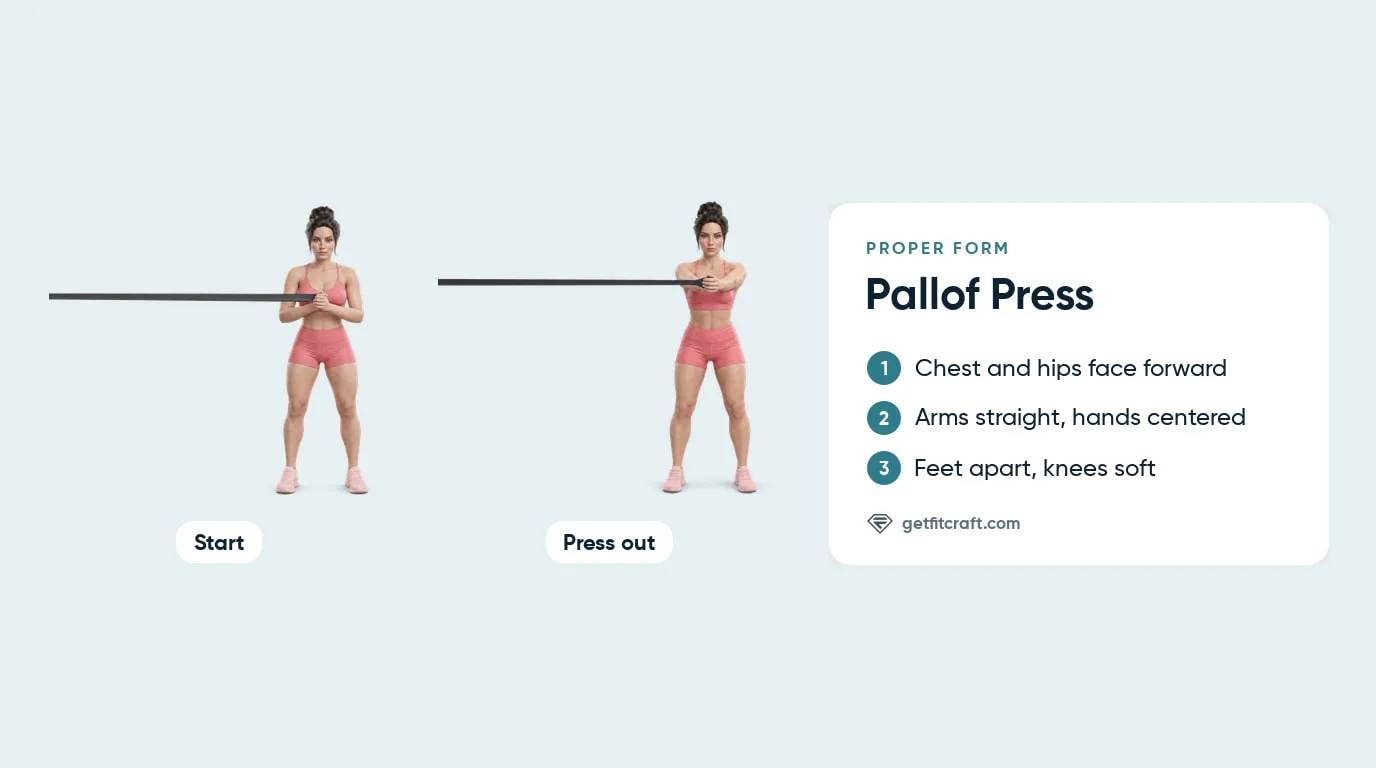
Common Mistakes (and How to Fix Them)
Many of these mistakes have the same fix: make the pull lighter, by standing closer to the anchor or using a lighter band, until you can stay square. Researchers who used the band Pallof press as a trunk strength test ended a test when the hips turned, the trunk bent backward or the elbows bent (Franco-López et al., 2024).
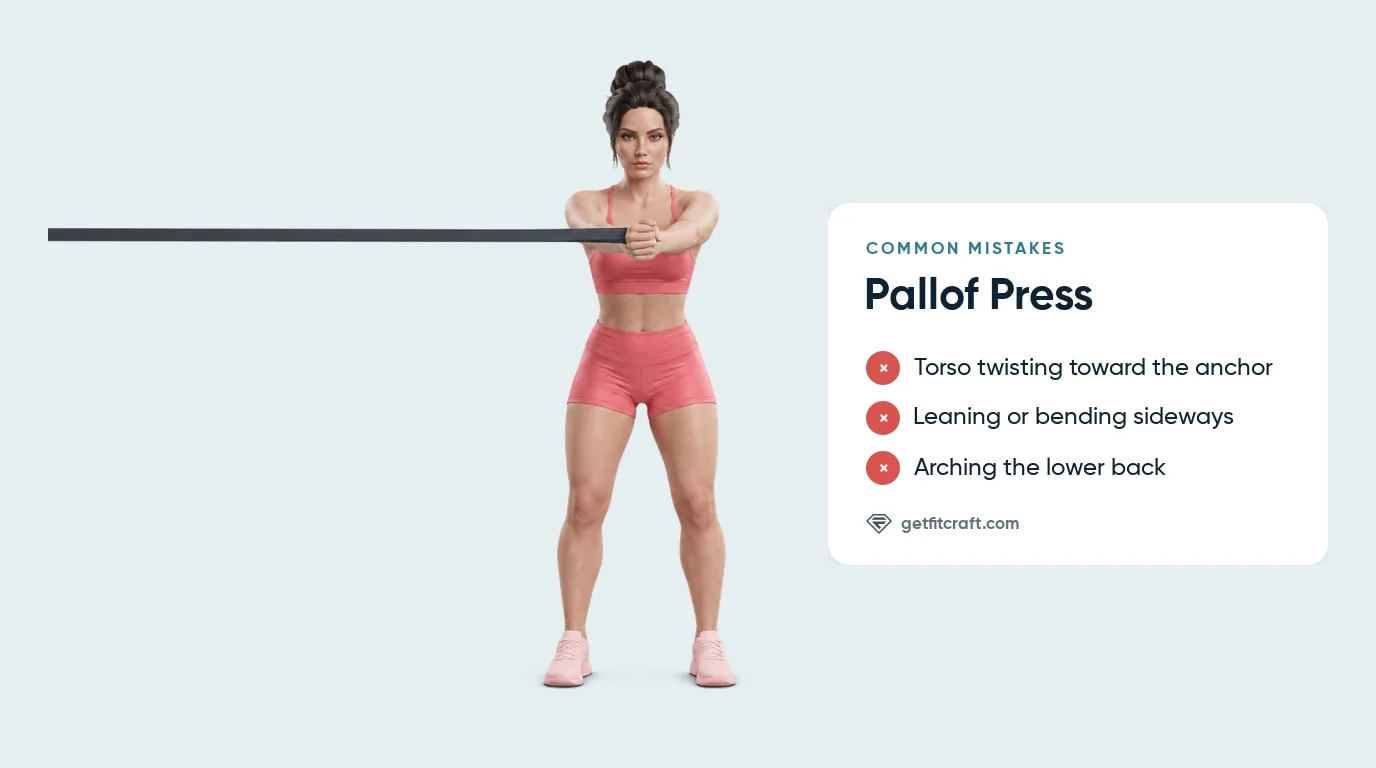
- Twisting toward the anchor. Your chest or hips turn toward the band as you press. Stopping that turn is the whole point of the exercise, so this is the main mistake to fix. Step closer to the anchor or use a lighter band, and brace your middle before you press.
- Leaning or bending sideways. Your body tips toward or away from the anchor to fight the pull. Stand tall with your shoulders level and your ribs over your hips.
- Arching the lower back. Your ribs lift and your lower back curves as you press. Keep your ribs over your hips. You should not feel this exercise in your lower back.
- Letting your hands drift toward the anchor. Your hands end up off to one side instead of in front of your breastbone. Keep them in line with the middle of your chest the whole time.
- Bending your elbows during the hold. Bent elbows bring your hands closer to your chest, which shortens the lever and makes the hold easier. Keep your arms straight while you hold, or use a lighter band.
- Shrugging your shoulders. Your shoulders creep up toward your ears as you press. Keep them level and relaxed.
- Rushing, with no hold at the front. Pressing out and coming straight back skips the hold, where your arms are straight and the band works hardest to turn you. Press slowly, hold for about 2 to 5 seconds, and bring your hands back just as slowly.
- Using a band that is too strong. If you can't stay square, the band is too strong for you right now. Staying square matters more than how hard the band pulls. When you are ready for more, use a stronger band instead of overstretching a light one.
- Holding your breath. Breathe out as you press, keep taking small, easy breaths during the hold, and breathe in as you bring your hands back.
Pallof Press Variations: Easier, Harder, Cable, and Kneeling
With a band, where you stand sets the difficulty: farther from the anchor is harder and closer is easier. A stronger or lighter band changes it too (ACE).
Easier: Closer, Lighter, Wider, or Part Way
Stand a little closer to the anchor or switch to a lighter band. You can also spread your feet a little wider for a steadier base, or press your hands only part way out. A part-way press keeps your hands closer to your chest, which shortens the lever and makes the hold easier.
Standing Band Pallof Press (the Standard Version)
This is the version taught above: standing side-on to a band anchored at about chest height, feet about hip- to shoulder-width apart, with straight arms and a hold of about 2 to 5 seconds at the front.
Cable Pallof Press
Gyms often use a cable machine with a handle set at about chest height, directly to one side, so the cable runs straight in from your side. ACE's exercise library calls this the standing anti-rotation press: you lace your fingers around the handle and start with your elbows tucked by your sides (ACE). The weight stack pulls about the same through the whole press, while a band pulls harder the more it stretches, so on a cable you set the difficulty with the weight you choose.
Longer Holds
Hold the press out longer, building toward 15 to 30 seconds, once short holds feel easy and you stay square. NASM lists a longer hold at full arm extension as one way to progress.
Feet Together or Split Stance
Bring your feet closer together, or stand in a split stance with one foot about a stride ahead of the other. A smaller base makes it harder to stay square. A 2025 study of 12 active adults measured how much the lower back and pelvis moved during 15-second holds. They moved least when kneeling, and more with the feet together or with one foot directly in front of the other (Juan-Recio et al., 2025).
Tall-Kneeling and Half-Kneeling Pallof Press
Kneeling takes your legs out of the move. Kneel tall on both knees, or kneel on one knee with it under your hip and the other foot flat in front, both knees bent about 90 degrees and your back toes tucked. Use a cushion under your knees. Either knee can be the one down, and you do both sides.
Sources differ on whether kneeling is easier or harder than standing. ACE starts with a kneeling version and moves to standing, and the 2025 study found kneeling the steadiest position it tested. NASM moves from standing to tall-kneeling because your legs can no longer help. Treat kneeling as a different position rather than a step up or down, and stay tall and square.
Overhead and Sideways-Step Versions
NASM also names an overhead Pallof press and a Pallof press with a controlled sideways step as advanced options. None of the sources we checked describes how to do them, so they are not taught here.
When to Avoid or Modify the Pallof Press
Most healthy adults can do the Pallof press. A burn in the sides of your waist, your abs or the front of your shoulders is normal; any pain in a joint, your lower back or your neck means stop. A few conditions call for a check with a doctor or physical therapist first. Always consult your physician or physical therapist for personalized guidance.
- Lower back pain, sciatica, or a known disc problem. Skip the Pallof press while your back hurts. See a doctor or physical therapist before you do it, and ask them which exercises suit you. During any rep, lower back pain means stop.
- Shoulder pain or a recent shoulder injury. Your arms hold the band straight out at chest height through every hold. See a doctor or physical therapist before you do Pallof presses, and ask them which exercises suit you. Any shoulder pain means stop.
- Recent surgery on your spine, belly, hips or shoulders. Get clearance from your surgeon before you do the Pallof press, and ask them or your physical therapist when and how to return.
- Pregnancy, early postpartum, or active diastasis recti. The Pallof press asks your belly muscles to brace against the band. Ask your doctor or midwife before you do it, and ask which version fits your stage. Any pain in your back, belly or pelvis means stop.
- Uncontrolled high blood pressure or heart disease. Ask your doctor whether this exercise suits you and how hard to work. Keep taking small, easy breaths through every hold; never hold your breath.
- Dizziness or balance problems. Check with your doctor or physical therapist before you train, and ask which version suits you. If you feel dizzy or light-headed, step toward the anchor so the band goes slack, then rest.
- Knee pain. Any knee pain means stop. The kneeling versions put your weight on your knees, so see a doctor or physical therapist before you kneel for this exercise, and ask them which version suits you.
Related Exercises
If Pallof presses are part of your plan, these exercises train the same muscles in other ways:
- No-equipment option: Side Planks train the obliques to keep your trunk from bending sideways, with no band or anchor needed.
- Anti-rotation with dumbbells: Renegade Rows put a one-arm dumbbell row on top of a push-up plank, so your abs and obliques have to hold your hips level against the lifting arm.
- Rotation on purpose: Russian Twists and Plank-N-Twist train the obliques by turning your trunk, while the Pallof press trains them to stop the turn.
- Bracing foundation: Dead Bugs and Forearm Planks train the rectus abdominis and transverse abdominis to hold your trunk still.
How to Program the Pallof Press
The Pallof press fits with your other core exercises or in your warm-up with a light band; NASM uses Pallof presses both ways (NASM). The sets, reps and holds in the table below come from ACE, NASM and the Cleveland Clinic. For how often to train, the American College of Sports Medicine position stand on resistance training suggests that beginners train 2 to 3 days a week (Ratamess et al., 2009). It sets no numbers for the Pallof press itself.
| Version | Sets × Reps | Hold at the front |
|---|---|---|
| Easier (closer to the anchor, a lighter band, a wider stance, or a part-way press) | 2 × 10 per side | About 2 to 3 seconds |
| Standard (standing, feet about hip- to shoulder-width apart) | 2-3 × 10-15 per side | About 2 to 5 seconds |
| Harder (farther from the anchor, a stronger band, feet together, or a split stance) | 2-3 × 10-12 per side | About 5 seconds |
Longer holds: to make the press harder without a stronger band, hold each press longer, building toward 15 to 30 seconds.
Form floor over rep targets: end the set when you can't keep your chest and hips from turning. Fewer square reps beat a full set of twisted ones.
Pallof Press and FitCraft
The Pallof press only works while you stay square, so pick a band and a distance from the anchor that let you keep your chest and hips facing forward.
The FitCraft app does not include the Pallof press, so use the steps and the programming table above to plan it yourself. Start close to the anchor with a light band, step farther away while you stay square, then try longer holds, a narrower stance or a split stance. For a no-equipment core exercise that also trains the sides of your waist to hold you steady, the app includes the side plank.
FitCraft builds its plans from dumbbells, bodyweight and a handful of band exercises, matched to your level, goals and equipment through the free assessment. The app demonstrates each exercise in 3D and turns your workouts into a game, so they are easier to stick with.
Frequently Asked Questions
What muscles does the Pallof press work?
The Pallof press mainly works the obliques and the transverse abdominis. The obliques, along the sides of your waist, stop the band from turning your trunk, and the transverse abdominis, the deep layer that wraps around your middle, braces it. The rectus abdominis helps hold your trunk steady, and the anterior deltoids at the front of your shoulders hold your arms up.
What are the benefits of the Pallof press?
The Pallof press trains your core to stop your trunk from twisting while your spine stays still. NASM calls it a cornerstone anti-rotation exercise for the obliques and the deeper muscles that control rotation, without too much load on the spine, and also uses it in warm-ups. It needs only a resistance band and a sturdy anchor, and you can do it standing or kneeling.
What is the difference between a band and a cable Pallof press?
You do the same press with either one. A cable machine's weight stack pulls about the same through the whole press, while a band pulls harder the more it stretches. With a band, you set the difficulty by where you stand, farther from the anchor for harder and closer for easier, or by the band's strength.
Can you do a Pallof press without a band?
You need something that pulls you from the side: a resistance band and a sturdy anchor, or a cable machine at a gym. Without either one, skip it for now. A side plank also trains the sides of your waist to hold you steady, with no equipment.
How long should you hold a Pallof press?
Hold each press for about 2 to 5 seconds, then bring your hands back slowly. Do 2 to 3 sets of about 10 to 15 reps on each side. Once that feels easy and you stay square, longer holds are a harder option: build toward 15 to 30 seconds.
Is the kneeling Pallof press easier than standing?
Sources differ. ACE starts with a kneeling version and moves to standing, and a 2025 study found kneeling the steadiest of the positions it tested. NASM moves from standing to tall-kneeling because your legs can no longer help. Treat kneeling as a different position: kneel on a cushion, stay tall and square, and do both sides.
Can I do the Pallof press with lower back pain?
Not while your back hurts. A burn in the sides of your waist or your abs is normal, but you should not feel the Pallof press in your lower back, and any lower back pain during a rep means stop right away. If you have lower back pain, sciatica, or a disc problem, see a doctor or physical therapist before you do Pallof presses, and ask them which exercises suit you.