Side planks train your core to stop your trunk bending sideways.
They look simple, but form breaks show up fast: the hips sag, the chest rolls forward or back, or you start holding your breath. Each one means the hold is over.
Short holds with good form are better than long holds where your hips drop.
Quick Facts: Side Planks
- Equipment needed: None
- Difficulty: Advanced (as rated in the FitCraft app); the knee-supported version is easier
- Modality: Core strength
- Body region: Core and hips
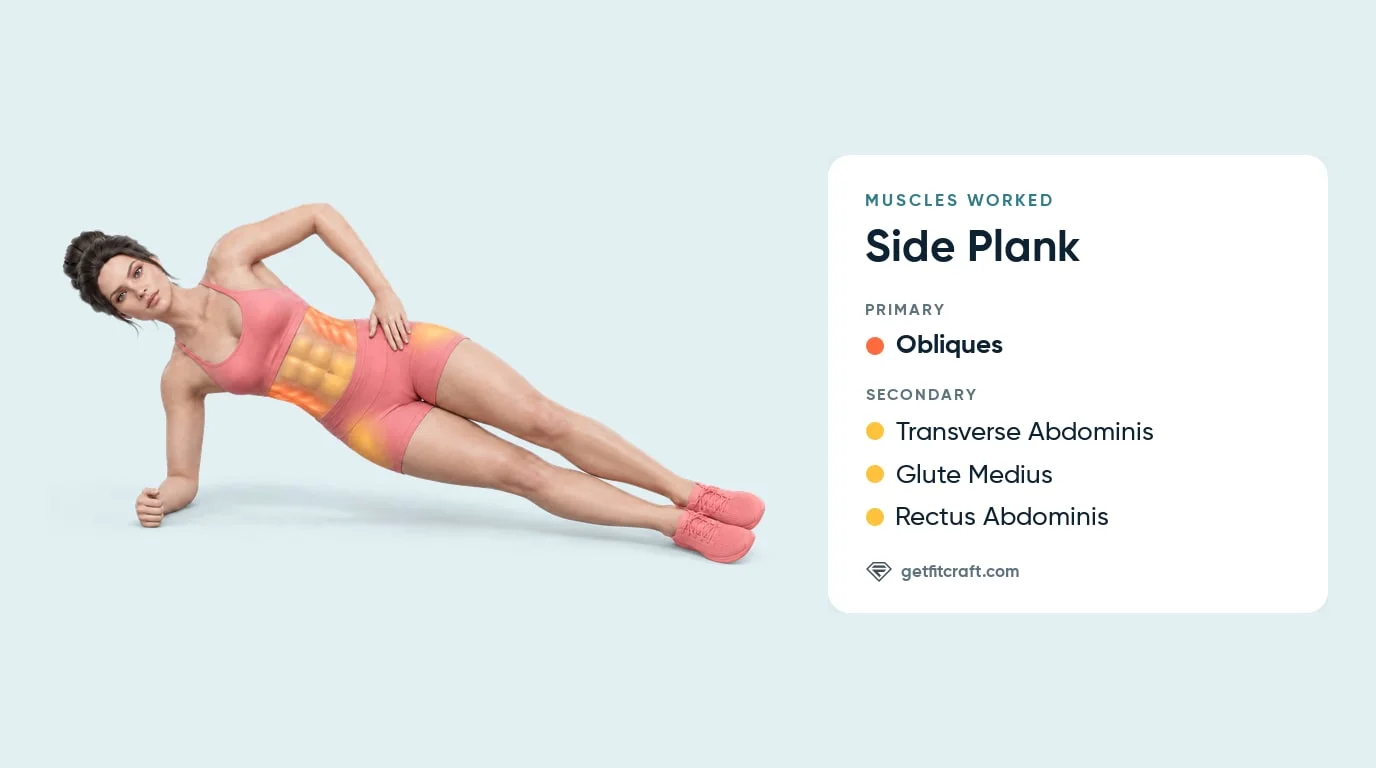
Muscles Worked
Primary muscles: the obliques, the internal and external obliques along the sides of your waist. The obliques, mostly on the side nearest the floor, hold your trunk straight against gravity. In a side plank, they work mostly isometrically. They don't shorten and lengthen through a big range. They create force to keep the rib cage, pelvis, and hips from dropping toward the floor.
Secondary muscles: the transverse abdominis, the glute medius, and the rectus abdominis. The transverse abdominis, the deepest layer of your core, braces your trunk. The glute medius, on the side of your bottom hip, holds your pelvis up. The rectus abdominis, the long muscle down the front of your stomach, helps stop the torso from rolling forward or backward or arching as fatigue builds.
Mechanism: side planks train your trunk to resist bending sideways, without bending your spine. An EMG study of nine rehabilitation exercises (Ekstrom et al., 2007) named the side bridge, another name for the side plank, as an exercise for strengthening the gluteus medius and the external oblique.
Step-by-Step: How to Perform Side Planks
Set your position first, then hold only as long as your body stays in one straight line.
Step 1: Set Up on Your Side
Lie on your side with your forearm flat on the floor and your elbow directly beneath your shoulder. Your forearm should point forward, perpendicular to your torso. Keep your legs straight. Stack your feet for the full version, which is harder to balance, or place the top foot slightly in front for more balance.
Form tip: keep your elbow directly under your shoulder. It is the base of the whole hold.
Step 2: Brace Your Core and Glutes
Before you lift, tighten your core and squeeze your glutes. Bracing first helps your trunk and hips lift together.
Step 3: Lift Your Hips
Press through your forearm and the side of your bottom foot to lift your hips off the floor. Stop when your body forms a straight line from the crown of your head through your heels. Keep the shoulder away from your ear.
Form tip: end the hold when your hips sag.
Step 4: Hold With Steady Breathing
Keep your head in line with your spine, your ribs stacked over your pelvis, and your top shoulder directly above the bottom shoulder. Rest your free hand on your hip, or reach it toward the ceiling. Both work, so pick the one that keeps you steady with your chest open. Breathe steadily the whole hold, smooth and even. End the hold when your hips sag, your shoulder shrugs, or you can't keep breathing steadily.
Form tip: keep your eyes looking straight ahead so your head doesn't drop, and never hold your breath.
Step 5: Lower and Switch Sides
Lower your hips with control instead of collapsing to the floor. Rest briefly, then repeat on the other side for the same hold time. If one side is weaker, hold the stronger side only as long as the weaker side can keep good form.
Get this exercise in a personalized workout
FitCraft, our mobile fitness app, uses its AI coach Ty to program core stability work like this into your plan at the right volume and intensity, based on your level, goals, and equipment. Ty was designed and trained by Domenic Angelino, MPH (Brown University) and NSCA-CSCS, with research published in the Journal of Strength and Conditioning Research and Medicine & Science in Sports & Exercise.
Take the Free Assessment Free · 2 minutes · No credit card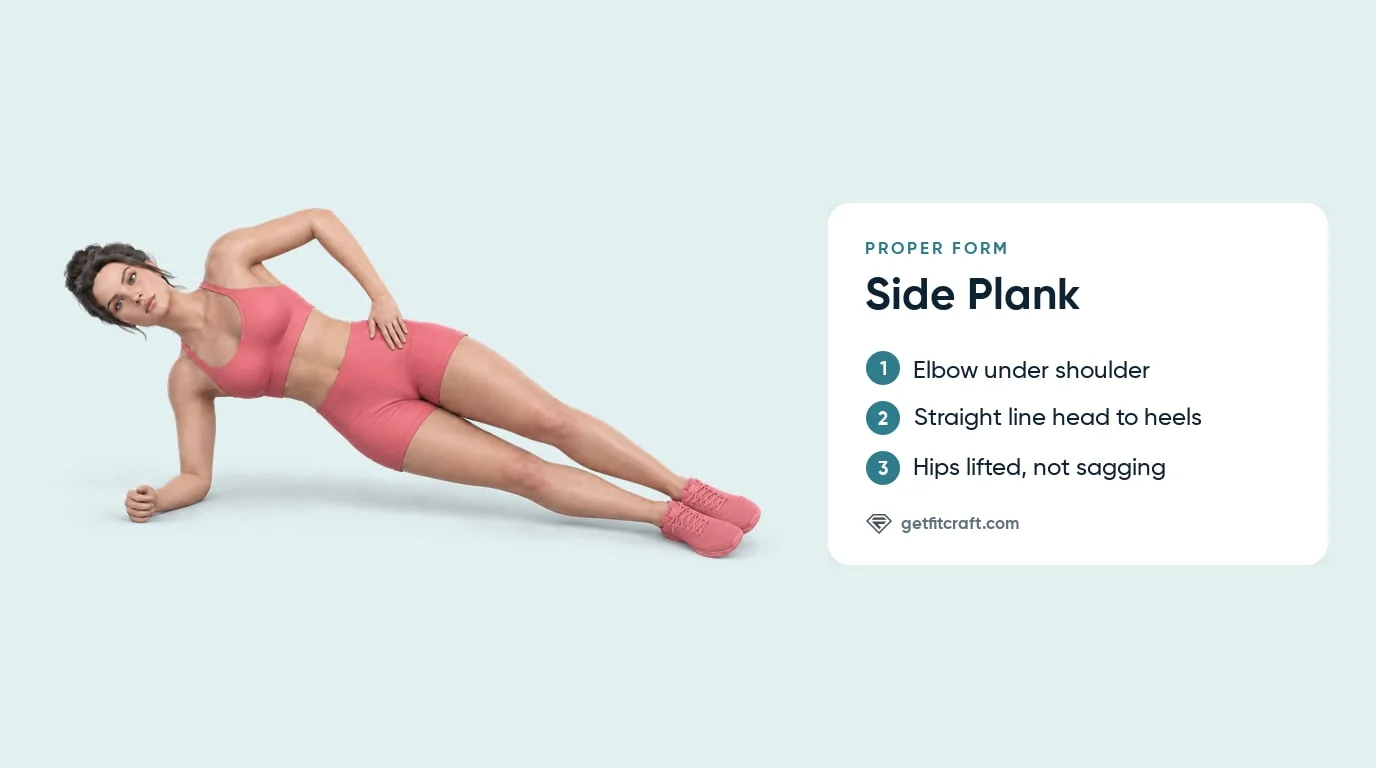
Common Mistakes (and How to Fix Them)
Most side plank errors show up as soon as fatigue starts. End the hold when your hips sag or your straight line breaks, and use the fixes below to set up your next hold.
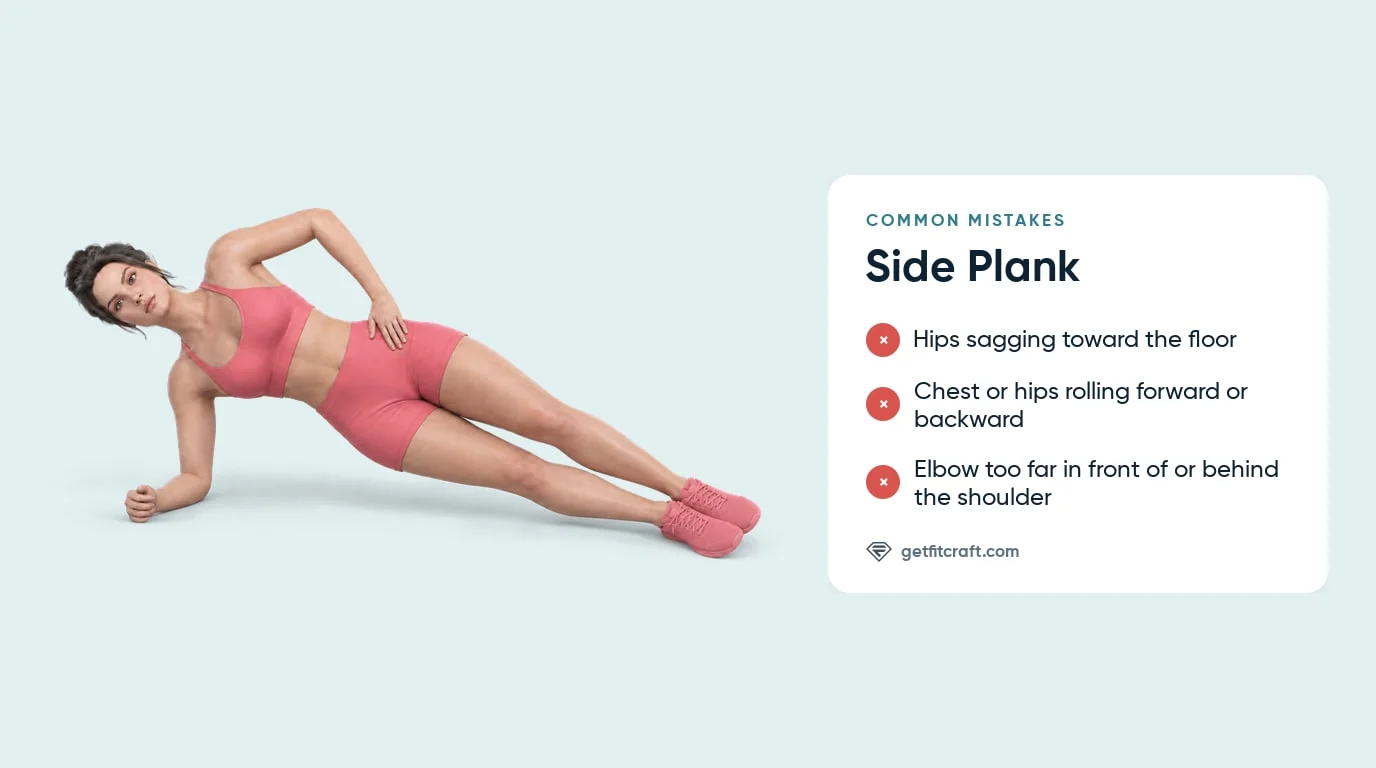
- Sagging hips. Your obliques and the side of your hip stop holding the line, so your pelvis drops. Fix: brace and squeeze your glutes before you lift, and end the hold as soon as your hips sag. Next time use a shorter hold, staggered feet or the knee-down version.
- Elbow too far from the shoulder. A long or short base makes the shoulder work in a weaker position. Fix: reset with the elbow directly under the shoulder before every hold.
- Shoulder shrugging. The supporting shoulder creeps toward your ear as the arm fatigues. Fix: press the floor away and keep the neck long. If your shoulder creeps up again, end the hold.
- Rolling forward or backward. Your torso should stay stacked, with the top shoulder over the bottom shoulder. Fix: imagine your back is against a wall and keep both hip bones facing forward. If you keep rolling, end the hold.
- Letting your head drop. Your head sags toward the floor as you tire. Fix: keep your head in line with your spine, eyes looking straight ahead.
- Holding your breath. Fix: breathe steadily the whole hold, smooth and even. If you can't keep breathing steadily, lower down and rest.
- Chasing time after form breaks. Holding on after your hips drop means your waist muscles are no longer doing the job. Fix: use shorter holds, knee-supported holds, or staggered feet until every second looks the same.
Side Plank Variations: Regressions and Progressions
Pick the version that lets you keep a straight line and breathe. Progress when both sides look the same.
Knee Side Plank (Easier)
Bend your knees and support yourself from your bottom knee and forearm, keeping one straight line from your head to your knee. Resting on your knee makes the hold easier, puts less load on your obliques and shoulder, and makes the straight-line position easier to learn.
Standard Side Plank (Advanced in the App)
Use the full setup from the steps above: elbow under shoulder, legs straight, feet stacked or staggered, and hips lifted. Start around 20 to 30 seconds and build toward 45 to 60 clean seconds per side before adding motion. Holding longer with your feet stacked makes it harder.
Side Plank Raise (Harder)
From the same position, lower your hips with control until your bottom hip lightly touches or hovers just above the floor, then lift them back to the straight line. Keep the movement slow. This adds reps while your waist still keeps your trunk from bending sideways.
Side Plank Reach Through (Harder)
Reach your top arm under your torso, then rotate it back toward the ceiling. This adds a twist through your upper back while your hips stay lifted. The app's version is done on your hand.
When to Avoid or Modify Side Planks
Side planks put your bodyweight on one shoulder and ask your trunk to brace hard, so a handful of conditions call for a doctor's or physical therapist's advice first. During any hold, a burn along the side of your waist is normal, but any pain in a joint, your lower back, or your neck means stop. Always consult your physician or physical therapist for personalized guidance.
- Current shoulder pain or recent shoulder surgery. Side planks load the supporting shoulder directly. Skip them while your shoulder hurts, and get clearance from your surgeon, doctor, or physical therapist before you do them again. During any hold, shoulder pain means stop.
- Acute lower-back pain or known disc pathology. Skip side planks while your back hurts. See a doctor or physical therapist before you do them again, and ask them which exercises suit you. During any hold, lower-back pain means stop.
- Recent childbirth or active diastasis recti. Get clearance from your doctor or a women's health physical therapist before you do side planks, and follow the plan they give you.
- Recent abdominal surgery or hernia. Get clearance from your surgeon or physician before you do side planks, and follow the plan they give you.
- Pregnancy, pelvic-floor dysfunction, or pelvic-organ prolapse. Ask your doctor, midwife, or a pelvic-floor physical therapist before you do side planks, and ask which exercises suit you. If you feel pressure, heaviness, or leaking during a hold, stop and tell them.
- Forearm or elbow discomfort. The forearm base can be uncomfortable on hard floors, so put a mat or folded towel under your forearm. Any pain in your elbow means stop; see a doctor or physical therapist before you do side planks again.
Related Exercises
If side planks are in your program, these exercises pair well with them:
- Harder side plank versions: Side Plank Raise and Side Plank Reach Through add motion once static holds are clean.
- Front planks: Forearm Planks and Hand Planks train the same straight-body brace while you face the floor.
- Floor core work: Deadbugs and Bird-Dogs teach you to keep your trunk steady while a leg moves, without your bodyweight on one shoulder.
- Glutes: Glute Bridges strengthen the glutes that help keep the pelvis from rolling or dropping.
- Harder core work: Hollow Holds and Plank Twists challenge the trunk after you can hold clean side planks on both sides.
How to Program Side Planks
Side planks are timed holds. Use the broader progression principles from the American College of Sports Medicine position stand on resistance training: increase difficulty gradually and match volume and frequency to training status (Ratamess et al., 2009). Let your form decide when a hold ends. The hold times below follow NASM's side plank guidance to start around 20 to 30 seconds and build toward 45 to 60. Treat the table as a practical starting point.
| Version | Sets × hold time (or reps) | Rest between sets | Frequency |
|---|---|---|---|
| Easier: knee-supported or staggered feet | 2-3 × 15-30 second holds per side | 45-60 seconds | 2-4 sessions/week |
| Standard (Advanced in the app): straight legs | 3 × 20-30 second holds per side, building toward 45-60 | 60 seconds | 3-5 sessions/week |
| Harder: longer holds with feet stacked, or side plank raises | 3-5 × 45-60 second holds or longer, or 8-15 controlled raises per side | 60-90 seconds | 4-6 sessions/week |
Where in your workout: put side planks near the end of a strength session, in a dedicated core block, or as a short core finisher. Avoid tiring your trunk before heavy squats, deadlifts, or overhead pressing.
Form comes before time: stop the set when your hips sag, your supporting shoulder shrugs, your torso rolls, or your breathing gets stuck. A clean 20-second hold is more useful than a collapsed 60-second hold.
How FitCraft Programs This Exercise
FitCraft maps your fitness level, goals, and available equipment during your personalized diagnostic and builds a plan around them. The app has a side plank exercise for each side, rated Advanced, and can include it in your plan.
Its 3D demonstration shows the move: a forearm side plank with the elbow under the shoulder, the top hand on the hip, legs straight with the feet slightly staggered, and the body in one straight line. The app also has two harder side plank exercises, side plank raises and side plank reach throughs.
Frequently Asked Questions
What muscles do side planks work?
Side planks mainly work the obliques, the muscles along the sides of your waist, which hold your trunk straight against gravity. The transverse abdominis braces your deep core, the glute medius on the side of your bottom hip holds your pelvis up, and the rectus abdominis, down the front of your stomach, helps keep your trunk from rolling or arching.
How long should I hold a side plank?
Start with about 20 to 30 seconds per side, and build toward 45 to 60 seconds with clean alignment before adding harder variations. End each hold when your hips sag, your shoulder shrugs, or you can't keep breathing steadily.
Should I do side planks on both sides?
Yes. Train both sides for equal time. If one side is weaker, match the stronger side to the weaker side's clean hold time until the gap closes.
Are knee side planks effective?
Yes. Resting on your knee makes the hold easier, puts less load on your shoulder and obliques, and lets you learn the same brace with better control. They are the right easier version when full side planks make your hips drop.
Can I do side planks with shoulder pain?
Not while your shoulder hurts. Side planks place your bodyweight through the supporting shoulder, and any shoulder pain during a hold means stop. If your shoulder hurts, was recently injured, or had surgery, see a doctor or physical therapist before you do side planks, and ask them which exercises suit you.