Pressing exercises work the fronts of your shoulders. The rear delt raise trains the backs of your shoulders and the muscles between your shoulder blades, with nothing but the weight of your arms.
If you add weight too soon, the raise can turn into a swing or a row, with bent elbows and a rising chest. This guide teaches the no-weight version the FitCraft app uses and adds light dumbbells as the harder option.
This guide covers the flat-back hinge setup, the long-arm cue that keeps the movement a raise, the hold version, the mistakes that turn the raise into a swing or a row, and how to program it.
Quick Facts: Rear Delt Raise
- Equipment needed: None (the FitCraft app version uses no weights); light dumbbells make it harder
- Difficulty: Beginner (the FitCraft app rates both the rear delt raise and the rear delt raise hold Beginner)
- Modality: Strength
- Body region: Upper body (backs of the shoulders and upper back)
Muscles Worked
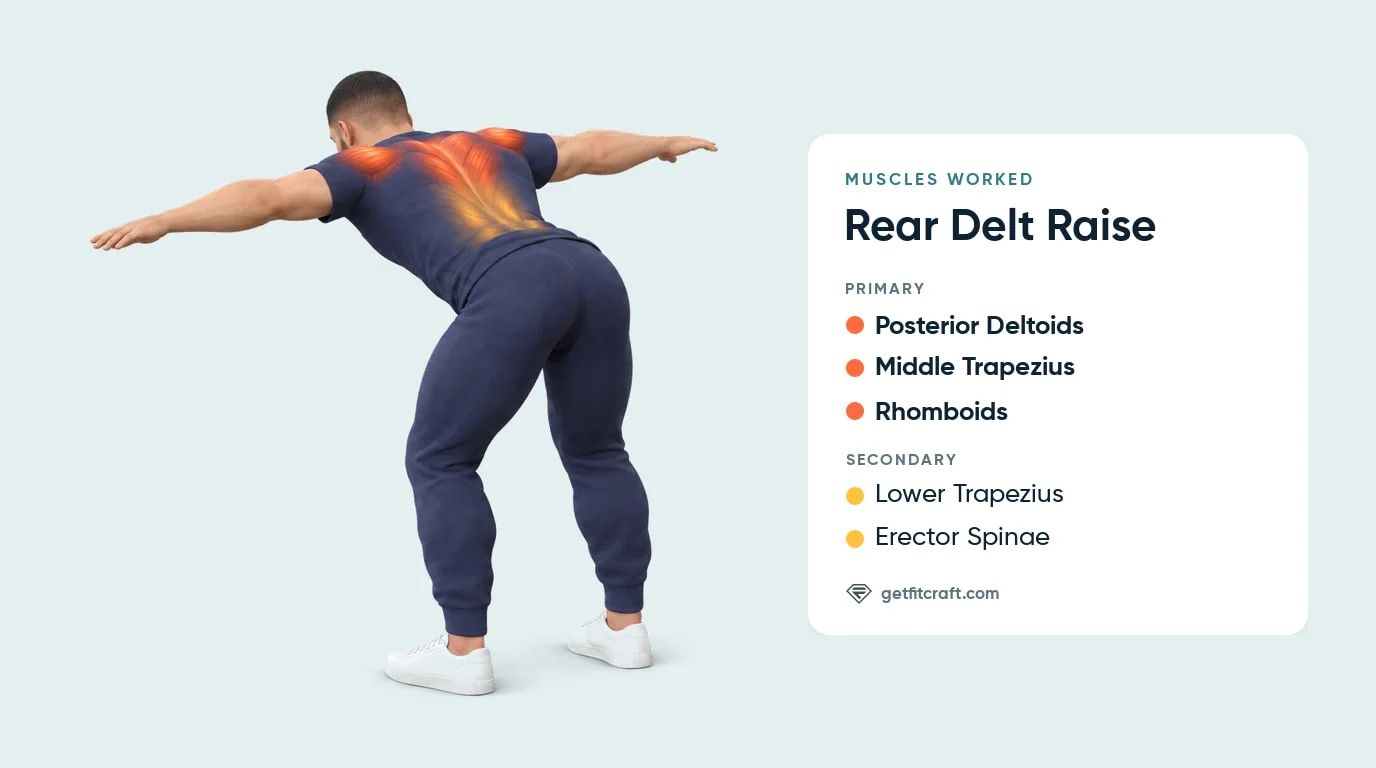
Primary movers: the posterior deltoids, middle trapezius, and rhomboids. The posterior deltoids, the rear of the three heads that make up each shoulder muscle, lift your arms out to the sides. The middle trapezius and rhomboids, between your shoulder blades, squeeze the shoulder blades together as your arms reach the T. They shorten as you raise your arms and lengthen under control as you lower them.
Secondary movers: the lower trapezius, which holds your shoulder blades down and back, away from your ears, and the erector spinae, the muscles along your spine, which hold your back flat in the hinge for the whole set. The hinge is why your back position matters on an exercise that looks like it's all shoulders.
Evidence: in ACE's shoulder study, which tested ten shoulder exercises, the seated rear lateral raise, a seated version of this movement, ranked first for rear deltoid activity. This guide starts with no weights, long arms and a steady pace, the version the FitCraft app uses, and adds light dumbbells only once that feels easy.
Step-by-Step: How to Perform a Rear Delt Raise
The movement depends on two things: a stable, flat-back hinge and an elbow bend that doesn't change.
Step 1: Set Your Hinge
Stand with your feet about hip- to shoulder-width apart, knees bent. Push your hips back and hinge forward with a flat back until your chest is close to parallel with the floor. Let your arms hang straight down under your shoulders, palms facing each other, hands empty. Keep your head in line with your spine, eyes on the floor a little ahead of your feet.
Form tip: if the backs of your legs pull your back round, bend your knees more or hinge a little less.
Step 2: Set Long Arms and Brace
Keep your arms long, straight or with a slight bend in the elbows, and hold that same bend for the whole set. Brace your abs to steady the hinge. This fixed elbow is the difference between a raise and a row.
Form tip: if your elbows bend more as your arms rise, the raise is turning into a row. Reset the bend you started with.
Step 3: Raise Your Arms Out to the Sides
Breathe out and raise both arms out to the sides in a wide arc until they are level with your shoulders, so your body makes a T. Your elbows travel straight out from your shoulders, not back toward your hips, and your palms turn to face the floor as your arms rise. Picture pulling your hands apart, not hoisting them up.
Form tip: keep your torso still, and don't lift your chest or stand up as your arms rise.
Step 4: Squeeze and Pause at the Top
Squeeze your shoulder blades together and hold for a beat with your arms level with your shoulders. Don't swing past shoulder height and don't let your shoulders creep up toward your ears. For the hold version, keep your arms right here, level and steady, for as long as your back stays flat.
Form tip: keep breathing during the pause or the hold. Never hold your breath while you're bent over.
Step 5: Lower with Control
Breathe in and bring your arms back down the same arc over about a second or a little longer, under control the whole way. Keep the same elbow bend and the flat back. If your hinge collapses, stand up, reset, and start the next rep clean.
Form tip: keep your head in line with your spine. Don't let it hang with your chin tucked toward your chest.
Get this exercise in a personalized workout
FitCraft, our mobile fitness app, uses an AI coach to program isolation exercises like this into your plan at the right volume and intensity, based on your level, goals, and equipment. Every FitCraft program is designed by Domenic Angelino, MPH (Brown University) and NSCA-CSCS, with research published in the Journal of Strength and Conditioning Research and Medicine & Science in Sports & Exercise.
Take the Free Assessment Free · 2 minutes · No credit card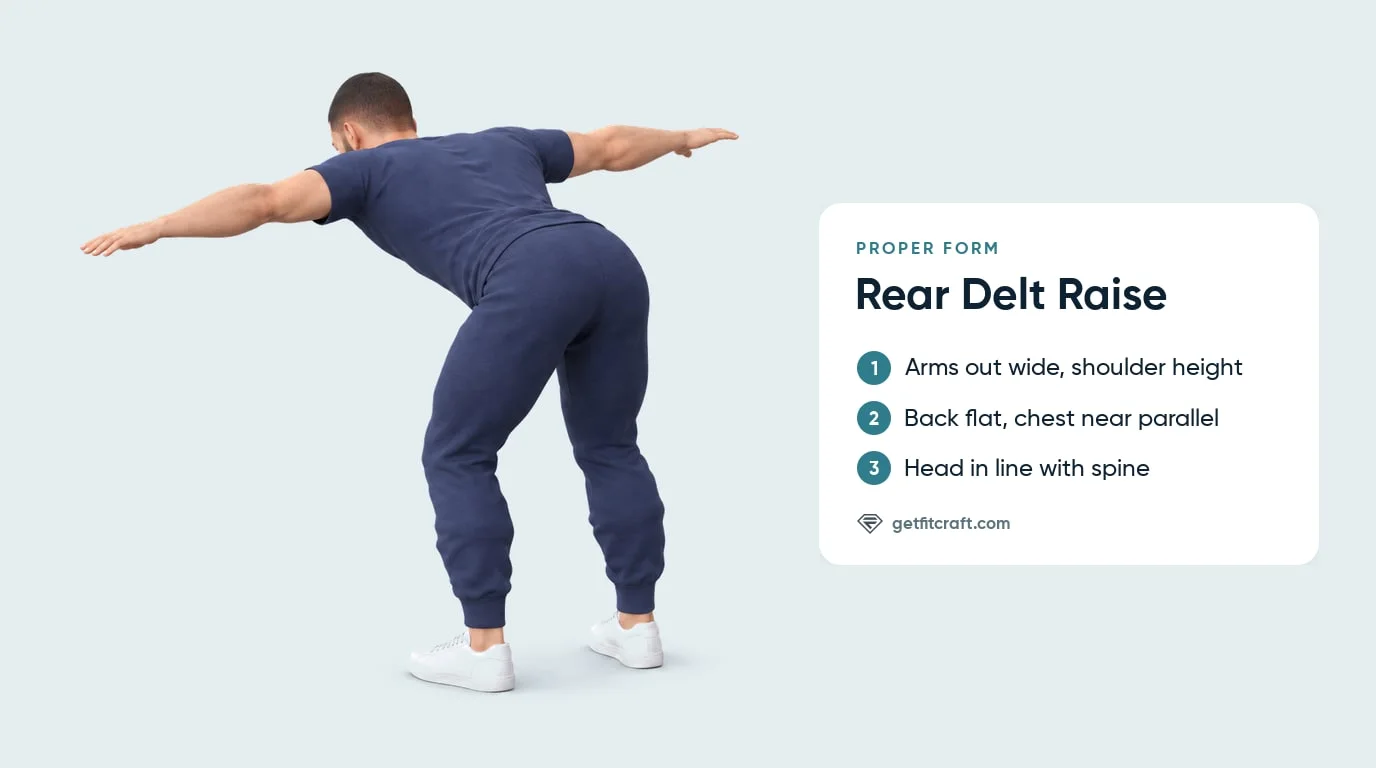
Common Mistakes (and How to Fix Them)
These are the errors that turn a rear delt raise into a swing or a row, and how to fix each one.
- Adding weight too soon. Picking up dumbbells before the no-weight version feels easy can lead to swinging the arms up or bending the elbows to finish the rep. Fix: master the no-weight raise and the hold first, then use light dumbbells you can raise with a flat back and long arms.
- Turning it into a row. Bending and straightening the elbows through the rep turns the raise into a row. Fix: set your elbow bend at the start, straight or slightly bent, and keep that exact angle from bottom to top. The arm moves as one unit from the shoulder.
- Shrugging the shoulders. Letting your shoulders ride up toward your ears can make you feel this in your neck. Fix: draw your shoulder blades down and back before each rep and keep them there as you lift.
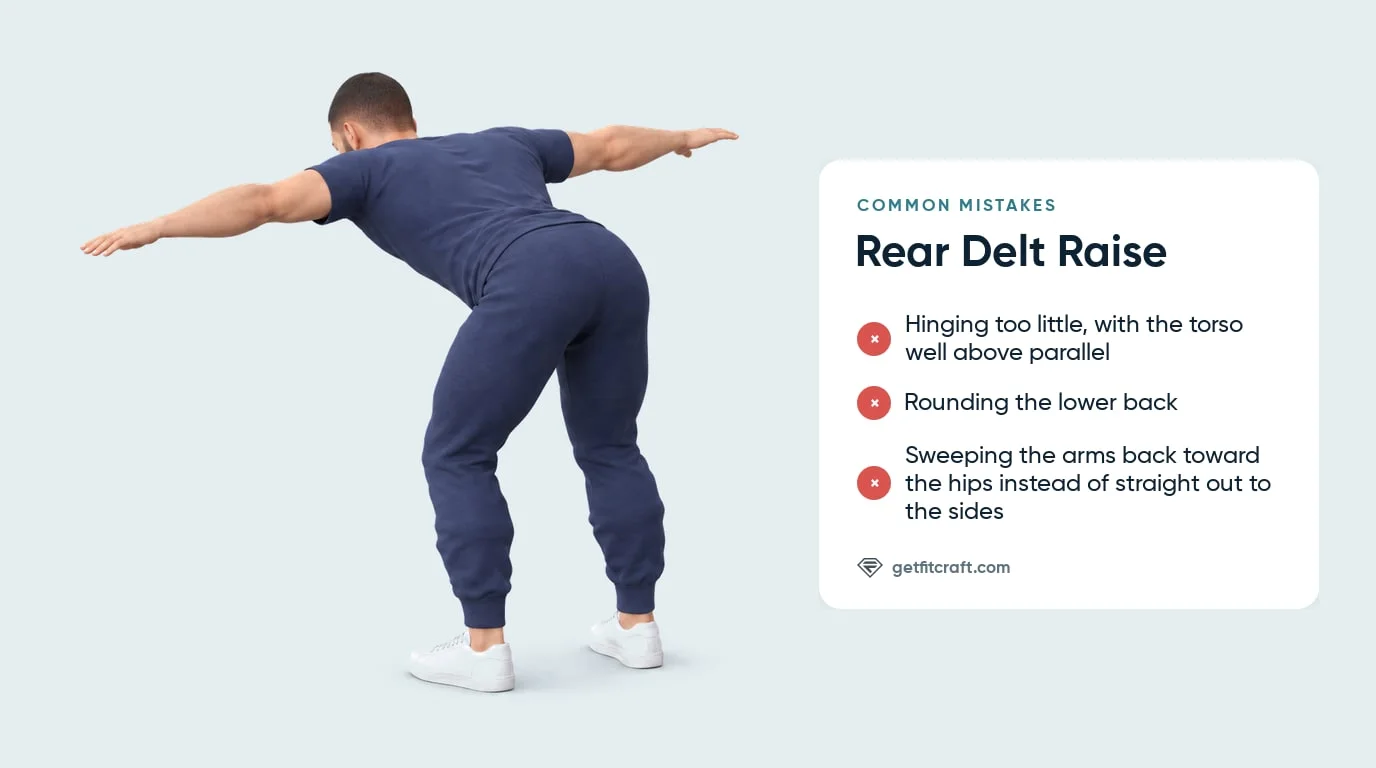
- Standing too upright. A shallow hinge changes the direction your arms travel, so less of the work lands on the backs of your shoulders. Fix: hinge until your chest is close to parallel with the floor, as far as your back stays flat, so your arms travel out against gravity. If your back starts to round, bend your knees more or hinge a little less.
- Sweeping the arms back toward the hips. Your arms should travel straight out to the sides, not back along your body. Fix: send your elbows straight out from your shoulders so your arms and upper back make a T at the top.
- Swinging and using momentum. Throwing the arms up with a little bounce from the hips or chest means momentum moves your arms, not your muscles. Fix: pause at the top and lower under control. If you can't do that with dumbbells, go back to no weights.
- Rounding the lower back. Letting your back round under the hinge puts strain on your lower back. Fix: keep a flat, braced back, bend your knees more or hinge a little less, or use the seated or chest-supported variation, which is easier on your lower back.
- Letting your head hang. Dropping your head with your chin tucked toward your chest takes your neck out of line with your back. Fix: keep your head in line with your spine, eyes on the floor a little ahead of your feet.
Rear Delt Raise Variations: Regressions and Progressions
The rear delt raise scales through holds, light dumbbells, and how much support your upper body gets. Here are the main versions.
Rear Delt Raise and Rear Delt Raise Hold, No Weights (Beginner)
The version this guide covers: hinge forward with a flat back, keep your arms long, and raise them out to the sides to shoulder height with empty hands. For the hold, raise your arms to the T and keep them there, level and steady, while you breathe and your back stays flat. If your arms drop, lower them slowly, rest a moment, and raise them again. If your back starts to round, stand up and rest. The FitCraft app rates both versions Beginner.
Resistance Band Pull-Apart (No Hinge)
Stand tall holding a resistance band with both hands out in front at shoulder height, then pull the band apart until your arms are out to the sides, squeezing the shoulder blades. There is no hinge, so it is a simple way to practice squeezing your shoulder blades together.
Seated Bent-Over Rear Delt Raise (Easier on the Lower Back)
Sit on the edge of a sturdy bench or chair, lean your chest onto your thighs, and perform the raise from there. Your legs support your upper body, so your lower back works less and you can focus on the backs of your shoulders.
Chest-Supported Rear Delt Raise (Easier on the Lower Back)
Lie face-down with your chest on an incline bench and perform the raise with your torso fully supported. The bench takes your lower back and any swinging out of the movement, so it is easier on your lower back. Any lower-back pain still means stop.
Dumbbell Rear Delt Raise (Harder)
Once the no-weight version feels easy, hold a light dumbbell in each hand and keep the same flat back, long arms, and shoulder-height finish. You can also make any version harder by pausing longer at the top with your shoulder blades squeezed together, or by holding the T longer.
When to Avoid or Modify Rear Delt Raises
Rear delt raises are a low-load exercise, and the no-weight version uses only the weight of your arms. A few situations still call for a doctor's or physical therapist's advice first. Always consult your physician or physical therapist for personalized guidance.
- Acute shoulder impingement or rotator cuff irritation. Raising the arms to shoulder height can pinch an irritated shoulder. See a doctor or physical therapist before you do rear delt raises. Any shoulder pain means stop.
- Lower-back pain or disc issues. The bent-over hinge asks the muscles along your spine to hold your back flat for the whole set. Any lower-back pain means stop. If you have a disc problem or have had lower-back pain, see a doctor or physical therapist before you do rear delt raises, and ask them whether a seated or chest-supported version suits you.
- Tight hamstrings that stop a flat-back hinge. If you can't hinge until your chest is close to parallel without your back rounding, bend your knees more or hinge a little less, or use the seated variation, where your chest rests on your thighs. Any pain in your lower back or the backs of your legs means stop.
- Recent shoulder or neck surgery. Get clearance from your surgeon or physical therapist before you do rear delt raises, and follow their plan for when and how to start.
- Neck strain or neck pain. Any neck pain means stop. See a doctor or physical therapist before you do this exercise. Once cleared, keep your head in line with your spine and your shoulders down, away from your ears, and use no weights until that position feels natural.
Related Exercises
If rear delt raises are in your routine, these movements train the same muscles or the other parts of the shoulder:
- Same target, band version: Band Pull-Aparts work the rear delts and the muscles between your shoulder blades with a resistance band, standing tall with no hinge.
- Compound that trains the rear delt: Bent-Over Rows work the rear delts alongside the lats and the muscles between your shoulder blades.
- Front and side of the shoulder: Front Raises and Lateral Raises train the anterior and medial deltoid heads, the front and side of the shoulder.
- Shoulder blade control: Y-Raises, T-Raises, and W-Raises train the muscles that move your shoulder blades.
- Mobility companion: the Seated Rear Delt Stretch stretches the back of the shoulder.
How to Program Rear Delt Raises
Rear delt raises with no weights or light dumbbells sit at the lighter, higher-rep end of the evidence-based ranges. The American College of Sports Medicine (ACSM) Position Stand on resistance training recommends 8 to 12 reps per set for novice and intermediate lifters training for muscle growth, and lighter sets of 10 to 15 reps with less than a minute of rest for muscular endurance. Novices should train 2 to 3 days per week (Ratamess et al., 2009).
| Level | Sets × Reps | Rest between sets | Frequency |
|---|---|---|---|
| Beginner (no weights: reps or a hold) | 2-3 × 12-15 reps, or 2-3 holds for as long as your arms stay level and your back stays flat | 45-60 seconds | 2-3 sessions/week |
| Intermediate (light dumbbells, strict tempo) | 3-4 × 12-20 | 45-75 seconds | 2-3 sessions/week |
| Advanced (light dumbbells, longer pauses or holds) | 3-4 × 12-20 | 60-90 seconds | 2-4 sessions/week |
Where in your workout: late in the session, after your compound pressing and pulling work. Rear delt raises are a small isolation exercise, so doing them early would tire the backs of your shoulders and your upper back before your heavier lifts. On a push day, do them after your pressing. On a pull day, do them after your rows.
Reps over load, always: this is one exercise where chasing a heavier dumbbell works against you, because a heavier weight tempts you to swing or row. Treat 12 to 20 strict reps as the target, and only add or increase dumbbells when you can hit the top of that range with a clean pause every set.
Stop the set when form slips: the set is over the moment your elbows start bending and straightening, your shoulders shrug, your back starts to round, or you start swinging. Clean reps matter more than finishing the planned number.
How FitCraft Programs This Exercise
During your personalized diagnostic assessment, the app maps your fitness level, goals, and available equipment, then builds a balanced training plan for your level that can include rear delt raises.
The app has two rear delt raise exercises, each with an interactive 3D demonstration: the rear delt raise and the rear delt raise hold, both with no weights and both rated Beginner. Every program is designed by Domenic Angelino, FitCraft's chief exercise scientist, then adapted to you by the AI.
Frequently Asked Questions
How many rear delt raises should a beginner do?
Start with 2 to 3 sets of 12 to 15 reps with no weights, two or three times a week. The hold version is another good start: raise your arms to shoulder height and hold them there while they stay level and your back stays flat. Add light dumbbells only once the no-weight version feels easy, and if your form breaks before rep 12, go back to no weights.
What muscles do rear delt raises work?
The primary movers are the posterior deltoids, at the backs of your shoulders, which lift your arms out to the sides, and the middle trapezius and rhomboids, which squeeze your shoulder blades together. The lower trapezius helps hold your shoulder blades down and back, and the erector spinae, the muscles along your spine, hold your back flat in the hinge.
Why do I feel rear delt raises in my traps instead of my shoulders?
Some burn between your shoulder blades is expected, because the middle trapezius and rhomboids are main movers in this exercise along with the backs of your shoulders. Feeling it at the top of your shoulders or in your neck can mean you are shrugging, your head is hanging, or the dumbbells are too heavy. Keep your shoulders down, away from your ears, keep your head in line with your spine, and use no weights or lighter dumbbells. If you feel pain in your neck, stop, and see a doctor or physical therapist before you do this exercise again.
Are rear delt raises good for posture?
No single exercise fixes posture. Rear delt raises train the posterior deltoids, middle trapezius and rhomboids, the muscles that pull your arms and shoulder blades back.
Can I do rear delt raises with shoulder impingement?
Not until a doctor or physical therapist clears you. If you have shoulder impingement, or raising your arms pinches or hurts your shoulder, stop and see a doctor or physical therapist before you do rear delt raises. Once you are cleared, use no weights, keep your back flat, and raise your arms no higher than your shoulders.