Most pressing exercises train how much force you can produce. The explosive floor press trains how fast you can produce it: you press a light to moderate weight up from a dead stop as fast as you can, every rep.
The setup could not be simpler. You lie on the floor, so there's no bench to buy and no spotter needed. The floor itself stops your upper arms level with your body, so they never drop below it.
This guide covers the dumbbell version, the one in the FitCraft app, done with two dumbbells or one. If you train in a gym, the barbell floor press follows the same dead-stop pattern with a fixed bar path.
Quick Facts: Explosive Floor Press
- Equipment needed: One or two dumbbells and some floor space; no bench
- Difficulty: Intermediate (as rated in the FitCraft app)
- Modality: Strength
- Body region: Upper body
Muscles Worked
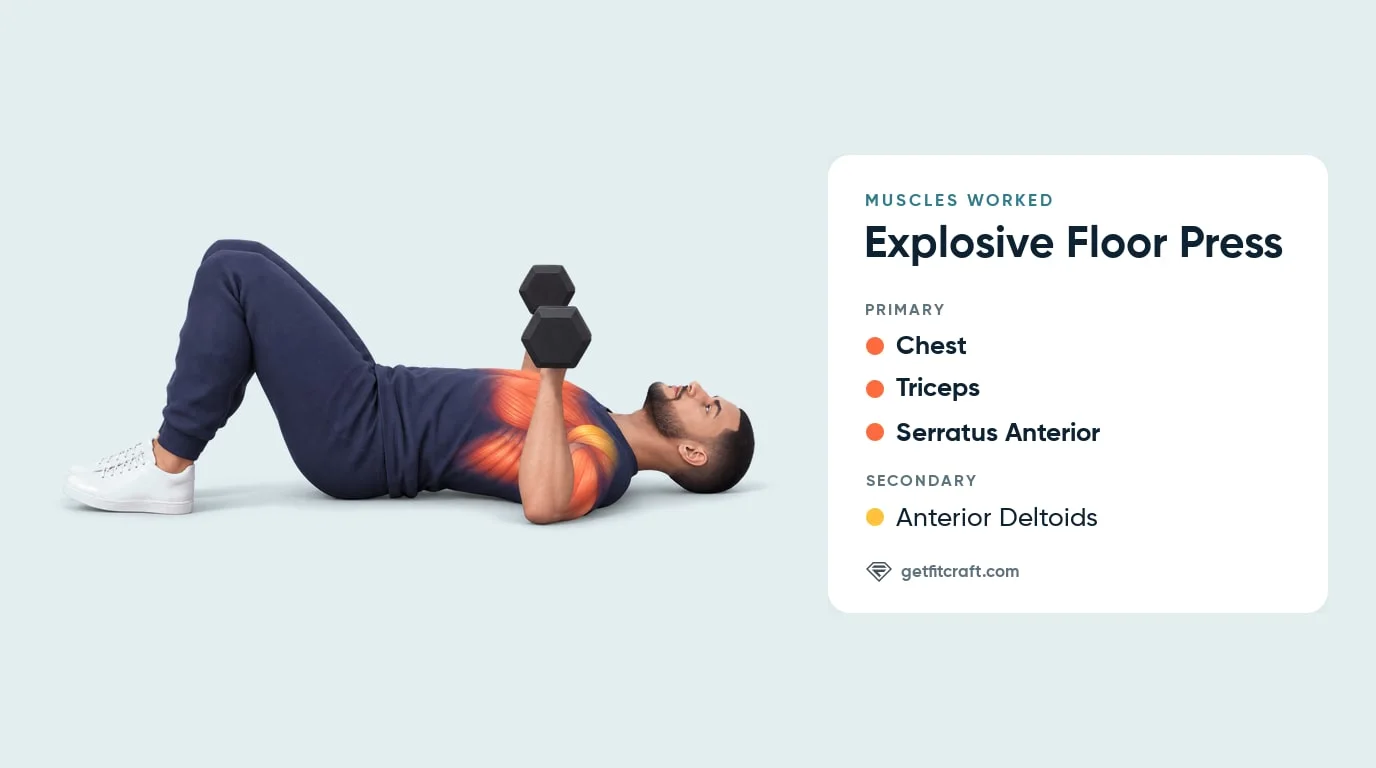
Primary movers: the chest (pectoralis major), the triceps (triceps brachii) and the serratus anterior. The chest drives your upper arms up off the floor and in over your chest, the triceps straighten your elbows to finish the press, and the serratus anterior, the muscle along your ribs under each armpit, holds your shoulder blades steady against your rib cage as you drive the weight up. They work under control as you lower (eccentric phase) and contract hard from a standstill on the fast press (concentric phase).
Secondary movers: the anterior deltoids, the fronts of your shoulders, which help lift your upper arms off the floor as you press.
Why the dead stop and the speed both matter: when you lower a weight and press straight back up, the stretch at the bottom gives the press a small rebound boost. Pausing about a second on the floor lets that boost fade (ExRx's bench press analysis), so every rep starts from a dead stop and your own push does the work of getting the weight moving. Trying to press as fast as you can, with a weight light enough to move fast, is what makes it power work.
Step-by-Step: How to Perform the Explosive Floor Press
Getting into and out of position with dumbbells deserves as much attention as the press itself. The cues below cover both.
Step 1: Get Into Position Safely
Sit on the floor with the dumbbells resting on your thighs. Lie back while bringing the dumbbells with you to the sides of your chest, then plant your feet flat with knees bent. Your head, upper back and hips rest on the floor. A mat is fine; you don't need a bench.
Form tip: bring the dumbbells down with you as you lie back instead of reaching for them on the floor beside you.
Step 2: Set Your Base
Press the dumbbells up over your shoulders and chest to start, palms facing your feet, handles running side to side, thumbs wrapped around them. Pull your shoulder blades down and back into the floor. Keep your wrists straight and stacked over your elbows, and keep your head, upper back and hips on the floor, with your lower back resting on it, not arched. As you lower, your upper arms angle out partway from your body, anywhere from close to your sides to about 70 degrees, never straight out in a T.
Form tip: never bridge your hips to move the weight.
Step 3: Lower With Control to a Dead Stop
Inhale and lower the dumbbells under control, in about a second, until the backs of your upper arms rest on the floor. Slower, up to a 2 to 3 count, is fine; never let them drop. Let everything settle for a real pause of about a second.
Form tip: let your upper arms land softly and never bounce them off the floor. The pause is the point of the exercise, so don't shorten it.
Step 4: Press Up Explosively
Breathe out hard and drive the dumbbells straight up as fast as you can, to straight or nearly straight arms over your shoulders and chest, not over your face. Keep your shoulders on the floor at the top.
Form tip: keep a firm grip with your thumbs wrapped around the handles. The dumbbells never leave your hands.
Step 5: Reset and Repeat
Same controlled lower, same pause of about a second, same fast drive on every rep. Speed is your form gauge: when your reps slow down, or you can't control the weight on the way down, the set is over. To finish, lower the dumbbells to the floor beside you with control before you sit up.
Form tip: if a rep grinds instead of moving fast, the weight is too heavy for this exercise.
Get this exercise in a personalized workout
FitCraft, our mobile fitness app, uses an AI coach to program compound strength exercises like this into your plan at the right volume and intensity, based on your level, goals, and equipment. Every FitCraft program is designed by Domenic Angelino, MPH (Brown University) and NSCA-CSCS, with research published in the Journal of Strength and Conditioning Research and Medicine & Science in Sports & Exercise.
Take the Free Assessment Free · 2 minutes · No credit card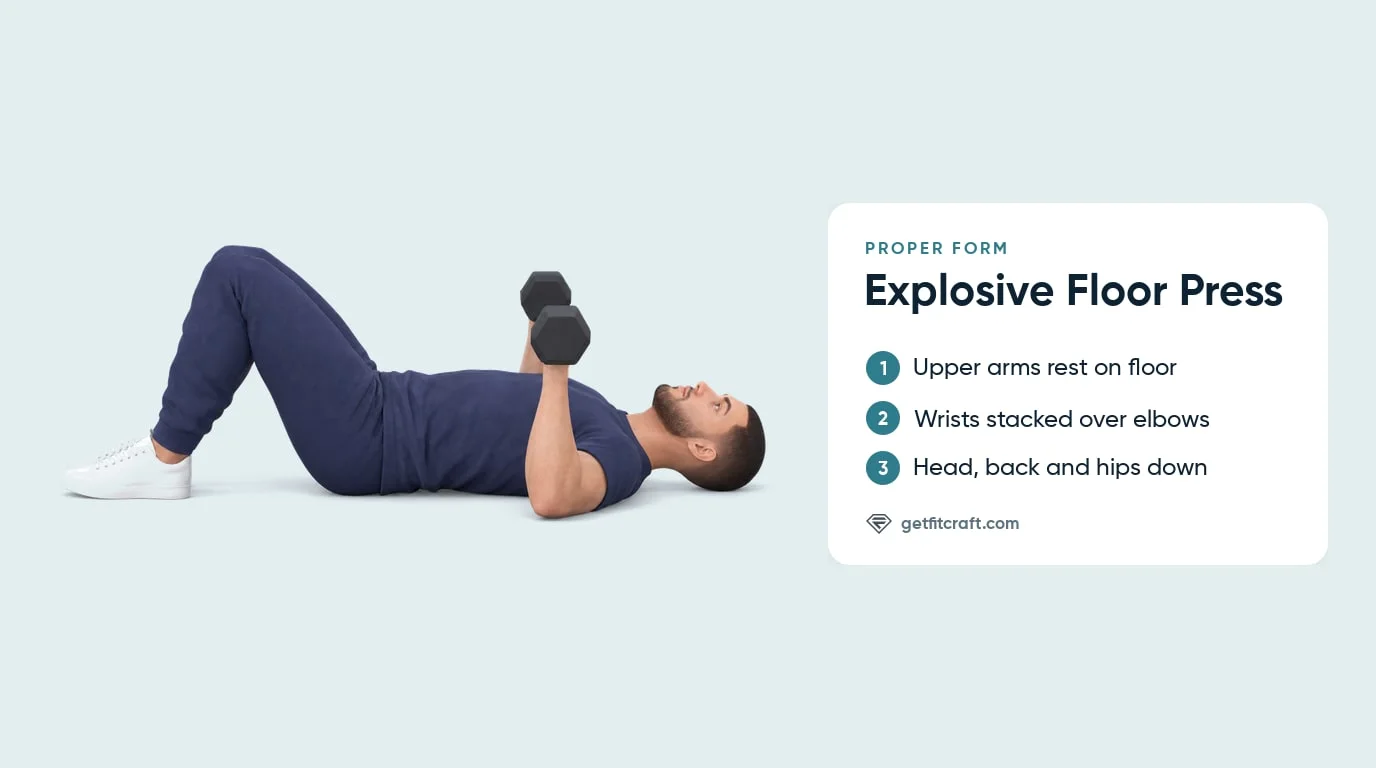
Common Mistakes (and How to Fix Them)
Here are the most common mistakes.
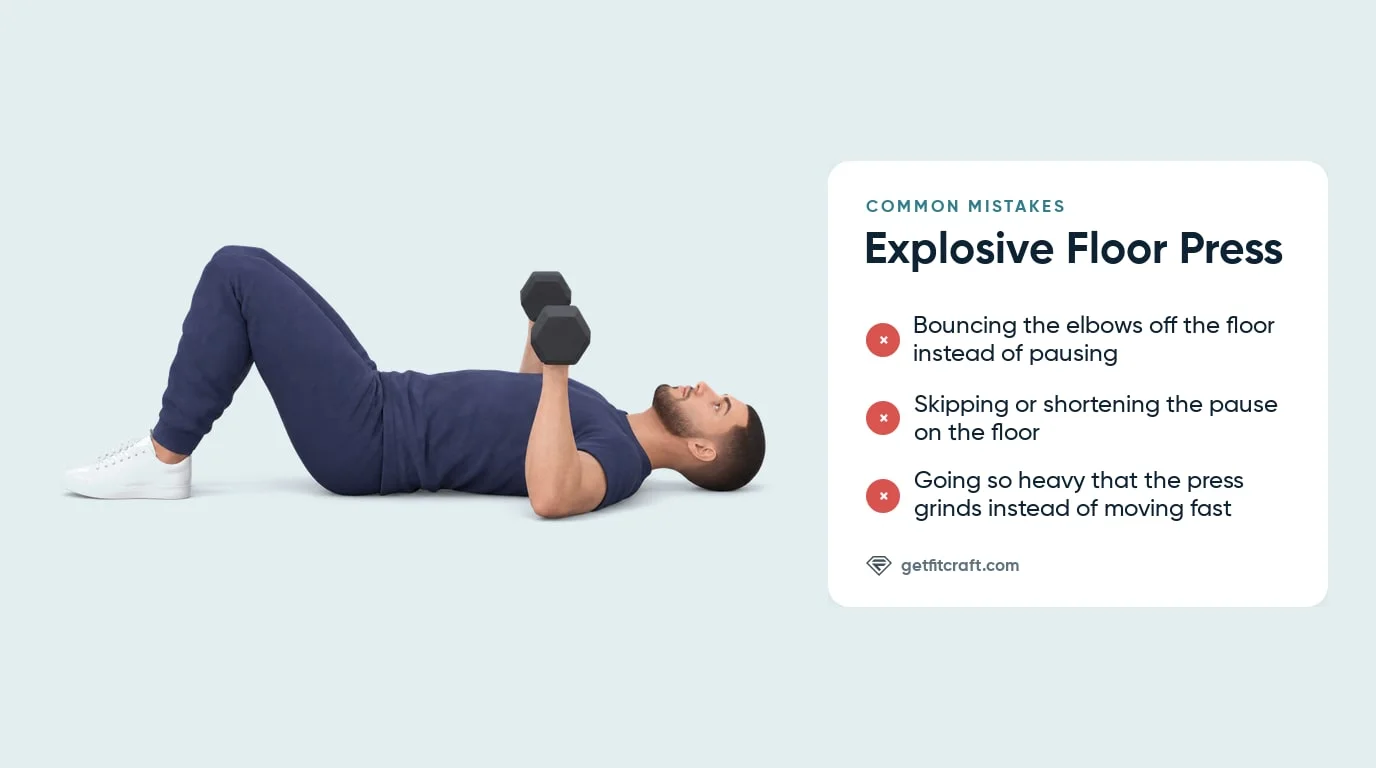
- Bouncing the elbows off the floor. Rebounding out of the bottom brings momentum back into a movement designed to remove it. Fix: let your upper arms land softly and hold still about a second on every rep before you press.
- Skipping or shortening the pause. Without the full stop, the rebound helps you up and the exercise loses its point. Fix: hold still about a second on the floor before every press.
- Going too heavy. When the dumbbells barely creep upward, you're doing slow strength work with extra risk instead of power work. Fix: pick a light to moderate weight you can press fast on every rep.
- Dropping the dumbbells on the way down. A quick lowering is fine only if it stays under control and lands softly. Fix: lower in about a second or slower, and never let the weights fall.
- Bridging the hips. Lifting your hips or arching your lower back to move the weight takes the work away from your arms and chest. Fix: keep your head, upper back and hips on the floor for the whole set, with your lower back resting on it.
- Elbows flared to 90 degrees. A T-shaped arm position under a fast press is a shoulder complaint waiting to happen. Fix: let your upper arms angle out partway on every lower, anywhere from close to your sides to about 70 degrees.
- Wrists rolled back. Letting the dumbbells bend the wrists backward leaks force and strains the joint. Fix: stack each dumbbell over the heel of the palm with the wrist in line with the forearm.
- Rolling toward the weight on the single-arm version. One dumbbell pulls your body toward that side. Fix: brace so your body stays flat on the floor, rest your free arm on the floor a little out from your side, and use a lighter weight if you still roll.
- Careless setup and exit. Hauling dumbbells around while lying down puts your shoulders and wrists in awkward positions. Fix: bring the weights down with you as you lie back, and set them on the floor beside you before you sit up.
Explosive Floor Press Variations: Regressions and Progressions
Start where you are and progress when your form is solid at the current level.
Chest Press (Easier)
The same floor setup, pressed up at a smooth, steady pace instead of as fast as you can. In FitCraft this is the chest press. Get comfortable with it first, so the pause and the pressing path feel automatic before you add speed.
Explosive Floor Press (Standard)
A light to moderate weight, a controlled lower of about a second, a pause of about a second on the floor, and a press as fast as you can. The FitCraft app rates it Intermediate. When every rep of every set shoots up at the same speed, you can try slightly heavier dumbbells.
Slightly Heavier Explosive Floor Press (Harder)
Use slightly heavier dumbbells, but only while every rep still shoots up fast. If reps start to slow down or grind, go back to the lighter weight. Speed stays the priority.
Single-Arm Explosive Floor Press
One dumbbell in one hand, with your free arm resting on the floor a little out from your side for balance; then switch sides. The single weight tries to roll your body toward it, so brace and keep your body flat on the floor while one arm presses. Pick a weight that lets you stay flat and still press fast. The FitCraft app has this version for each side, rated Intermediate like the two-arm press.
When to Avoid or Modify the Explosive Floor Press
If any of the following applies to you, check with your physician or a physical therapist before you do the explosive floor press. During a set, a burn in your chest or arms is normal; any pain in a joint, your lower back or your neck means stop.
- Acute shoulder, elbow, or wrist injury, or recent surgery on any of them. Get clearance from your doctor, surgeon or physical therapist before you do it. Any pain in your shoulder, elbow or wrist during a set means stop.
- Uncontrolled hypertension or known cardiovascular disease. Holding your breath while you lift, the Valsalva maneuver, can drive blood pressure very high and cause dizziness or fainting (ACSM). Ask your doctor or cardiologist whether this exercise suits you before you start, breathe out on every press, and stop if you feel dizzy or lightheaded.
- Pregnancy. This press is done lying flat on your back. Ask your doctor or midwife whether it suits you before you do it.
- The first weeks after giving birth, or diastasis recti. Ask your doctor or a physical therapist whether the explosive floor press suits you before you start.
- Lower-back pain. See a doctor or physical therapist before you do the explosive floor press. Keep your hips and lower back resting on the floor without bridging, and stop if your lower back hurts.
Related Exercises
If the explosive floor press is part of your routine, these movements complement or extend the same training pattern:
- Same floor position, controlled pace: the Chest Press uses the same setup at a smooth, steady pace, and the Chest Fly trains the chest through a wide hugging arc on the floor, a natural pairing across the week.
- Lockout and triceps partners: Skull Crushers and the Tate Press isolate the elbow-extension half of the movement, and both are performed lying on the same patch of floor.
- Bodyweight pressing: Push-Ups and Close-Grip Push-Ups keep the pressing pattern trained anywhere, and a fast push-up makes a solid power substitute when dumbbells are unavailable.
- Core foundation for supine bracing: Deadbugs and Forearm Planks build the rib-down bracing that keeps the lower back quiet while the arms move fast.
- Pulling balance: Bent-Over Rows keep the shoulder girdle balanced when pressing volume climbs.
How to Program the Explosive Floor Press
Power work follows different rules than muscle-building work. The American College of Sports Medicine (ACSM) Position Stand on resistance training recommends training power with light to moderate loads (about 30 to 60 percent of the most you can lift once for upper-body exercises) moved at high velocity for roughly 3-6 reps per set, added alongside a regular strength training program, with 3 to 5 minutes of rest between sets so speed stays high (Ratamess et al., 2009).
| Level | Sets × Reps | Rest between sets | Frequency |
|---|---|---|---|
| Easier (chest press, smooth pace) | 2-3 × 8-12 | 90-120 seconds | 2-3 sessions/week |
| Standard (explosive, light to moderate weight) | 3-4 × 4-6 | 3-5 minutes | 2-3 sessions/week |
| Harder (slightly heavier, still fast) | 4-5 × 3-5 | 3-5 minutes | 2-3 sessions/week |
Where in your workout: explosive work goes first, right after your warm-up, while the nervous system is fresh. Speed is the first quality fatigue steals, so pressing explosively at the end of a session defeats the purpose. A classic push-day structure runs explosive floor press, then a controlled strength press like the chest press, then isolation work.
Form floor over rep targets: on this exercise the form floor is speed itself. If a rep grinds, if the pause disappears, or if your hips start bridging, stop the set there. Slow reps on a power exercise train the wrong quality and add risk without benefit.
How FitCraft Programs This Exercise
Knowing how to do an explosive floor press is step one. Knowing when your strength base is ready for power work, what load keeps reps fast, and when to progress is where most people get stuck.
FitCraft maps your level, goals, and equipment during the diagnostic assessment and builds a plan around them. The app has the explosive floor press with two dumbbells and with one dumbbell on each side, all rated Intermediate, and can include it in your plan; the chest press, in the same floor position at a smooth, steady pace, is the easier step.
Its 3D demonstration shows the dead stop on the floor and the fast press, so you can see the rhythm of a rep before you try it.
Frequently Asked Questions
How heavy should the explosive floor press be?
Lighter than you think. Use a light to moderate weight you can press fast on every rep. ACSM's power-training guidance uses light loads for upper-body exercises, about 30 to 60 percent of the most you can lift once. If a rep grinds instead of shooting up fast, the dumbbells are too heavy for this exercise.
What muscles does the explosive floor press work?
The explosive floor press works three main muscles: the chest (pectoralis major), the triceps (triceps brachii, the backs of the upper arms) and the serratus anterior, the muscle along your ribs under each armpit. The anterior deltoids, the fronts of the shoulders, help.
What is the difference between a floor press and a chest press?
In FitCraft, both are done lying on the floor with your knees bent and your feet flat, and the floor stops your upper arms level with your body. In the app, both rest about a second with your upper arms on the floor. The chest press then presses up at a smooth, controlled pace. The explosive floor press makes that rest a strict dead stop and drives up as fast as you can. A dumbbell press on a flat bench lets your elbows travel below your body for a deeper stretch; that bench version is not in the app.
Why press explosively instead of at a normal tempo?
Pressing with maximal intended speed trains rate of force development, meaning how quickly your muscles can produce force. The pause on the floor takes away the bounce, so every rep starts from a dead stop and your own push does all the work of getting the weight moving. That builds pushing power: how quickly your chest, triceps and serratus anterior can push.
Can I do the explosive floor press with shoulder pain?
Not while your shoulder hurts. A burn in your chest or arms is normal, but any shoulder pain during a set means stop right away. See a doctor or physical therapist and ask whether the explosive floor press suits you before you do it again.