Hamstring tightness often turns standing stretches into a lower-back rounding contest. The straight leg pull-back changes the setup. Your spine stays supported, your neck stays relaxed, and the stretch can stay where you want it: the back of the thigh.
The goal is steady tension at a range you can control. If the leg doesn't get close to vertical, that is fine. Use a strap, soften the knee, and keep breathing until the hamstring stops guarding.
Quick Facts: Straight Leg Pull-Back
- Equipment needed: None; yoga strap, towel, or belt optional
- Difficulty: Beginner to Intermediate
- Modality: Mobility / static stretching
- Body region: Lower body and posterior chain
- FitCraft quest category: Mobility
Areas Stretched & Mobilized
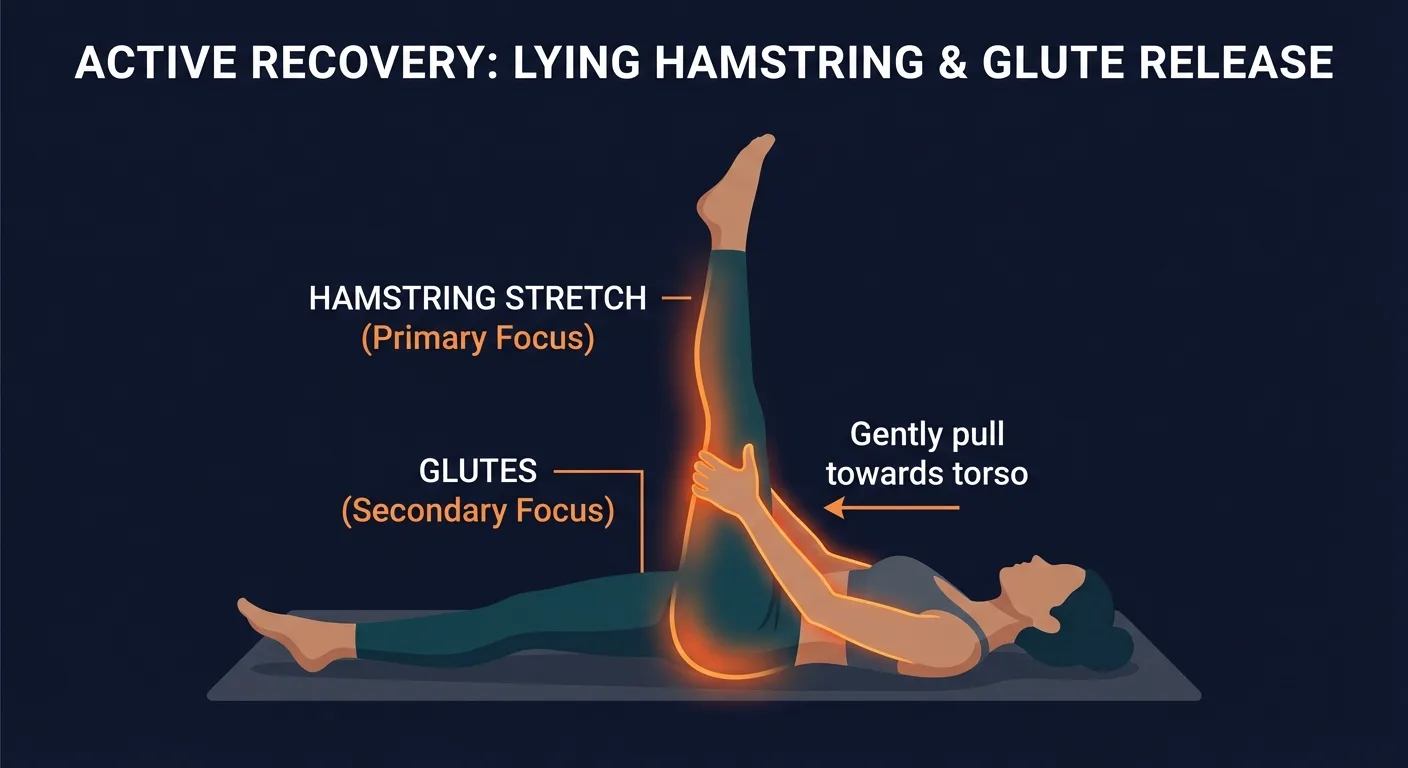
Primary target: the hamstrings, including the biceps femoris, semitendinosus, and semimembranosus. As the hip flexes and the knee stays extended, those muscles lengthen across the back of the thigh. The stretch is passive during the hold, while the release is controlled as the leg lowers back down.
Secondary targets: the gluteus maximus and posterior hip capsule can feel light tension when the thigh moves closer to the torso. If you flex the foot, the gastrocnemius adds a mild calf stretch because it crosses the knee and ankle.
Stabilizers: this is low-demand mobility work, so the stabilizer role is mostly about staying quiet. The abdominal wall keeps the pelvis from tipping, the opposite hip stays long on the floor, and the upper body stays relaxed so you don't turn the stretch into a crunch.
Mechanism: the supine setup reduces the need to hinge from the spine. That makes the stretch easier to dose than a standing forward fold. You can change intensity by bending the knee, using a strap, moving the thigh closer to the torso, or flexing the foot, all while keeping the lower back supported.
Step-by-Step: How to Do the Straight Leg Pull-Back
- Lie flat on your back. Extend both legs on the floor, relax your shoulders, and let your head rest naturally. Take a breath before you move.
- Raise one leg. Lift the working leg toward the ceiling. Keep it straight enough to feel the hamstring, but use a soft knee if the back of the knee feels sharp.
- Hold the leg or use a strap. Reach behind the thigh, calf, or ankle. If that makes your head or shoulders lift, loop a strap or towel around the foot instead. Coach Ty's cue: "Keep your head down. Let the strap bring the leg to you."
- Pull to moderate tension. Draw the leg a little closer to your torso until the stretch sits in the back of the thigh. Stop before pain, tingling, or the lower back peeling away from the floor.
- Anchor the opposite leg. Keep the resting leg long and heavy. If it lifts, soften that knee and press the heel down. Ty's cue: "One leg moves. The other leg stays calm."
- Hold, breathe, and switch. Hold for 20 to 60 seconds, then release slowly and repeat on the other side for one to three rounds.
Get this exercise in a personalized workout
FitCraft, our mobile fitness app, uses its AI coach Ty to program mobility work like this into your plan at the right volume and intensity, based on your level, goals, and equipment. Ty was designed and trained by Domenic Angelino, MPH (Brown University) and NSCA-CSCS, with research published in the Journal of Strength and Conditioning Research and Medicine & Science in Sports & Exercise.
Take the Free Assessment Free • 2 minutes • No credit card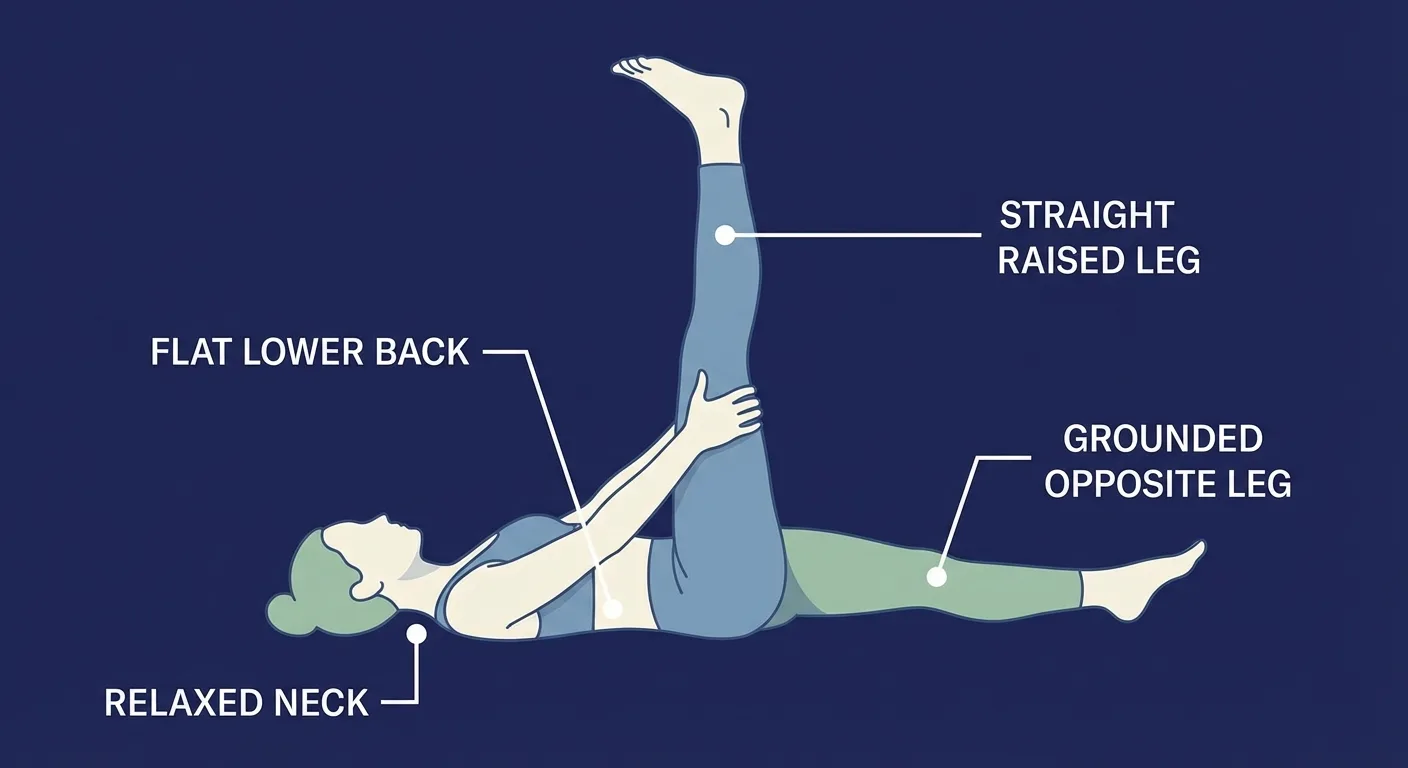
Common Mistakes (and How to Fix Them)
Lifting the Head and Shoulders
What it looks like: You crunch up to reach the leg, with the neck and shoulders working hard.
Why it's a problem: You add neck tension without improving the hamstring stretch.
The fix: Use a strap or towel so your arms can stay long and your head can stay down.
Cranking on the Leg
What it looks like: You yank the leg toward your chest and try to force a bigger range.
Why it's a problem: Strong pulling can trigger guarding, irritate a strained hamstring, or turn a stretch into nerve tension.
The fix: Pull to a 4 or 5 out of 10 stretch. Breathe there before you decide whether to move deeper.
Forcing a Locked Knee
What it looks like: You hyperextend the knee to make the leg look perfectly straight.
Why it's a problem: A locked knee can shift the sensation into the joint or behind the knee instead of the hamstring belly.
The fix: Keep the knee straight-ish with a small bend. The hamstring still gets the message.
Lifting the Opposite Leg
What it looks like: The resting leg floats up as the raised leg comes closer.
Why it's a problem: You lose the anchor that helps the pelvis stay steady.
The fix: Press the resting heel into the floor or bend that knee slightly if your hip flexors pull it up.
Straight Leg Pull-Back Variations: Regressions and Progressions
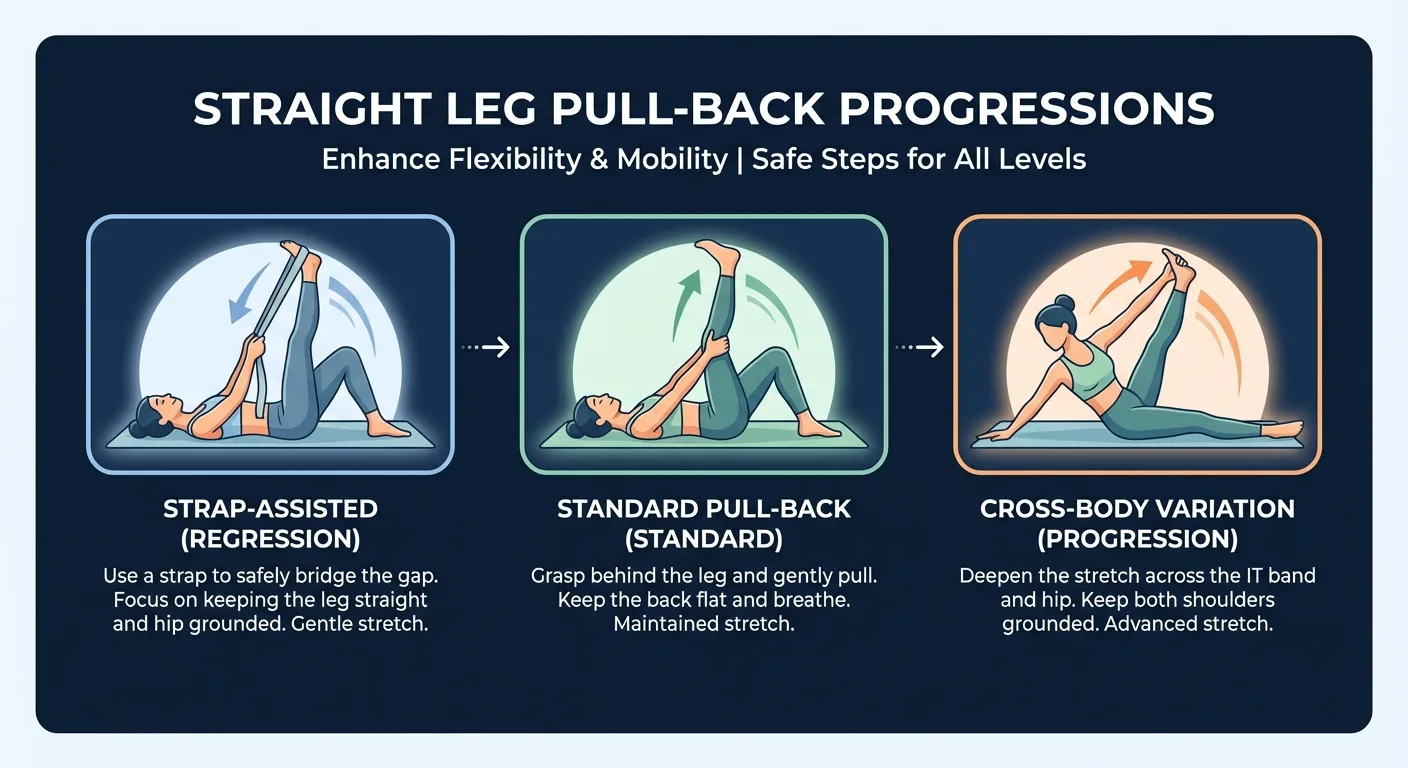
Strap-Assisted Straight Leg Pull-Back
Loop a yoga strap, towel, or belt around the ball of the foot. This is the best starting point if reaching the leg makes your upper body tense.
Bent-Knee Straight Leg Pull-Back
Keep the working knee slightly bent and pull from behind the thigh. Use this version when the full position creates nerve-like symptoms or sharp pulling behind the knee.
Flexed-Foot Pull-Back
Pull the toes gently toward the shin during the hold. This adds calf tension and makes the hamstring stretch feel more complete, but it should still feel like muscle stretch rather than tingling.
Cross-Body Pull-Back
Guide the raised leg slightly across the body toward the opposite shoulder. Keep the pelvis heavy and use a smaller range if the outer hip feels pinchy.
When to Avoid or Modify Straight Leg Pull-Back
The straight leg pull-back is safe for most healthy adults, but a few conditions call for a smaller range, a strap, or a different drill. Always consult your physician or physical therapist for personalized guidance.
- Active sciatica, numbness, tingling, or radiating pain. Strong hamstring stretching can feel like nerve tension when symptoms travel below the knee. Use a bent-knee version or switch to gentle cat-cow until symptoms calm.
- Recent hamstring strain. Stretching a newly strained muscle can slow healing. Wait until walking and daily movement feel normal, then reintroduce a gentle strap version.
- Lower-back pain that worsens with hip flexion. Keep the thigh farther from the torso and avoid forcing the leg vertical. Pair with glute bridges if you need a more active posterior-chain option.
- Hypermobility or Ehlers-Danlos syndrome. Skip passive end-range pulling. Choose active mobility and stop well before the joint feels loose or unstable.
- Pregnancy, especially second and third trimesters. Stay in a comfortable range and avoid aggressive pelvic or SI-joint stretching. A bent-knee strap version is usually easier to control.
- Recent hip, knee, or spine surgery. Follow your surgeon or physical therapist's range limits before adding any long static hold.
Related Exercises
Use these exercises to round out the same mobility pattern:
- Same area, different angle: Downward Dog and Half Pigeon stretch the posterior chain and hips from different positions.
- Active mobility pairing: Cat-Cow and Seated Cat-Cow help the spine move gently before or after hamstring work.
- Hip opener pairing: Butterfly Pose and Z-Sit complement the hamstring stretch with adductor and hip rotation work.
- Strength support: Glute Bridges and Calf Raises train the posterior chain through active range.
How to Program Straight Leg Pull-Back
Mobility programming depends on hold quality, total time in tension, and consistency. The broader progression model from the American College of Sports Medicine recommends matching volume and recovery to training level (Ratamess et al., 2009).
| Level | Sets × Reps | Rest between sets | Frequency |
|---|---|---|---|
| Beginner (gentle range) | 1-2 × 15-30 second holds per side | 30-60 seconds | 5-7 sessions/week |
| Intermediate (working into resistance) | 2-3 × 30-60 second holds per side | 30-60 seconds | 5-7 sessions/week |
| Advanced (deeper range or active engagement) | 2-4 × 30-90 second holds or 5-10 active reps per side | 30-90 seconds | Daily if symptoms stay calm |
Where in your workout: use short, gentle holds after a warm-up if you need more range before training. Save longer static holds for cooldowns, recovery days, or evening mobility blocks.
Form floor over time targets: stop the set when the lower back lifts, the neck strains, the opposite leg floats, or the stretch turns into numbness, tingling, or sharp pain.
How FitCraft Programs This Exercise
FitCraft uses its AI coach Ty to place mobility work inside a balanced plan at the right dose for your level, goals, and equipment. For hamstring stretches like the straight leg pull-back, that usually means pairing short holds with warm-ups or longer holds with cooldown and recovery sessions.
Ty adjusts the variation and volume to match your level. A strap-assisted hold can come before the standard position, and deeper foot-flexed or cross-body versions come later when the stretch stays controlled.
Frequently Asked Questions
What muscles does the straight leg pull-back stretch?
The straight leg pull-back mainly stretches the hamstrings: biceps femoris, semitendinosus, and semimembranosus. It can also lightly stretch the glutes and calves, especially when the foot is flexed.
My leg will not go straight. Am I doing it wrong?
No. Use a strap and keep a soft bend in the knee. Aim for a steady stretch in the back of the thigh while the knee stays comfortable.
How long should I hold the straight leg pull-back?
Start with 15 to 30 seconds per side for one or two rounds. Work toward 30 to 60 seconds per side for two or three rounds if the stretch stays comfortable.
Is this better than a standing forward fold for hamstrings?
It is often a better starting point for people with tight hamstrings or a sensitive lower back because the floor supports the spine. Standing forward folds can be useful, but they are easier to compensate through by rounding the lower back.
Can I do the straight leg pull-back with sciatica?
Modify or skip it if it increases radiating pain, numbness, tingling, or symptoms below the knee. Use a smaller range with a bent knee and ask a physical therapist or healthcare provider before using strong hamstring stretching when sciatica is active.