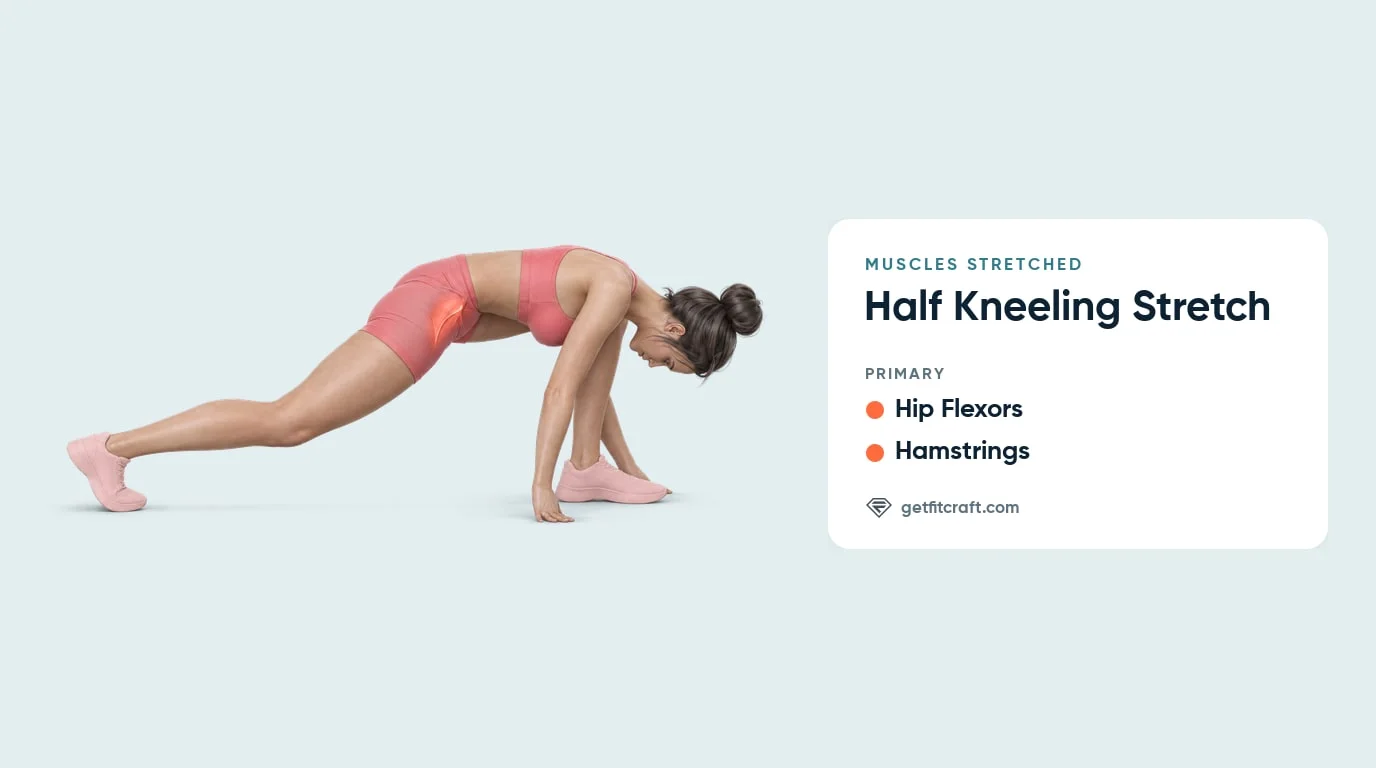
Areas Stretched & Mobilized
Muscles stretched: the hip flexors and the hamstrings. Your back leg reaches long behind your hip with the knee off the floor, which lengthens the hip flexors at the front of that hip. Your front hip folds deeply with your chest low over the thigh, which lengthens the hamstrings at the back of the front thigh. The hip flexor stretch is on the back leg and the hamstring stretch is on the front leg, so switch sides to stretch both.
Where you should feel it: a mild stretch at the front of your back hip and along the back of your front thigh. You shouldn't feel it in your knees or your lower back. Any pain in a joint (your knees, hips and wrists included), your lower back or your neck means stop.
Evidence. No study has tested this exact hold. Studies of hip flexor stretching in general support the idea behind it: in a randomized trial of 33 people with limited hip extension, active and passive hip flexor stretching done at home both improved hip extension range over six weeks, with no difference between the two methods (Winters et al., 2004). A meta-analysis of eight studies found that hip flexor stretches of 30 to 90 seconds had no effect on performance, while much longer stretching of 270 to 480 seconds caused a trivial drop (Konrad et al., 2021).
When you sit, your hips stay bent, so the hip flexors at the front of the hip spend that time at a short length. The half kneeling stretch takes one hip the other way: the back leg reaches long behind you, which lengthens the front of that hip.
Despite the name, the FitCraft app's half kneeling stretch keeps both knees off the floor. It is a deep lunge with both hands on the floor beside your front foot, the back knee lifted with the heel up, and the chest folded low over the front thigh. That fold adds a second stretch along the back of your front thigh. The classic upright version, kneeling tall on the back knee with the tailbone gently tucked, is a valid and gentler way to stretch the front of the hip, and this guide includes it as an easier option.
The same lunge is the starting position of the half kneeling triplanar stretch, which adds a twist with one arm reaching to the ceiling. Learn this hold first.
Quick Facts: Half Kneeling Stretch
- Equipment needed: None (optional: a folded towel or pad for the back knee and yoga blocks for the hands in the easier versions)
- Difficulty: Intermediate (as rated in the FitCraft app)
- Modality: Static stretch (a hold)
- Body region: Hips and thighs (hip flexors and hamstrings, stretched)
How to Do the Half Kneeling Stretch (Step-by-Step)
- Step into the lunge. From your hands and feet, step one foot forward between your hands so the front heel is down and the front knee sits roughly over the ankle. Your back leg stays long behind you with the knee lifted off the floor and the heel up on the ball of the foot. It can be anywhere from nearly straight to softly bent.
- Place your hands and fold. Rest both hands on the floor beside your front foot, one on each side or both inside it, flat or on your fingertips, and let your chest fold low over your front thigh. If the floor feels far away, rest your hands on blocks or a sturdy step.
- Let your hips sink. Let your hips sink forward and down until you feel a mild stretch at the front of your back hip and along the back of your front thigh. Keep your back long so your lower back does not sag toward the floor; a gently rounded upper back is fine. Let your head relax in line with your spine, and look down if your neck is uncomfortable. Deepen the stretch by letting your hips sink, not by walking your hands farther away.
- Hold and breathe. Hold for about 10 to 30 seconds at a time, or the time your workout sets, breathing slowly and steadily. Each time you breathe out, ease a little lower without bouncing or forcing, and never hold your breath.
- Switch sides. Step back and repeat with the other foot forward for the same time. On each side, check three things: hands down beside your front foot, back knee lifted with the heel up, and front knee roughly over your ankle.
Get this exercise in a personalized workout
FitCraft, our mobile fitness app, uses an AI coach to program mobility work like this into your plan at the right volume and intensity, based on your level, goals, and equipment. Every FitCraft program is designed by Domenic Angelino, MPH (Brown University) and NSCA-CSCS, with research published in the Journal of Strength and Conditioning Research and Medicine & Science in Sports & Exercise.
Take the Free Assessment Free · 2 minutes · No credit card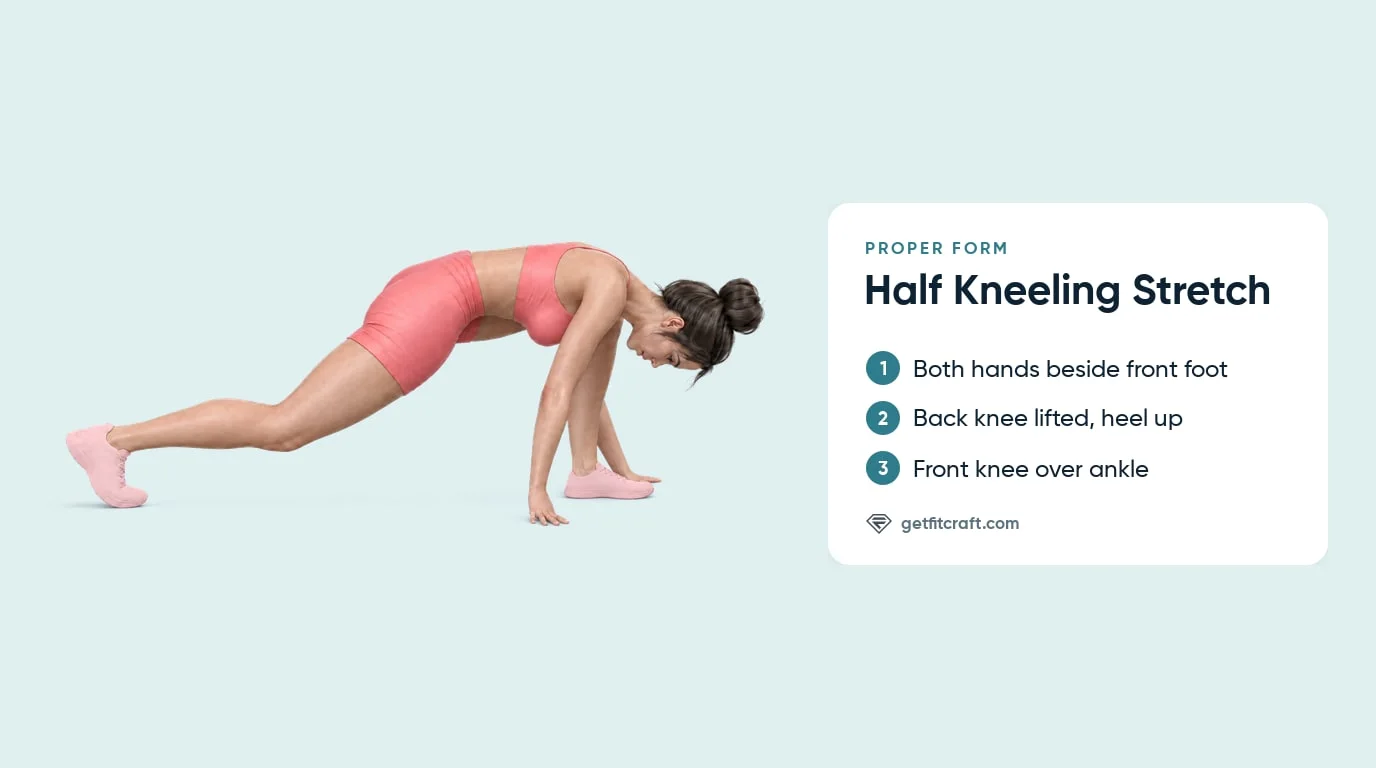
Common Mistakes to Avoid
The half kneeling stretch is simple to set up, but watch for these faults.
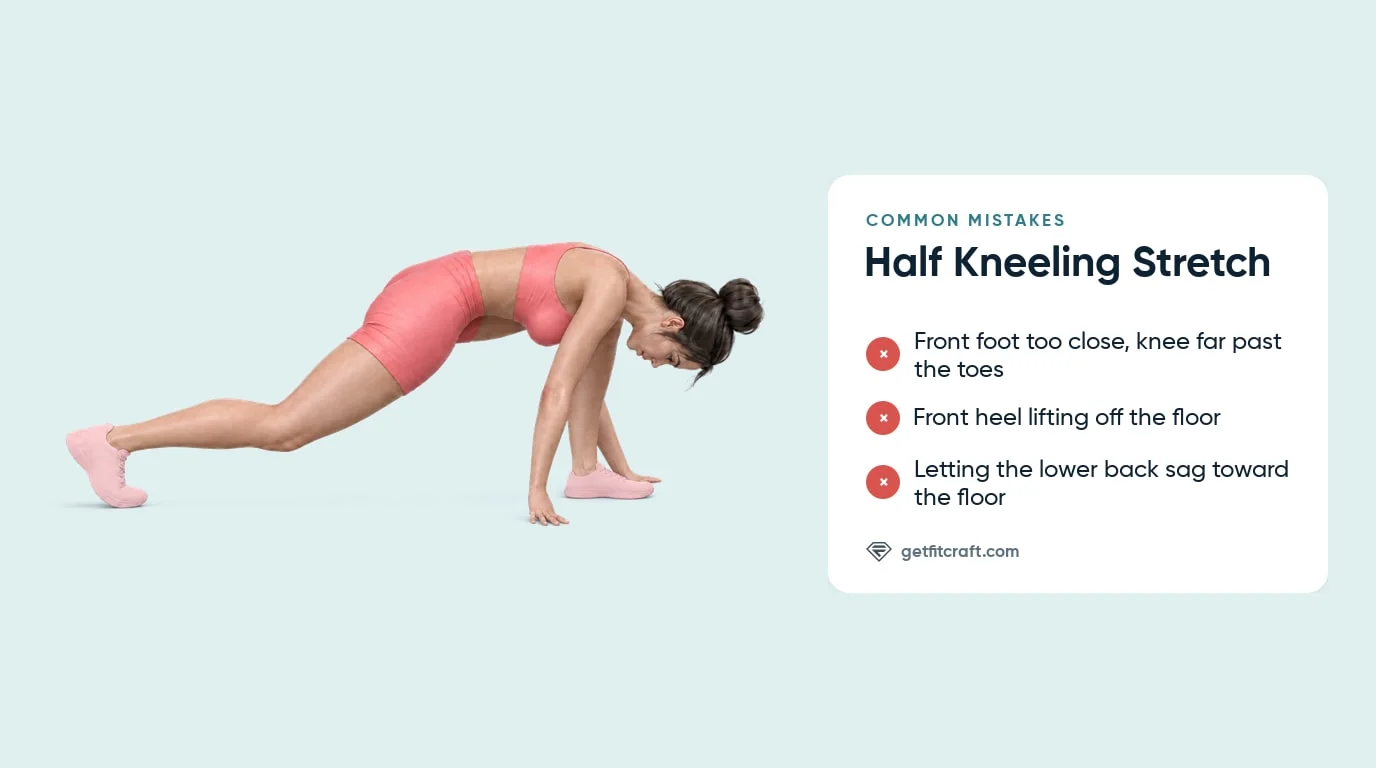
- Front foot too close. If your front knee drifts far past your toes, step your front foot a little farther forward so the knee sits roughly over the ankle.
- Front heel lifting off the floor. Keep your whole front foot flat, heel down.
- Letting the lower back sag. Keep your back long so your lower back does not sink toward the floor. A gently rounded upper back is fine in this hold; a sagging lower back is not.
- Bouncing or forcing the hips lower. Ease into a mild stretch and let your hips settle a little more on each breath out. Never bounce.
- Holding your breath. Breathe slowly and steadily for the whole hold.
- Stretching only one side. Give the other foot forward the same time.
Half Kneeling Stretch Variations: Regressions and Progressions
The app's version is the hold described above. These options make it gentler or harder. In every one, stop at a mild stretch.
Low Lunge with the Back Knee Down (Easier)
Lower your back knee onto a folded towel or pad and keep your hands on the floor or on blocks. This is the first easier step from the app's hold.
Hands on Blocks (Easier)
Rest your hands on yoga blocks or a sturdy step so you fold less deeply. This also helps if the floor feels far away. If your wrists are uncomfortable on the floor, come up onto your fingertips or fists, or use the blocks.
Upright Kneeling Hip Flexor Stretch (Easier)
Kneel tall with your back knee on a pad and your hands on your front thigh, gently tuck your tailbone and shift your hips a little forward. This classic version is a gentler stretch of the same front of the hip, with less of the fold over the front thigh.
Half Kneeling Stretch Hold (Intermediate)
The version this guide teaches: both hands on the floor beside the front foot, the back knee lifted with the heel up, and the hips sinking forward and down, held about 10 to 30 seconds on each side. The FitCraft app rates it Intermediate.
Deeper Lunge (Harder)
Step your front foot a little farther forward and let your hips sink lower, only to a mild stretch.
Half Kneeling Triplanar Stretch (Advanced)
From this same lunge, keep one hand down, turn your chest open and reach your other arm up to the ceiling, then come back down. The FitCraft app rates it Advanced, and it has its own full guide.
When to Avoid the Half Kneeling Stretch
A few conditions call for a check with your doctor or physical therapist first. A mild stretch at the front of your hip and the back of your thigh is normal; any pain in a joint (your knees, hips and wrists included), your lower back or your neck means stop. Always consult a qualified healthcare provider or physical therapist before starting or returning to any exercise program, especially if any of the following apply.
- Knee pain or recent knee surgery. See a doctor or physical therapist before you try the half kneeling stretch, or your surgeon after any knee surgery. Any knee pain means stop.
- Hip flexor or hamstring strain, or a recent hip injury. Skip the stretch and see a doctor or physical therapist, and ask them when and how to return to stretching that area. Any hip pain means stop.
- Hypermobility, Ehlers-Danlos, or other connective tissue disorders. Ask your doctor or physical therapist whether deep stretches fit your plan before you try the half kneeling stretch. Any pain in a joint, your lower back or your neck means stop.
- Pregnancy. Check with your doctor or midwife before doing the half kneeling stretch. Any pelvic pain, or any pain in a joint, your lower back or your neck, means stop.
- Disc problems, sciatica, or recent back surgery. See a doctor or physical therapist first, or your surgeon after back surgery. Any pain in your lower back, or pain running down your leg, means stop.
- Lower back pain during the hold. You shouldn't feel this stretch in your lower back. Any lower back pain means stop; see a doctor or physical therapist before you try it again.
Related Exercises
- Direct progression: the half kneeling triplanar stretch starts from this exact lunge and adds a twist with one arm reaching to the ceiling. The app rates it Advanced.
- Upright lunge stretch: the lunge reach holds a tall high lunge with both arms overhead and stretches the hip flexors, the lats and the hamstrings. The app rates it Advanced.
- Standing lunge hold: Warrior I holds a shorter standing lunge with both heels down and the arms up. The app rates it Beginner.
- Front of the trunk: cobra pose is a face-down back bend that stretches the rectus abdominis.
- Spinal mobility pairing: cat-cow moves your spine through rounding and arching and pairs well with the half kneeling stretch in a mobility session.
- Neighboring hip stretches: butterfly pose for the adductors, the hip abductor stretch for the glute medius and glutes on the outside of the hip, and half pigeon for the glutes, hip flexors and hamstrings.
- Strength in a split stance: rear lunges and split squats work the quadriceps and glutes in a similar lunge position.
How to Program the Half Kneeling Stretch
The American College of Sports Medicine's guidance on flexibility exercise recommends holding a static stretch for about 10 to 30 seconds to the point of tightness, for about 60 seconds in total per stretch, on 2 or more days a week (Garber et al., 2011). For the half kneeling stretch, that means holds of about 10 to 30 seconds on each side, repeated, or the time your workout sets. Hip flexor stretches of 30 to 90 seconds had no effect on performance in a meta-analysis (Konrad et al., 2021), so the hold also fits before training.
| Version | Hold time | Amount | Frequency |
|---|---|---|---|
| Easier: back knee down on a pad, hands on blocks, or the upright kneeling stretch | About 10 to 30 seconds per side | Repeat to about 60 seconds in total | 2 or more days a week |
| Intermediate: the app's hold, hands down and back knee lifted | About 10 to 30 seconds per side, or the time your workout sets | Repeat to about 60 seconds in total | 2 or more days a week |
| Harder: a deeper lunge, hips a little lower | About 10 to 30 seconds per side, or the time your workout sets | Repeat to about 60 seconds in total | 2 or more days a week |
The half kneeling triplanar stretch, rated Advanced, has its own guide and timing.
Where in your day. Use it in a warm-up before lower-body training, after training, in a cooldown, or in a standalone mobility session, paired with cat-cow for the spine.
Form over hold targets. The hold only counts while your front heel stays down and your lower back stays long. If your lower back starts to sag or you find yourself forcing your hips lower, ease up or end the hold and reset. Any pain in a joint (your knees, hips and wrists included), your lower back or your neck means stop.
How FitCraft Programs This Exercise
FitCraft maps your level, goals, and equipment during the diagnostic and builds a plan around them. The app has a half kneeling stretch hold for each side, rated Intermediate, and can include it in your plan. Its harder relative, the half kneeling triplanar stretch, is rated Advanced.
Its 3D demonstrations show the app's version: both hands on the floor beside the front foot, the back knee lifted with the heel up, and the chest folded low over the front thigh.
Frequently Asked Questions
Can I do the half kneeling stretch if kneeling hurts my knee?
No. Any knee pain, including pain from kneeling, means stop. If kneeling or the stretch hurts your knee, or you have a recent knee injury or surgery, see a doctor or physical therapist (or your surgeon) before you try it. The FitCraft app's version keeps the back knee off the floor.
What is the difference between the half kneeling stretch and the triplanar version?
Both start from the same lunge, with the front foot flat between your hands and the back knee lifted. The half kneeling stretch holds that lunge with both hands on the floor and stretches the hip flexors and the hamstrings. The half kneeling triplanar stretch keeps one hand down, turns your chest open toward your front leg and reaches the other arm to the ceiling, which also stretches the obliques, the lats, the glutes and the muscles along your spine. The FitCraft app rates the half kneeling stretch Intermediate and the triplanar stretch Advanced.
How long should I hold the half kneeling stretch?
Hold for about 10 to 30 seconds at a time, or the time your workout sets, and give the other side the same time. The American College of Sports Medicine suggests about 60 seconds in total per stretch on 2 or more days a week (Garber et al., 2011). A meta-analysis found that hip flexor stretches of 30 to 90 seconds had no effect on performance (Konrad et al., 2021), so a short hold also fits in a warm-up.
Why do I not feel the half kneeling stretch in my hip?
Check your stance and your hips. Step your front foot a little farther forward, keep your back leg long with the heel up, and let your hips sink forward and down until you feel a mild stretch at the front of your back hip. Keep your lower back from sagging, and deepen the stretch by letting your hips sink, not by walking your hands away. You should feel it at the front of your back hip and along the back of your front thigh, not in your knees or your lower back.
Is the half kneeling stretch good for desk workers?
It is a simple way to stretch the front of the hip, which stays at a short length while you sit with your hips bent. In a randomized trial of 33 people with limited hip extension, hip flexor stretching done at home, active or passive, improved hip extension range over six weeks (Winters et al., 2004). That study did not test this exact hold. Hold about 10 to 30 seconds on each side, and stop for any pain in a joint, your lower back or your neck.