You decided this is the year you get stronger, so you got down on the floor for a set of push-ups and managed three shaky ones. The next video you found moved on to pull-ups and pistol squats. By Friday the plan had fallen apart, and it felt like proof that bodyweight training is for people who are already fit.
That plan was missing its first steps. Calisthenics, training with your own body weight, runs from a push-up against a wall to a one-arm push-up, and a beginner should start at the bottom. Muscle matters more with every birthday, too. Inactive adults lose about 3 to 8 percent of their muscle mass per decade, and 10 weeks of resistance training can add about 1.4 kg of lean weight, according to a review by Westcott (2012).
This page gives you one beginner calisthenics workout of six moves, a quick test to find your starting version of each, and the exact point to move up. It takes 20 to 25 minutes and needs a wall, a counter, a sturdy chair, a heavy table or a door frame, and some floor. New to the word? Our explainer on what calisthenics is covers the basics. If you'd rather have a full weekly plan at four levels, our calisthenics workout plan builder makes one and runs each session for you.
The Beginner Calisthenics Workout at a Glance
Do the six moves as three pairs. Finish one set of the first move in a pair, go straight to the second, rest 60 seconds, and repeat until you've done all your sets for that pair. Pairing an upper-body move with a lower-body move lets one group rest while the other works, which roughly halves your session time, as Iversen and colleagues (2021) explain in their review of time-efficient training.
| Pair | Move | Easiest version | Next versions | Sets x reps or time |
|---|---|---|---|---|
| A | Push-up | Wall push-up | Counter, chair, knees, low step, floor | 2-3 x 8-15 |
| A | Squat | Sit-to-stand from a chair | Bodyweight squat, pause squat | 2-3 x 8-15 |
| B | Row | Door-frame row | Table row with bent knees, then straight legs | 2-3 x 8-15 |
| B | Lunge | Split squat holding a chair | Split squat, reverse lunge, walking lunge | 2-3 x 8-12 per leg |
| C | Plank | Counter plank | Knee plank, forearm plank, long-lever plank | 2-3 x 20-40 sec |
| C | Hollow hold | Dead bug | Tuck hollow, one-leg hollow, full hollow | 2-3 x 6-10 per side, then 20-30 sec holds |
Warm up for about 3 minutes before you start. March in place for a minute, then do 10 arm circles each way, 10 hip circles and 5 slow sit-to-stands. Finish with a minute of easy stretching for whatever feels tight. Do the workout three days a week with a rest day between sessions, such as Monday, Wednesday and Friday, and start with 2 sets of each move for the first two weeks.
How to Find Your Starting Version
Your starting version of each move is the one you can do for at least 8 clean reps, or a 20-second hold, with a rep or two left over. Clean means your last rep looks like your first. Your body stays straight on push-ups, rows and planks, and your knees follow your toes on squats and lunges.
Then let the count sort it out. If you get fewer than 8 clean reps, drop one version. If 15 reps feel easy, move up one. Anywhere in between is where you start. The Iversen review lists 6 to 15 reps per set as an efficient range for building strength and muscle, so this window keeps every set useful.
Stop each set with one or two good reps in the tank. In a 2023 meta-analysis of 15 studies, Refalo and colleagues found that training all the way to failure wasn't clearly better for muscle growth than stopping short. For a beginner, stopping short also keeps your form clean while you learn the moves.
Push-Ups: From the Wall to the Floor
Push-ups train your chest, shoulders and triceps, and the height of your hands sets the load. Ebben and colleagues (2011) measured the force through the hands of 23 adults on a force plate. A floor push-up put about 64 percent of body weight on the hands. Knees on the floor cut that to 49 percent, hands on a 2-foot box to 41 percent, and hands on a 1-foot box to 55 percent, so a push-up from a low step is harder than one from your knees.
- Wall push-up. Hands on the wall at shoulder height, feet a step back, body straight.
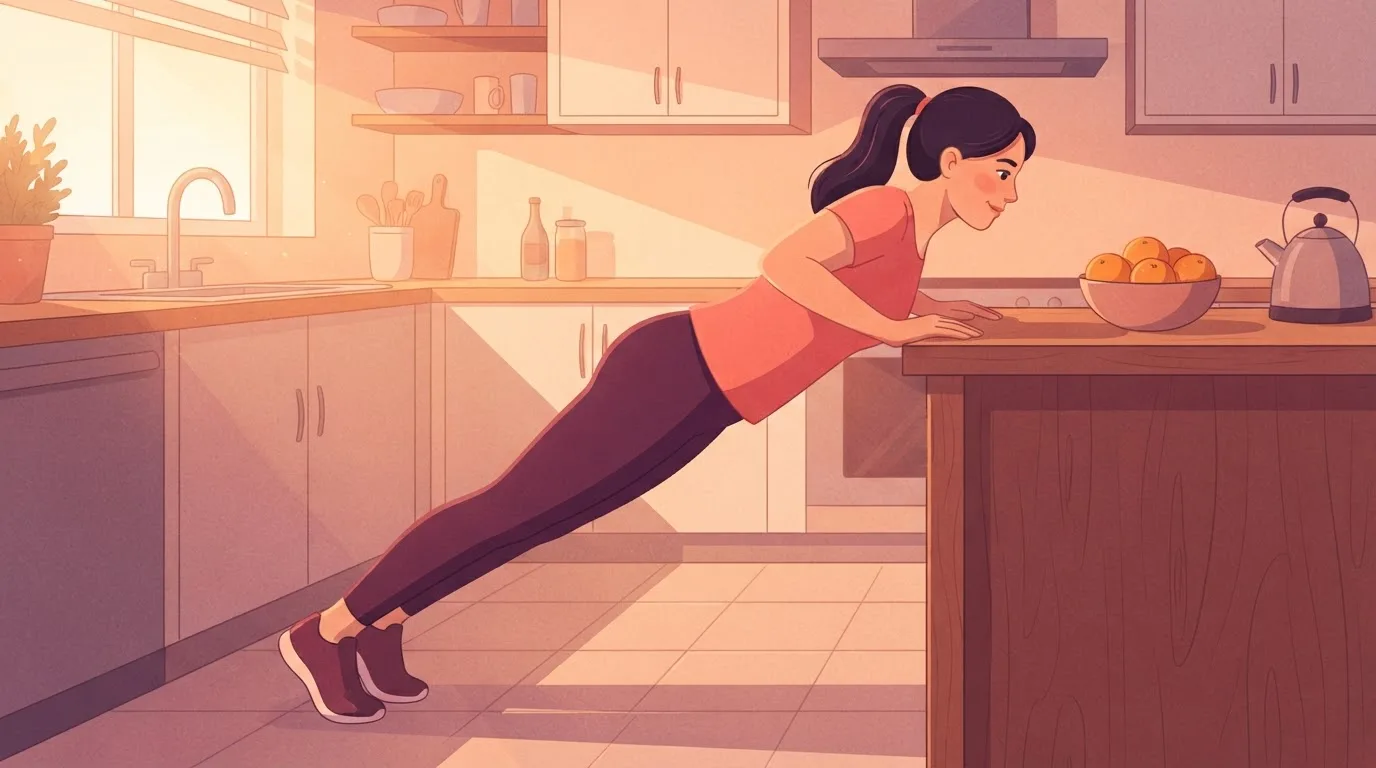
- Counter push-up. Hands on the edge of a kitchen counter, feet back far enough that your body forms one line. Our incline push-up guide shows the form.
- Chair push-up. Hands on the seat of a sturdy chair pushed against a wall so it can't slide.
- Knee push-up. Hands on the floor and knees down, with one straight line from your knees to your head.
- Step push-up. Hands on a stair or a sturdy step about a foot high.
- Floor push-up. Lower until your chest is about a fist from the floor, then press back up.
Move up when you reach 15 clean reps on every set for two sessions in a row, and start the new version back at 8. Once the floor push-up feels solid, our push-up progression guide takes you through the harder versions.
Rows: From a Door Frame to a Table
Rows train your upper back and biceps, the pulling muscles that push-ups don't reach. Without a bar at home, your best tools are a solid door frame and a heavy table. The more your body leans back toward horizontal, the more of your weight you pull.
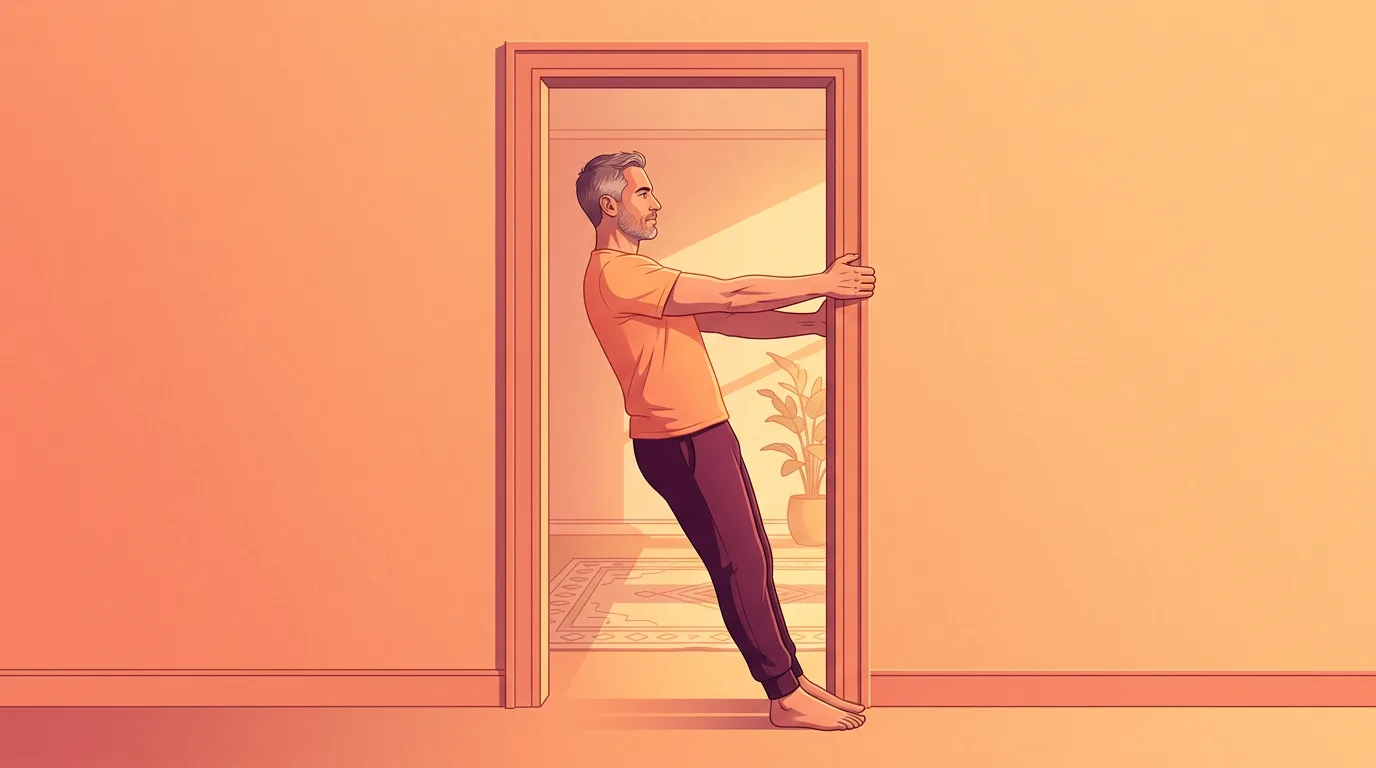
- Door-frame row. Stand facing one side of an open doorway with your feet close to the bottom of the frame. Grip the frame with both hands at chest height, one above the other, lean back until your arms are straight, then pull your chest toward the frame. Move your feet closer to the frame to lean back further.
- Table row, knees bent. Lie on your back under a heavy table with your chest below its edge. Grip the edge with both hands, keep your knees bent and feet flat, and pull your chest up toward the table.
- Table row, legs straight. Same setup, with your legs straight and your heels on the floor, so you lift more of your weight.
- Bar or ring row. When you get a low bar or a set of rings, the inverted row is the next step.
Use a solid, heavy table that doesn't lift or slide when you pull hard on its edge, and test it with a few gentle pulls first. Never use a folding, glass or pedestal table. Rows like these are kind to your back. In a lab study of 7 men by Fenwick and colleagues (2009), the inverted row, the bar version of a table row, worked the lats hardest of three rows while putting the least load on the lower back.
Find out what's really holding you back
FitCraft, our mobile fitness app, pairs you with an AI coach who builds you a personalized plan around your goals, schedule, and fitness level. Every FitCraft program is designed by Domenic Angelino, MPH (Brown University) and NSCA-CSCS, with research published in the Journal of Strength and Conditioning Research and Medicine & Science in Sports & Exercise.
Take the Free Assessment Free • 2 minutes • No credit cardSquats: From a Chair to a Pause Squat
Squats train your thighs and glutes, and a chair is the easiest way to learn how deep to go.
- Sit-to-stand. Sit on a sturdy chair, lean forward a little and stand up without using your hands, then sit back down slowly.
- Bodyweight squat. Push your hips back and down until your thighs are about level with the floor, heels down and knees following your toes, then stand. Our squat guide covers the common mistakes.
- Pause squat. Hold the bottom position for 3 seconds before you stand.
Lowering over 3 seconds makes any version harder without changing the move. That's the easiest way to keep squats challenging before you're ready for one-leg work.
Lunges: From a Supported Split Squat to a Walking Lunge
Lunges train one leg at a time, so they build balance along with leg strength.
- Split squat holding a chair. Stand in a long stride with one hand on the back of a chair. Lower your back knee toward the floor and push back up, keeping most of your weight on the front foot.
- Split squat, hands free. The same move with no support.
- Reverse lunge. Step one foot back into the lunge, then push back to standing. Stepping back keeps your weight over the front foot, which most people find easier to control than stepping forward. Our rear lunge guide shows each step.
- Walking lunge. Step forward into each lunge and travel across the room.
Do all the reps on one leg, then switch. If a knee complains, shorten the depth before you drop the move.
Planks: From the Counter to the Floor
- Counter plank. Forearms on a kitchen counter, feet back, body straight.
- Knee plank. Forearms on the floor and knees down.
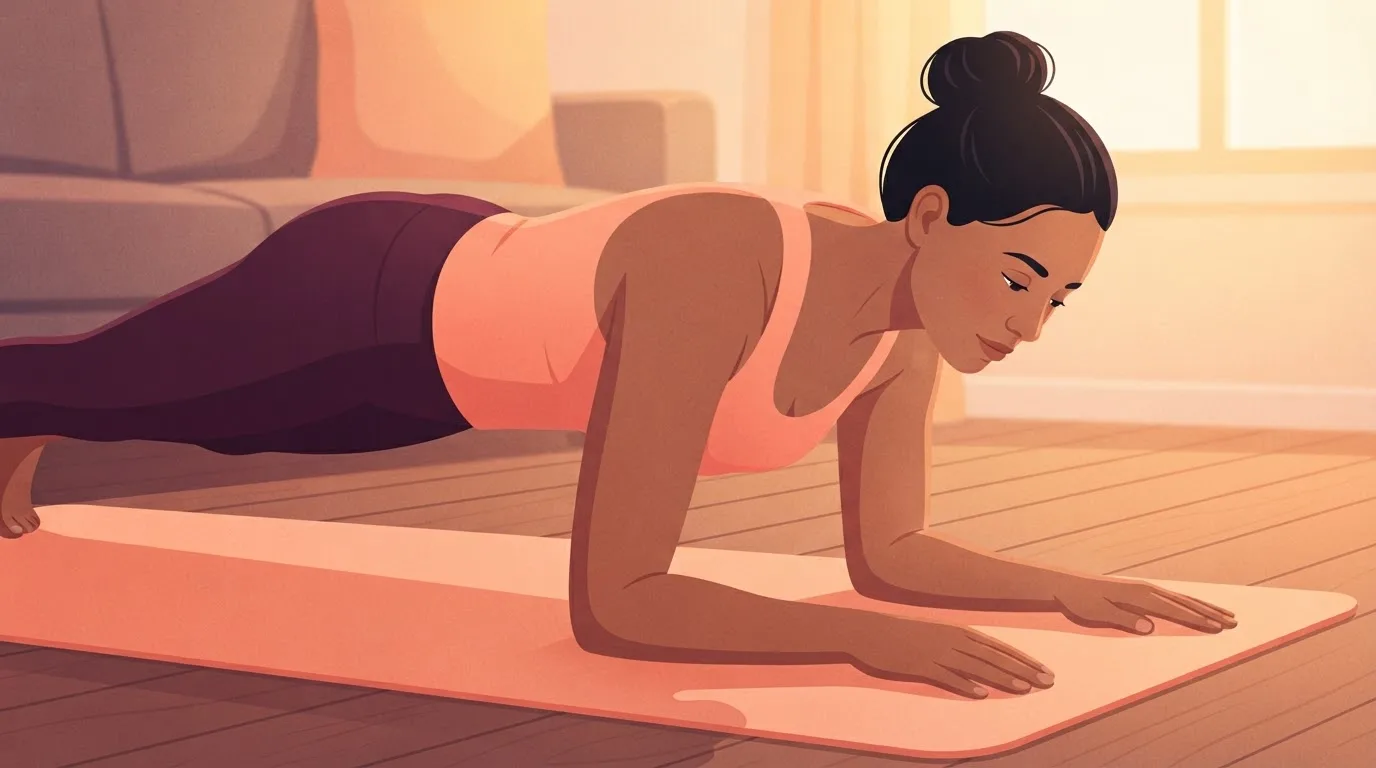
- Forearm plank. Elbows under your shoulders and one straight line from head to heels. Our forearm plank guide covers the cues.
- Long-lever plank. Elbows a few inches ahead of your shoulders, glutes squeezed and pelvis tucked under.
That last step is harder than it looks. In 19 people, Schoenfeld and colleagues (2014) found that moving the elbows forward and tilting the pelvis back raised activity in the upper and lower abs and the external obliques compared with a standard plank. Hold each plank for 20 to 40 seconds, and end the set when your hips sag or your lower back starts to arch.
Hollow Holds: From the Dead Bug to the Full Hollow
The hollow hold trains the front of your core to keep your lower back flat, the same job it does in a push-up and a plank. It's hard on day one, so start with the dead bug.
- Dead bug. Lie on your back with your arms pointing at the ceiling and your knees bent over your hips. Lower one arm and the opposite leg toward the floor while your lower back stays pressed down, then switch. Our dead bug guide shows the form.
- Tuck hollow hold. Press your lower back into the floor, lift your head and shoulders, and hold your bent knees over your hips.
- One-leg hollow hold. The same position with one leg straight and low.
- Full hollow hold. Both legs straight and a few inches off the floor, with your arms by your sides, then overhead. Our hollow hold guide covers the full position.
Each step adds work for your abs. Souza and colleagues (2001) recorded 12 healthy adults doing harder and harder levels of the dead bug and found that abdominal muscle activity rose in step with the difficulty. Move up a step when you can do 10 slow reps per side, or hold for 30 seconds with your lower back flat, on every set.
How Fast Will You Progress?
Expect your reps to climb quickly at first. In a classic 8-week training study of 15 young adults, Moritani and deVries (1979) found that most of the early strength gain came from the nervous system learning to use the muscle, while muscle growth took a larger share after about 3 to 5 weeks.
- Weeks 1 and 2. Learn each move at your starting version, 2 sets each. Mild soreness a day or two after a session is normal.
- Weeks 3 and 4. Add a third set to each move, and move up any move where you hit the top of the range on every set for two sessions in a row.
- Weeks 5 to 8. Keep climbing one version at a time. By now, muscle growth is adding to the strength your nervous system gained.
Each new version feels hard for the first session or two, which is normal. Drop back to the bottom of the rep range and build up again. If you'd like each session planned and run for you, FitCraft works as a home workout app with no equipment needed. Your AI coach demonstrates each exercise in your plan on an interactive 3D model and says your name during workouts, your workouts adjust as you progress, and streaks, XP and leaderboards give you a reason to come back.
Upper Body Calisthenics Routine for Beginners
On a busy day, run the push-up, row and plank from the routine as a circuit. Do one set of each back to back, rest a minute, and repeat for three rounds, which takes about 12 minutes. Use it in place of the full routine when you're short on time, or as a fourth session in the week if your shoulders feel fresh.
Is Calisthenics Better Than Weight Lifting?
For a beginner, calisthenics and weight lifting build strength about equally when the sets are hard, and calisthenics is easier to start at home. In a trial by Kikuchi and Nakazato (2017), 18 young men trained twice a week for 8 weeks with either push-ups or a bench press at a matched load, and both groups gained similar muscle and strength. Weights pull ahead once you want heavy loads or a bigger one-rep max. Our guide to calisthenics vs weights covers that trade-off.
The Bottom Line
A beginner calisthenics workout works when every move starts easy enough to do well. Pick your version of the six moves, do the routine three times a week, and move up one version at a time when the top of the rep range comes easily for two sessions in a row.
Working out consistently is hard, but it doesn't have to be. As Stacy, 41, put it, "After my second kid, I needed something stupidly simple." Start this week with the wall, the counter and a chair.
Frequently Asked Questions
Is 20 minutes of calisthenics enough?
Yes, 20 minutes of calisthenics three times a week is enough for a beginner to get stronger. Pairing an upper-body move with a lower-body move roughly halves session time (Iversen 2021), and this routine gives each muscle group 6 to 9 hard sets a week, above the minimum of 4 that review recommends. Add sets before you add more exercises.
What is the 3-3-3 rule for working out?
The 3-3-3 rule has no official definition. People usually mean three exercises, three sets of each, on three days a week. This routine follows the same idea with three pairs of moves, up to three sets each, three days a week.
What are military calisthenics?
Military calisthenics are the bodyweight drills armed forces use to warm up and build basic fitness, usually done as a group to a set count. The US Army's Preparation Drill, for example, includes push-ups, forward and rear lunges and a squat-and-reach move called the squat bender. The drills are the same for women and men, and the routine on this page trains the same movements at your own pace.
Can women do this beginner calisthenics workout?
Yes. The six moves, the versions and the move-up rule are the same for women and men, and your starting version sets the difficulty. If push-ups feel much harder than squats at first, start them a version or two lower and let each move climb at its own pace.
Do you need equipment for calisthenics as a beginner?
No. A wall, a kitchen counter, a sturdy chair, a heavy table or a door frame, and some floor cover all six moves in this routine. A pull-up bar is the first piece of equipment worth buying later, because it lets you hang from a bar and pull your full body weight.