The Turkish get-up looks simple: you stand up from the floor and lie back down. What makes it hard is that one arm holds a weight straight up the whole time, and each step has to be steady before you start the next one.
That is why you learn it in pieces: the steps with no weight first, then a half get-up, then the full get-up with a light dumbbell. A heavier dumbbell comes later, once a full rep up and back down is smooth on both sides.
FitCraft has no kettlebells, so this guide teaches the get-up with one dumbbell, and the steps are the same with either weight. What changes is how the weight sits in your hand. A kettlebell's bell rests on the back of your wrist and forearm, while a dumbbell balances in your hand with a weight head on each side of your grip, so you hold the middle of the handle and keep your wrist straight.
Quick Facts: Turkish Get-Up
- Equipment needed: One dumbbell (the traditional tool is a kettlebell). Learn the steps with no weight first, on a non-slip floor or mat.
- Difficulty: Advanced. The full get-up has seven moves up and the same seven back down while one arm holds a weight straight up, so it takes practice, and ACE's exercise library rates the Turkish get-up Advanced. Beginners can start with no weight or with the half get-up.
- Modality: Strength
- Body region: Full body: the shoulder holding the dumbbell, the sides of your waist, your glutes and your thighs
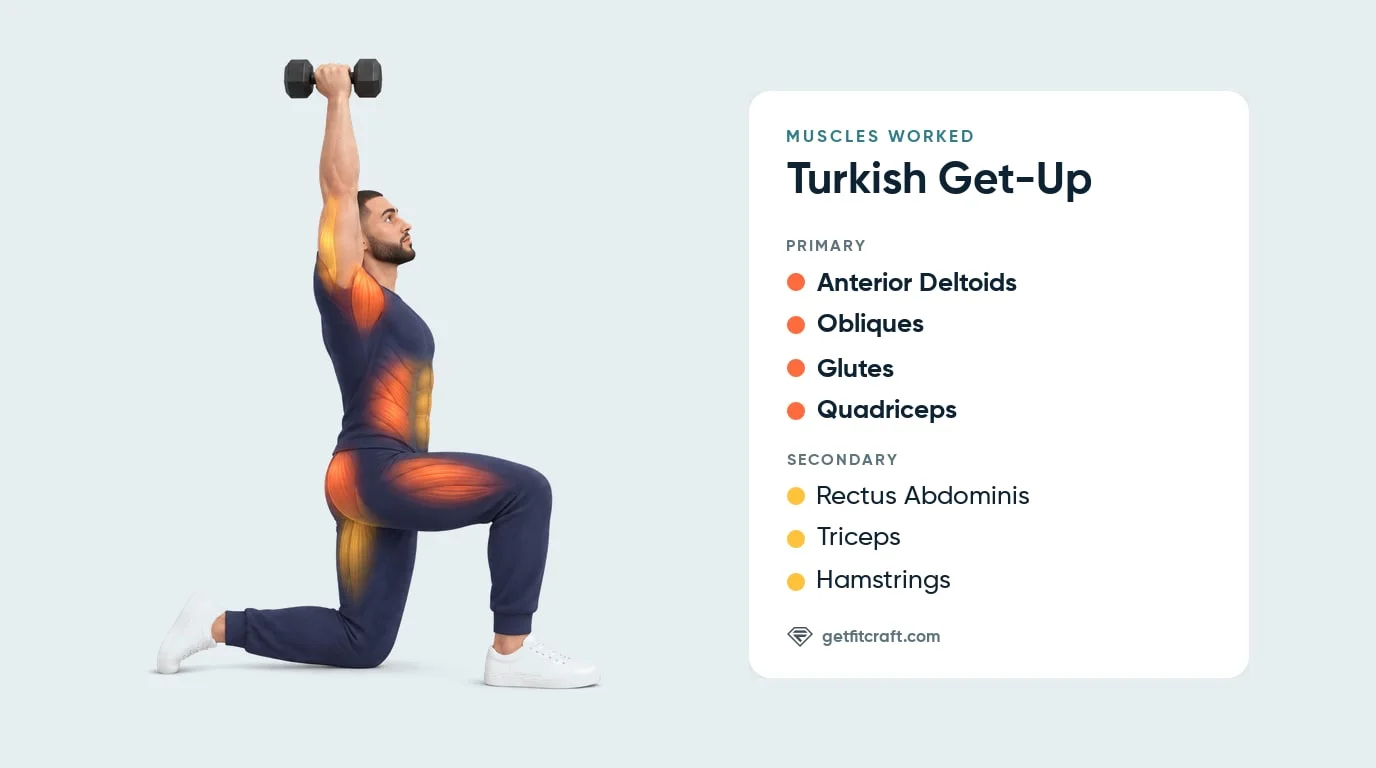
Muscles Worked
Primary movers: the anterior deltoids, the obliques, the glutes, and the quadriceps. The anterior deltoid, the front of the shoulder on your dumbbell arm, holds the weight straight up through every step. Your obliques, along the sides of your waist, roll you up onto your elbow, sit you up and lower you back down. Your glutes lift your hips into the high bridge and help you stand, and your quadriceps, the fronts of your thighs, stand you up from the half-kneel.
Secondary muscles: the rectus abdominis, the triceps, and the hamstrings. Your rectus abdominis, the abs down the front of your belly, helps the obliques roll you up and lower you down. Your triceps lock the dumbbell elbow straight, and on your free arm they push you up from your elbow to your hand. Your hamstrings, the backs of your thighs, help in the bridge and as you kneel and stand.
Where you should feel it: mostly in your glutes, the sides of your waist, the shoulder holding the dumbbell and the fronts of your thighs, with the backs of your arms, your abs and the backs of your thighs helping. Your lower back and neck shouldn't hurt.
Benefits: the get-up has you practice getting off the floor and back down while you hold a weight steady above you. It trains these muscles together, along with your balance and control.
What a study of the shoulders found: in a 2019 study, researchers recorded the activity of eight shoulder muscle groups on both sides in 12 experienced people doing get-ups with a kettlebell. The shoulder muscles on the weight side worked harder during the steps when the free arm was not holding the body up, and the free arm's shoulder muscles worked whenever that forearm or hand was supporting the body. Overall demand was highest in the move up onto the elbow and in the leg sweep, and the authors suggest training both the way up and the way down (St-Onge et al., 2019).
Step-by-Step: How to Perform a Turkish Get-Up
The get-up has seven moves on the way up (steps 3 to 9) and the same seven in reverse on the way down. Read all 11 steps before your first rep, and learn them with no weight. This is the lunge-style get-up, where you kneel on one knee before you stand. ExRx, the American Council on Exercise and the NSCA all describe it this way with a kettlebell. Some coaches also teach a squat-style stand, which this guide does not cover.
- Pick up the dumbbell safely
- Set your start position
- Roll to your elbow
- Push up to your hand
- Lift into a high bridge
- Sweep your leg through
- Lift your hand
- Line up your back shin
- Stand up
- Come back down by reversing every step
- Set the dumbbell down and switch sides
Step 1: Pick Up the Dumbbell Safely
Lie on your side facing the dumbbell and hold it close to your chest with both hands. Roll onto your back, then press it straight up over your shoulder with both arms before you let go with your free hand.
Form tip: never press the dumbbell up from the floor with one arm.
Step 2: Set Your Start Position
Lock the dumbbell arm straight, with your wrist straight and your knuckles toward the ceiling. Bend the knee on the same side so that foot is flat on the floor about a foot from your buttock. Lay your other leg straight on the floor, angled out about 45 degrees, and rest your other arm on the floor anywhere from beside you to out at about 45 degrees.
Form tip: hold the middle of the handle. Your palm can face in or forward, as long as your wrist stays straight. Keep your eyes on the dumbbell from here until it is back at your chest.
Step 3: Roll to Your Elbow
Push through the foot of your bent leg and roll diagonally up onto your free elbow. The dumbbell arm stays locked straight above your shoulder.
Form tip: move slowly and get steady on your elbow before you go on.
Step 4: Push Up to Your Hand
Push your free hand into the floor and straighten that arm to come up to sitting.
Form tip: keep the dumbbell arm straight, with no bend or drift.
Step 5: Lift Into a High Bridge
Press through your hand and your foot to lift your hips into a high bridge.
Form tip: lift your hips high enough to sweep your straight leg under you.
Step 6: Sweep Your Leg Through
Sweep your straight leg back under your body until that knee rests on the floor under your hip.
Form tip: if your hip feels tight as you sweep, lift your hips higher first, or stop at the high bridge and come back down. Any hip pain means stop. A mat or folded towel under the knee helps on a hard floor.
Step 7: Lift Your Hand
Lift your free hand off the floor so your shoulders stack over your hips and your torso is upright.
Form tip: draw your dumbbell shoulder down, away from your ear.
Step 8: Line Up Your Back Shin
Turn your back shin so it points straight behind you, like a windshield wiper. You are now in a half-kneel, with your front foot flat, your back knee on the floor and the dumbbell still straight above your shoulder.
Step 9: Stand Up
Shift your hips forward a little and stand up from the half-kneel as you would from a lunge, pushing through your front foot and bringing your back foot up beside it. The dumbbell stays straight above your shoulder, and your eyes stay on it.
Form tip: never stand straight up from the bridge. Always go through the kneel first.
Step 10: Come Back Down by Reversing Every Step
Step back with the leg on your free-hand side and lower that knee to the floor. Turn your back shin back to where it was after the sweep, and reach your free hand back down to the floor. Sweep your leg back out in front of you into the high bridge, then lower your hips to sit, lower onto your elbow, and lie back down.
Form tip: never drop back to the floor. Move one step at a time, as slowly as on the way up, with the dumbbell arm straight and your eyes on the dumbbell.
Step 11: Set the Dumbbell Down and Switch Sides
Bring the dumbbell to your chest with both hands and roll onto your side to set it down. Then pick it up with your other hand the same way and do the same number of reps on that side.
Breathing: breathe naturally and keep breathing the whole time. It can help to breathe in before you roll up and breathe out as you stand, but never hold your breath.
Get a personalized dumbbell workout
FitCraft, our mobile fitness app, does not include the Turkish get-up, but it uses an AI coach to program dumbbell and bodyweight exercises such as glute bridges, side planks and the shoulder press into your plan at the right volume and intensity, based on your level, goals, and equipment. Every FitCraft program is designed by Domenic Angelino, MPH (Brown University) and NSCA-CSCS, with research published in the Journal of Strength and Conditioning Research and Medicine & Science in Sports & Exercise.
Take the Free Assessment Free · 2 minutes · No credit card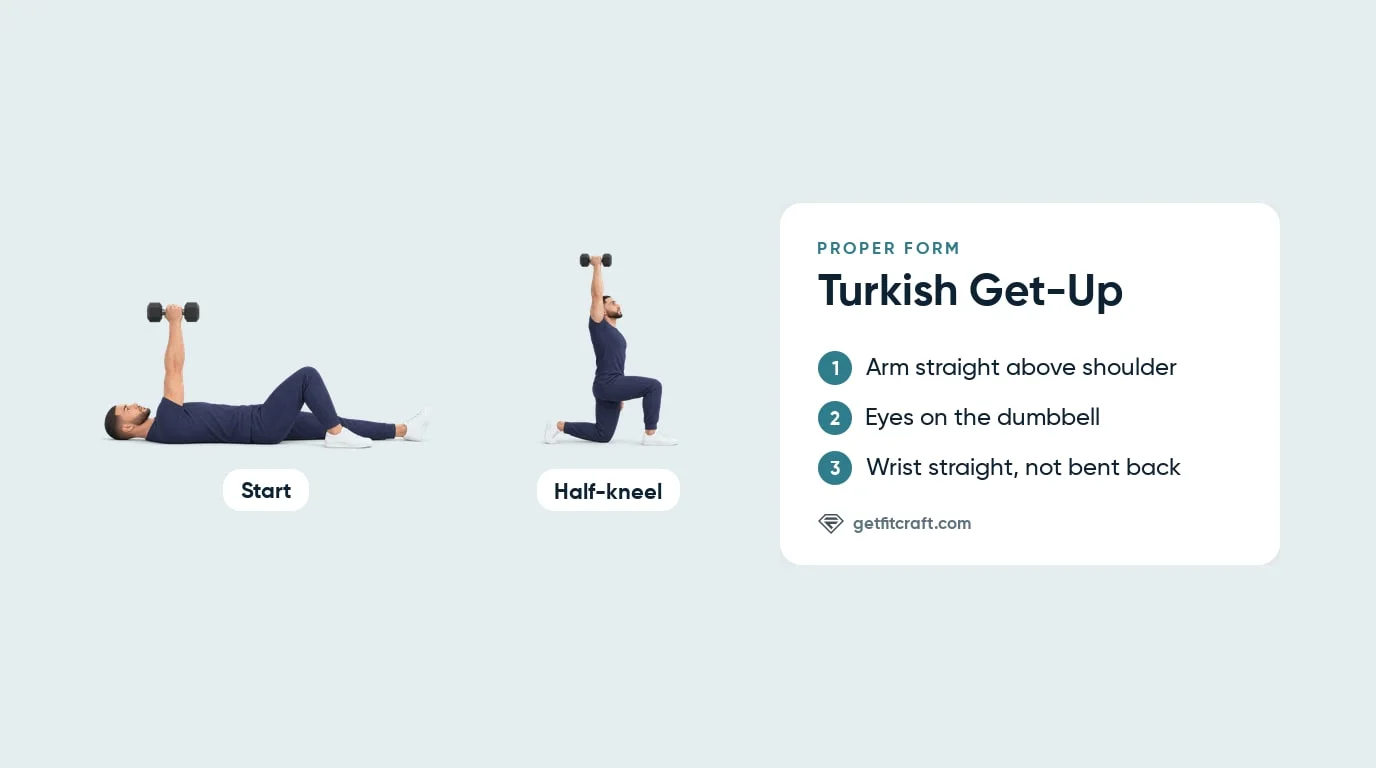
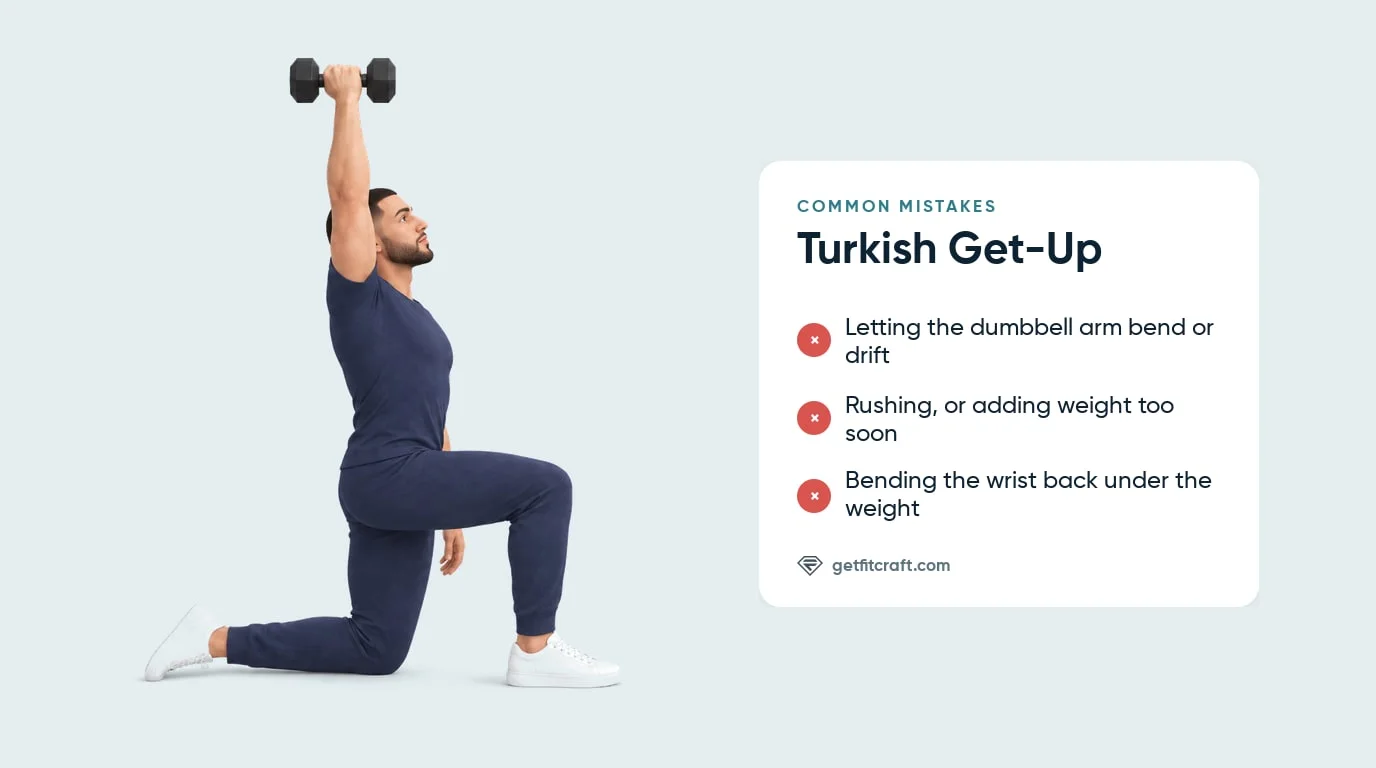
Common Mistakes (and How to Fix Them)
A 2022 article on correcting get-up errors makes the point that the get-up is about the quality of the movement, not sheer strength or speed, and that doing it without proper technique can lead to errors and a higher risk of injury (Collum et al., 2022). These are the mistakes to watch for.
- Letting the dumbbell arm bend or drift. The arm should stay locked straight above your shoulder at every step. Keep your elbow locked and your eyes on the dumbbell. If you can't keep it steady, lower it with control, using your free hand to help.
- Rushing, or adding weight too soon. Move slowly and get steady at each step before you start the next. Add weight only when a full rep up and back down is smooth on both sides.
- Bending the wrist back under the weight. Grip the middle of the handle and keep your wrist straight, with your knuckles toward the ceiling.
- Standing straight up from the bridge, skipping the kneel. Sweep your leg through to the half-kneel, line up your back shin, and only then stand.
- Hips too low to sweep the leg through. Press through your hand and foot to lift your hips higher before you sweep. Your lower back should never hurt; if it does, stop.
- Taking your eyes off the dumbbell. Your body follows your eyes, so watching the dumbbell the whole way up and down helps keep your arm straight up and your back long.
- Shrugging the dumbbell shoulder up to your ear. Draw that shoulder down, away from your ear, and keep it there.
- Dropping back to the floor instead of reversing the steps. Come down the same way you went up, one step at a time.
Turkish Get-Up Variations: Regressions and Progressions
Work through these in order, from the no-weight get-up to a heavier dumbbell.
No-Weight or Shoe Get-Up
Do every step with no weight, or balance a shoe on your closed fist and keep it from falling. ACE's technique guide uses this to learn the get-up before adding weight, and an NSCA article on coaching the get-up uses the shoe get-up as the first step before any loaded get-up (ACE; Romero and Hockett, 2019).
Half Get-Up
Roll to your elbow, push up to your hand, and lift into the high bridge if that feels steady, then reverse back down. ACE's technique guide suggests starting with the steps up to a stable bridge before you learn the rest.
Dumbbell Turkish Get-Up
This is the version taught on this page: the full get-up with one light dumbbell, held by the middle of the handle with your wrist straight. Your palm can face in or forward.
Kettlebell Turkish Get-Up
The traditional version uses a kettlebell. The bell rests on the back of your wrist and forearm instead of balancing in your hand, and the steps are the same. Keep your wrist straight. FitCraft has no kettlebells, so this guide uses a dumbbell; to compare the two weights, see kettlebell vs dumbbell.
Heavier or Slower Get-Ups
Use a slightly heavier dumbbell, added in small steps, only once a full rep up and back down is smooth on both sides. You can also pause for a slow breath at every step, keeping your arm straight and still, or add a rep or two to each set as long as every step stays smooth.
When to Avoid or Modify Turkish Get-Ups
Start with no weight, move slowly, and use a non-slip floor or mat. A burn in your glutes, thighs, shoulders or the sides of your waist is normal; any pain in a joint, your lower back or your neck means stop. A few conditions call for a check with a doctor or physical therapist first. Always consult your physician or physical therapist for personalized guidance.
- Shoulder pain or a past shoulder injury. One arm holds the dumbbell above you the whole time, and the other helps hold your body up. Skip get-ups while your shoulder hurts, and see a doctor or physical therapist before you do them. During any rep, shoulder pain means stop and lower the dumbbell with control, using your free hand to help.
- Wrist pain. Your dumbbell wrist stays straight under the weight, and your free hand pushes into the floor. If your wrist hurts, see a doctor or physical therapist before you do get-ups. Any wrist pain during a rep means stop.
- Lower-back pain, sciatica, or a disc problem. The bridge and the leg sweep ask your hips and trunk to lift and hold your body. Skip get-ups while your back hurts. See a doctor or physical therapist before you do them, and ask them which exercises suit you. During any rep, lower back pain means stop.
- Knee or hip pain. You kneel on one knee, sweep one leg under you and stand up from a lunge. Skip get-ups while your knee or hip hurts, and see a doctor or physical therapist first. Any knee or hip pain during a rep means stop.
- Neck pain. You watch the dumbbell the whole time, from lying on the floor to standing. Skip get-ups while your neck hurts, and see a doctor or physical therapist first. Any neck pain means stop.
- Recent shoulder, wrist, spine, hip, or knee surgery. Get clearance from your surgeon before you try get-ups, and ask them or your physical therapist when and how to return.
- Dizziness, balance problems, or high blood pressure. The get-up takes you from lying down to standing and back while you hold a weight above you. Ask your doctor whether it suits you and how hard to work. If you feel dizzy or light-headed, bring the dumbbell down with control, set it down and rest. Keep breathing the whole time; never hold your breath.
- Pregnancy or early postpartum. Ask your doctor or midwife before you do Turkish get-ups, and ask which version fits your stage. Any pain in your back, belly or pelvis means stop.
Related Exercises
If Turkish get-ups are part of your plan, these exercises train the same muscles one piece at a time:
- The high bridge: Glute Bridges train the hip lift from the floor with your glutes and hamstrings.
- Holding yourself up on one side: Side Planks train your obliques, the muscles along the sides of your waist that roll and sit you up in a get-up.
- The arm above you: the dumbbell Shoulder Press trains the front of your shoulder and your triceps, the muscles that hold the dumbbell up and lock your elbow in a get-up.
- The stand: Rear Lunges train your quads and glutes in the lunge you stand up from and step back into.
- Getting down and up: Burpees also take you down to the floor and back up to standing, at a fast pace, with your quads and glutes doing most of the work.
How to Program Turkish Get-Ups
Keep sets short and slow. ACE's technique guide uses sets of two to four reps, and the NSCA's step guide has you switch hands and repeat, so do the same number with each arm (ACE; NSCA). Rest as long as you need between sets, and end a set when your form starts to slip.
For how often to train, the American College of Sports Medicine position stand on resistance training suggests that beginners train 2 to 3 days a week (Ratamess et al., 2009). It does not cover the get-up itself, so the table below is a learning order built from the steps on this page, not figures from the position stand.
| Stage | What you do | Reps per set | Move on when |
|---|---|---|---|
| Learn the steps | Every step with no weight, or with a shoe balanced on your closed fist | 2 to 4 per side | Every step feels smooth, up and down |
| Half get-up | Roll to your elbow, push up to your hand, and lift into the bridge if that feels steady, then reverse back down | 2 to 4 per side | You reach the bridge and come back down smoothly on both sides |
| Full get-up | The whole get-up with one light dumbbell | 2 to 4 per side | A full rep up and back down is smooth on both sides |
| Harder | A slightly heavier dumbbell in small steps, a slow breath at every step, or a rep or two more per set | 2 to 4 per side, or a rep or two more | Keep going while every step stays smooth; if your form slips, go back a stage |
Form before reps: stop the set when your dumbbell arm bends or drifts, your wrist bends back, your eyes leave the dumbbell, or you start to rush. If your grip, wrist or arm can't keep the dumbbell steady above your shoulder, stop and lower it with control, using your free hand to help.
Turkish Get-Ups and FitCraft
The get-up takes patience. You learn it one step at a time, with no weight at first, and you add weight only when every step is smooth on both sides.
The FitCraft app does not include the Turkish get-up, so use the steps and variations above to learn it on your own: no weight or a shoe on your fist first, then the half get-up, then the full get-up with a light dumbbell. The app does include exercises that work some of the same muscles, such as glute bridges for the hip lift, side planks for the sides of your waist, and the dumbbell shoulder press for the front of your shoulder.
FitCraft's own programs are built from the dumbbell, band, and bodyweight exercises in its library. The free assessment matches your plan to your level, goals, and available equipment, and the app demonstrates each movement in 3D and guides your workouts.
Frequently Asked Questions
Can I do Turkish get-ups with shoulder pain?
Not while your shoulder hurts. One arm holds the dumbbell straight up the whole time, and the other arm helps hold your body up as you rise and lower. A burn in the muscles is normal, but any pain in your shoulder or another joint, your lower back or your neck means stop right away and lower the dumbbell with control, using your free hand to help. If you have shoulder pain or a past shoulder injury, see a doctor or physical therapist before you do get-ups, and ask them which exercises suit you.
What muscles does the Turkish get-up work?
The Turkish get-up mainly works the front of the shoulder holding the dumbbell (the anterior deltoid), the obliques along the sides of your waist, the glutes and the quadriceps. The rectus abdominis, the triceps and the hamstrings help. Your obliques and abs roll you up and lower you back down, your glutes lift the high bridge and help you stand, your quads stand you up from the half-kneel, and the front of your shoulder holds the dumbbell straight up through every step. Your triceps lock the dumbbell elbow and, on your free arm, push you up from your elbow to your hand, and your hamstrings help in the bridge and as you kneel and stand.
What are Turkish get-ups good for?
Turkish get-ups teach you to get up off the floor and back down while you hold a weight steady above you. They train the front of your shoulder, the sides of your waist, your glutes and your thighs together, along with your balance and control. The get-up is about how well you move, not how much you lift or how fast you go.
Can you do a Turkish get-up with a dumbbell instead of a kettlebell?
Yes. The steps are the same with either weight, and ACE notes that almost any weight works, including a dumbbell. The difference is how the weight sits in your hand. A kettlebell's bell rests on the back of your wrist and forearm, while a dumbbell balances in your hand with a weight head on each side of your grip, so hold the middle of the handle and keep your wrist straight with your knuckles toward the ceiling. Your palm can face in or forward. FitCraft has no kettlebells, so this guide uses a dumbbell.
What is a good Turkish get-up for beginners?
Start with no weight, or balance a shoe on your closed fist and keep it from falling as you go through every step. Next, try a half get-up: roll to your elbow, push up to your hand, and lift into the bridge if that feels steady, then reverse back down. Move to the full get-up with a light dumbbell once every step feels smooth.
What's a good weight for a Turkish get-up?
Start with no weight, or a shoe balanced on your fist. Once every step feels smooth, use a light dumbbell, and only go heavier, in small steps, when a full rep up and back down feels smooth on both sides. If your grip, wrist or arm can't keep the dumbbell steady above your shoulder, it is too heavy: stop and lower it with control, using your free hand to help.
How many Turkish get-ups should I do?
Start with sets of two to four slow get-ups, and do the same number with each arm. Rest as long as you need between sets, and end the set when your form starts to slip. Go slowly enough to get steady at every step, on the way up and on the way down.