The hip hinge teaches you to bend forward from your hips while your back stays flat, instead of rounding your spine. It is the base for deadlifts, so it makes sense to learn it with no weight before you pick up dumbbells.
You can learn it three ways, and all of them train the same movement: hands sliding down your thighs, a broomstick held along your back, or a wall behind you. This guide covers all three, the mistakes that turn a hinge into a squat, and how to tell when you are ready for weight.
Quick Facts: Hip Hinge
- Equipment needed: None. A broomstick or dowel and a wall are optional ways to check your form
- Difficulty: Beginner. You use no weight and choose how far to hinge, and ACE's exercise library rates the hip hinge Beginner
- Modality: Strength (a bodyweight technique drill)
- Body region: The backs of your thighs, your glutes and the muscles that run along your spine
- Next step: The dumbbell Romanian deadlift, once about 10 to 20 slow reps with a flat back feel easy
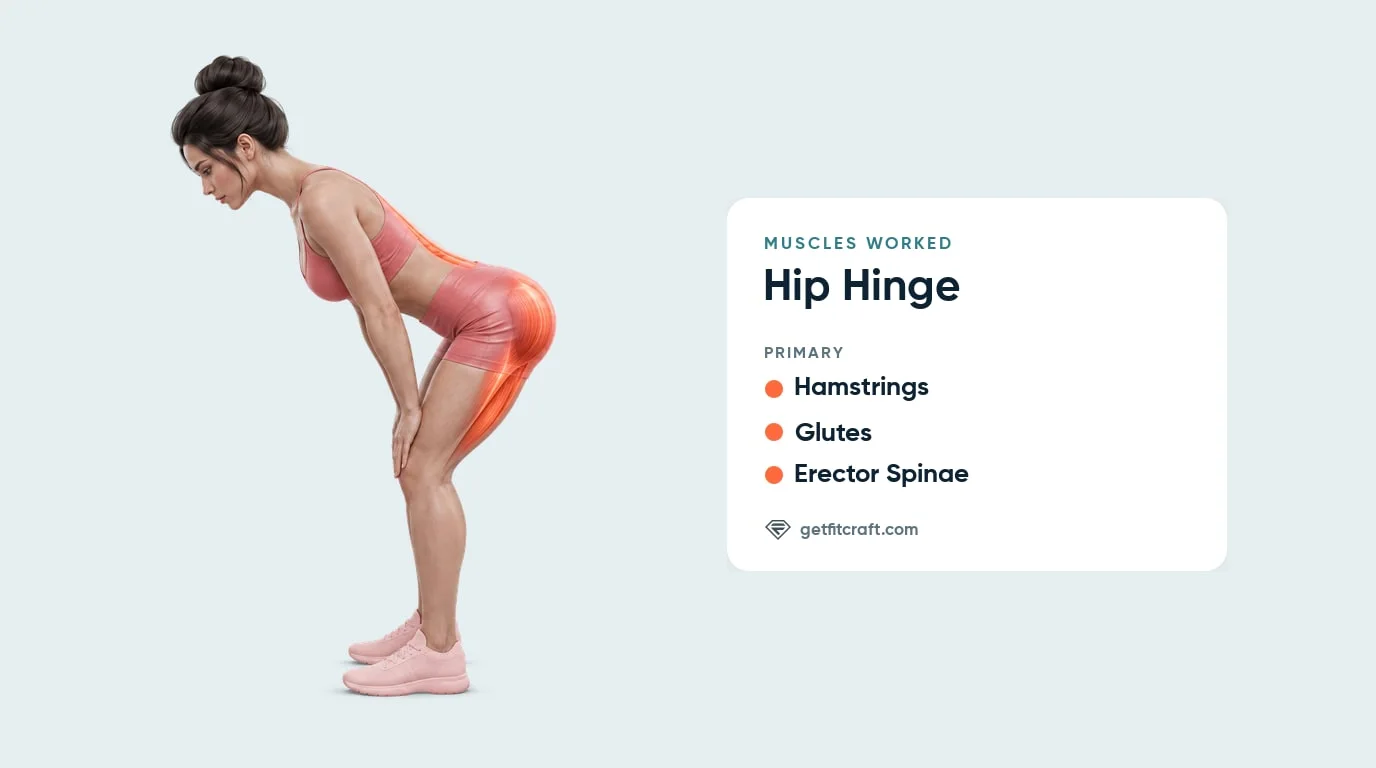
Muscles Worked
Primary muscles: the hamstrings, the glutes and the erector spinae. As your hips push back, the hamstrings on the backs of your thighs and your glutes control your upper body while it tips forward. On the way up, they drive your hips forward and stand you up tall. The erector spinae, the long muscles that run up either side of your spine, work to hold your back flat the whole time you are tipped forward.
What you should feel: mostly a stretch in the backs of your thighs on the way down, then your glutes working as you stand up. The muscles along your spine hold your back still, but your lower back should never hurt.
What the sources say: an ACE article on the hip hinge says hinge exercises train the glutes, the hamstrings and the back (Klika, 2016). The stretch you feel is your depth marker. It tells you where to stop, while the work comes from lowering and lifting your upper body on every rep.
How to Do a Hip Hinge: Step by Step
These steps teach the standard version, with your hands sliding down the fronts of your thighs. The dowel and wall versions further down follow the same steps.
Step 1: Set Your Stance
Stand tall with your feet about hip- to shoulder-width apart, toes pointing forward or turned slightly out, and unlock your knees into a soft bend. Rest your hands flat on the fronts of your thighs, set your shoulders back and down, and keep your neck in line with your back.
Form tip: set the soft knee bend now. It stays about the same for the whole rep.
Step 2: Push Your Hips Straight Back
With your weight over the middle of your feet and your heels, push your hips straight back. Your torso tips forward as your hips travel back, and your hands slide down your thighs toward your knees. Keep your back flat and your knees in the same soft bend.
Form tip: think of shutting a car door behind you with your hips.
Step 3: Stop at About 45 Degrees
Stop when your torso is about halfway to level with the floor, around 45 degrees, or when you feel a stretch in the backs of your thighs, whichever comes first. Go only as far as your back stays flat. Your hands do not need to reach your knees.
Form tip: look at the floor a little ahead of your feet so your neck stays in line with your back.
Step 4: Squeeze Your Glutes and Stand Tall
Squeeze your glutes and drive your hips forward to stand all the way up, knees still unlocked. Stop once you are upright, without leaning back or arching your lower back.
Form tip: your hands slide back up your thighs as you rise. Let your hips do the lifting.
Step 5: Breathe and Repeat Slowly
Breathe in as you push your hips back and out as you stand tall. Any steady rhythm is fine, even the other way round, as long as you never hold your breath. Take about two or three seconds on the way down and about the same on the way up.
Form tip: end the set when you can't keep your back flat, and stop right away if your lower back, your neck or a joint hurts.
Get a personalized lower-body workout
FitCraft, our mobile fitness app, does not include the bodyweight hip hinge drill, but it uses an AI coach to program hinge exercises such as the dumbbell Romanian deadlift, the single leg deadlift and glute bridges into your plan at the right volume and intensity, based on your level, goals, and equipment. Every FitCraft program is designed by Domenic Angelino, MPH (Brown University) and NSCA-CSCS, with research published in the Journal of Strength and Conditioning Research and Medicine & Science in Sports & Exercise.
Take the Free Assessment Free · 2 minutes · No credit card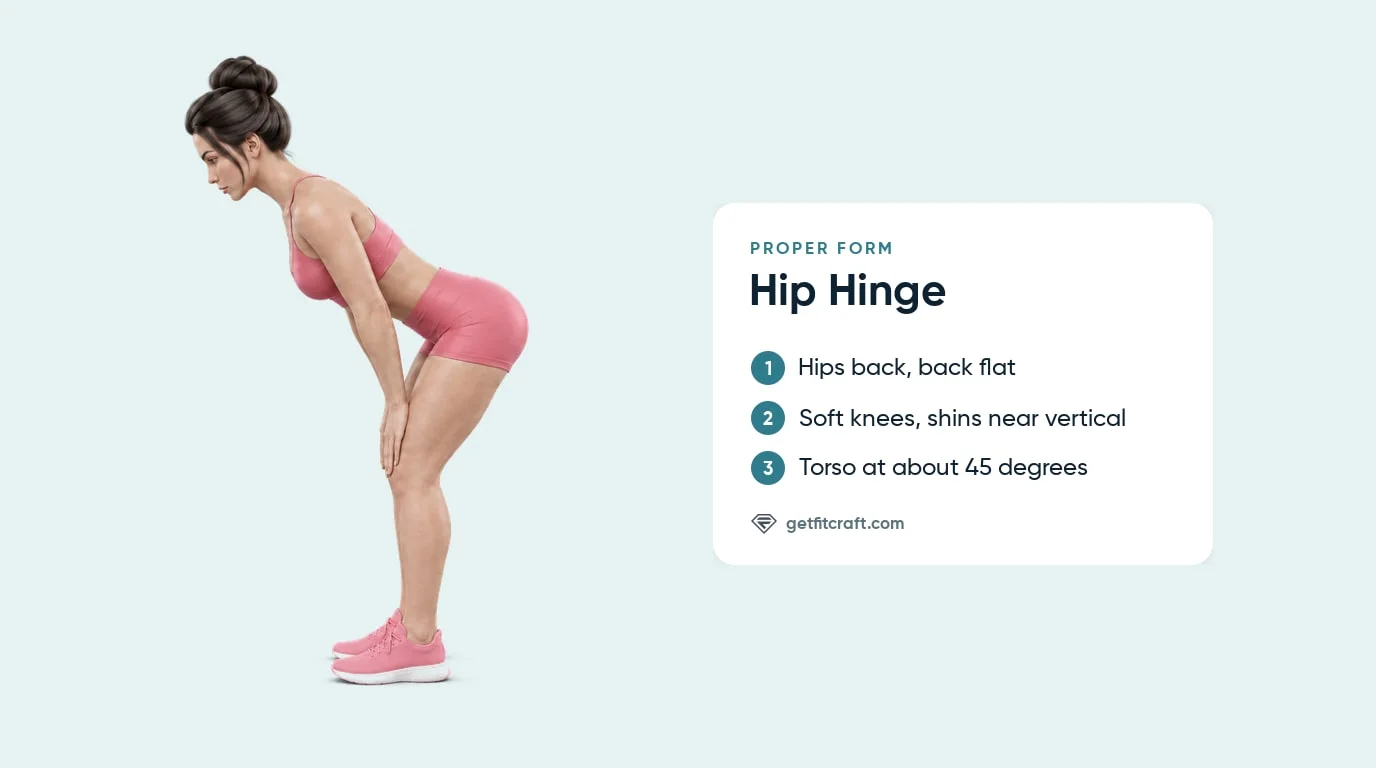
Common Hip Hinge Mistakes and How to Fix Them
Most hinge mistakes come from chasing depth or letting the knees take over. Get the shape right first and add range later.
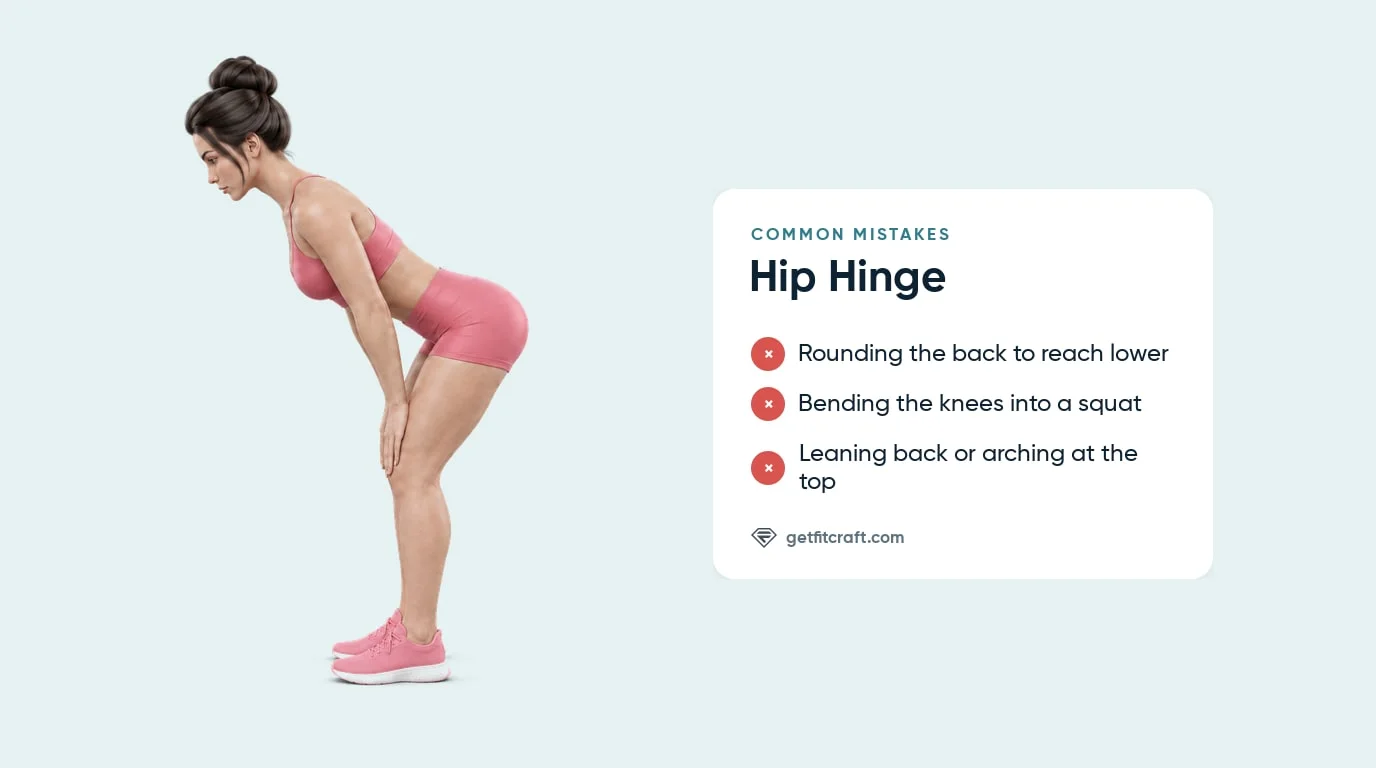
- Rounding your back to reach lower. Your hands do not need to reach your knees. Stop where your back is still flat, even if that is only a short way down. With a dowel, the moment a contact point lifts off is your signal to stop.
- Bending your knees into a squat. If your knees bend more and slide forward while your hips drop, the rep has become a squat. Set a soft bend at the start, keep it, and send your hips back as if reaching for a wall behind you.
- Leaning back or arching at the top. Standing tall is the finish. Squeeze your glutes and stop once you are upright, because leaning back past that adds nothing.
- Rocking onto your toes. Keep your weight over the middle of your feet and your heels. If you feel it drift onto your toes, stand up, reset, and start the next rep by shifting your weight back toward your heels as your hips move back.
- Dropping your head or craning it up. Keep your neck in line with your back by looking at the floor a little ahead of your feet. With a dowel, the back of your head stays on the stick.
- Locking your knees straight. Unlock them into a soft bend before the first rep and keep that bend all the way through, including when you stand tall.
Hip Hinge vs Squat: How to Tell Them Apart
In a squat, your knees bend a lot and your hips sink down. In a hip hinge, your knees keep a soft bend and your hips push back, so your chest tips forward instead. The table shows what to look for.
| Body part | Hip hinge | Squat |
|---|---|---|
| Knees | A soft bend that stays about the same, shins close to vertical | Bend a lot and move forward |
| Hips | Push straight back | Sink down |
| Chest | Tips forward to about 45 degrees | Stays more upright |
The wall tap makes the difference easy to feel: with your back a foot from a wall, you reach it by sending your hips back, not by sinking down. ACE's deadlift guide uses the same wall drill to teach the difference between hinging and squatting (McCall, 2024).
Hip Hinge Drills and Variations: Dowel, Wall Tap and Next Steps
All of these teach the same hinge. Pick the one that suits your space, then make it harder only while your back stays flat.
Hands on the Thighs (the Standard Version)
This is the version in the steps above and in the pictures on this page. Your palms rest on the fronts of your thighs and slide toward your knees as your hips go back. It needs no equipment, and your hands give you a feel for how far you have gone.
Dowel Hip Hinge
Hold a dowel or broomstick upright along your back, one hand behind your neck and the other at your lower back, so it touches the back of your head, your upper back and your tailbone. Hinge as usual. All three points stay on the stick the whole way, and if one lifts off, stop there, stand up and reset. ACE's exercise library teaches the hip hinge with a light bar held along the back and rates it Beginner (ACE Exercise Library). An NSCA article on teaching movement patterns explains that keeping the three contacts tends to keep the movement at your hips rather than your spine (Lincoln et al., 2023).
In a small study of 18 patients with a back condition called lumbar flexion syndrome, bending forward while holding a straight stick made the lower back round less and the hips bend more than bending forward without it (Yoon et al., 2015). The study measured movement, not pain, so it does not show that the drill treats back pain.
Wall Tap Hip Hinge
Stand with your back to a wall, about a foot away, feet between hip- and shoulder-width apart and knees unlocked. Push your hips back until they lightly touch the wall, then squeeze your glutes and stand tall. The same NSCA article starts its hinge progression with this drill, at about 12 inches from the wall, then moves to the dowel and then to a loaded hinge (Lincoln et al., 2023). You can also use the wall and the dowel together, as an ACE article on the drill does (Klika, 2016).
No wall nearby? Push your hips back as if you were closing a car door behind you with your hips.
Hands on the Hips
Resting your hands on your hips works too. Where your hands go is up to you, as long as your hips move back and your back stays flat.
Easier: A Smaller Range
Push your hips back only a little, then stand tall. Add range a bit at a time while your back stays flat. The wall tap also helps if the movement feels strange at first, because the wall shows you where your hips should go.
Harder: Lower or Slower
Hinge a little lower, toward level with the floor, but only as far as your back stays flat. An ACE article that uses the dowel and the wall goes as low as roughly parallel, or until a contact point lifts off (Klika, 2016). You can also take more time on each rep.
Next Step: The Dumbbell Romanian Deadlift
Once about 10 to 20 slow reps with a flat back feel easy, hold a light dumbbell in each hand and slide them down your thighs as you hinge. That is the dumbbell Romanian deadlift, and its guide covers where the dumbbells go and how low to take them.
Other Loaded Hip Hinge Exercises
Three more hinges have their own guides: good mornings hold one dumbbell at your chest, the dumbbell deadlift bends your knees more and lowers the weights to mid-shin or the floor, and the single leg deadlift does the hinge on one leg.
When to Avoid or Modify the Hip Hinge
The hip hinge uses only your body weight, so most healthy adults can start with it. A stretch in the backs of your thighs or a burn in your glutes is normal. Pain in a joint, your lower back or your neck means stop the drill right away. Check with a doctor or physical therapist before you start if any of these apply to you.
- Lower back pain, sciatica or a disc problem. Skip the hip hinge while your back hurts, and see a doctor or physical therapist before you start. Ask them which exercises are right for you. During any rep, lower back pain means stop.
- Recent surgery on your spine, hips or knees. Get your surgeon's clearance first, and ask them or your physical therapist when and how to start hinging.
- A hamstring strain or pain high in the back of your thigh. The bottom of the hinge stretches the backs of your thighs. Skip the drill, see a doctor or physical therapist, and ask them when it is safe to begin. Once they clear you, a gentle stretch there is normal, but pain in the back of your thigh means stop.
- Hip, knee or neck pain. If one of these already hurts, have a doctor or physical therapist look at it before you try the drill. Any hip, knee or neck pain during a rep means stop.
- Dizziness or light-headedness. If you feel dizzy during the drill, stand up tall slowly and rest, and talk to your doctor before you try it again.
- Pregnancy or the first weeks after giving birth. Ask your doctor or midwife before you start, and ask which exercises fit your stage. Pain in your back, belly or pelvis means stop.
Related Exercises
Once your hinge is steady, these exercises load it, train the same muscles without the forward lean, or round out your lower-body training:
- Loaded hinges: the Romanian Deadlift is the next step, and Good Mornings, the dumbbell Deadlift and the Single Leg Deadlift are other ways to load the hinge. Dumbbell Swings use the same hinge to swing one dumbbell with power.
- Same muscles, no forward lean: Glute Bridges work your glutes while you lie on your back, and Back Extensions and Superman Holds work the muscles along your spine while you lie face down.
- Knee-bending pattern: Squats are the movement to pair with your hinge in a lower-body workout.
- Keeping your back still: Bird Dogs and Deadbugs practice holding your trunk steady while you move.
How to Program the Hip Hinge
Treat the hip hinge as practice: slow reps with a flat back teach the pattern, and the set ends when your form slips. For beginners, the American College of Sports Medicine's position stand on resistance training suggests sets of 8 to 12 reps and training 2 to 3 days a week (Ratamess et al., 2009). It gives no numbers for this drill, so treat the table below as a practical starting point rather than figures from the position stand.
| Stage | Sets × Reps | Pace | Frequency |
|---|---|---|---|
| Learning (a smaller range, the wall tap, or hands on the thighs) | 2 × 8-12 | About 2-3 seconds down and 2-3 seconds up | 2-3 days/week |
| Standard (hands on the thighs or a dowel, torso to about 45 degrees) | 2-3 × 10-15 | About 2-3 seconds down and 2-3 seconds up | 2-3 days/week |
| Harder (lower toward level with a flat back, or slower reps) | 2-3 × 10-15 | Slower on the way down | 2-3 days/week |
When to add weight: once about 10 to 20 slow reps with a flat back feel easy, move on to the dumbbell Romanian deadlift with light dumbbells. Two ACE articles by Pete McCall put that point at 10 to 15 good hinges with a stable spine (McCall, 2025) and at 15 to 20 repetitions (McCall, 2020).
Where it fits: do your sets near the start of a workout, before any exercise that loads the hinge, while you are fresh enough to focus on form.
Form before numbers: end the set when your back starts to round, your knees start to squat, or your weight rolls onto your toes. A few clean reps teach more than a full set of sloppy ones.
Hip Hinge and FitCraft
Learning the hinge with no weight is the first step. Knowing when to add weight, and with which exercise, is the second.
The FitCraft app does not include the bodyweight hip hinge drill, so practice it on your own with the steps and the plan above. The app's dumbbell Romanian deadlift is the same hinge with a dumbbell in each hand, and the app also has the single leg deadlift.
FitCraft is a gamified fitness app. It builds plans from dumbbell and bodyweight exercises plus a few band moves, matches them to your level, goals and equipment through a free assessment, and teaches form with 3D demos.
Frequently Asked Questions
Can I do the hip hinge with lower back pain?
Not while your back hurts. A hip hinge should never hurt your lower back, so lower back pain during a rep means stop right away. If you have lower back pain, sciatica or a disc problem, see a doctor or physical therapist before you start, and ask them which exercises are right for you. A small study of the stick version measured movement, not pain, so it does not show that the drill treats back pain.
What muscles does the hip hinge work?
The hip hinge works three muscles: the hamstrings, the glutes and the erector spinae. Your hamstrings and glutes lower your upper body as your hips push back and lift it again as you stand, while the erector spinae, the long muscles beside your spine, keep your back flat. Expect a stretch in the backs of your thighs on the way down and your glutes working on the way up.
Is the hip hinge good for beginners?
Yes. ACE's exercise library rates the hip hinge Beginner, and an NSCA article on teaching movement patterns uses the wall and dowel versions before any loaded hinge. It needs no weight and you choose how far to go, so you can start small and add range as your form improves.
How far down should I go in a hip hinge?
Push your hips back until your torso is about halfway to level with the floor, around 45 degrees, or until you feel a stretch in the backs of your thighs, whichever comes first. Go only as far as your back stays flat. With tight hamstrings that may be only a short way down, and that still counts.
Do I need a dowel for the hip hinge?
No. Sliding your hands down the fronts of your thighs works fine, and so does resting them on your hips. A dowel or broomstick held along your spine is an extra check: it should keep touching the back of your head, your upper back and your tailbone, and if one point lifts off, stop there and reset.
When should I add weight to the hip hinge?
When about 10 to 20 slow reps with a flat back feel easy. Then hold a light dumbbell in each hand and slide them down your thighs as you hinge. That is the dumbbell Romanian deadlift, the next step after this drill.
Is the hip hinge a stretch?
Not mainly. You will feel a stretch in the backs of your thighs, and that stretch tells you how far to go. But you do not hold a position: on every rep your hamstrings and glutes lower and lift your upper body while the muscles along your spine keep your back flat.